
Лего бэтмен 3 все фонари
Обновлено: 18.04.2024
Предоставляем вам пошаговое прохождение игры Lego Batman 3: Beyond Gotham. Если у вас возникли какие-либо трудности или непонятные ситуации, тогда данное прохождение непременно поможет вам.
Уровень 1 - Преследование в канализации
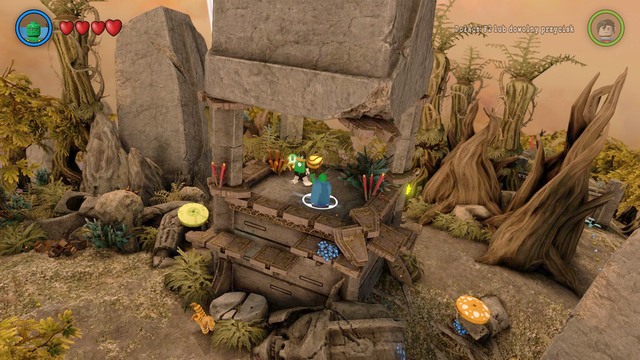
Начинаем свою охоту за Убийцей Кроком в канализации городка Готэма. Видите белый круг на земле? Это значит, что тут вам предстоит применить действие. Когда станете в этот круг, то жмите на соответствующую кнопку, после доберётесь до платформы повыше.
Проходите дальше и вскоре окажитесь около красного светящегося переключателя. Становитесь на белый круг, который находится на возвышенности и жмите на соответствующую кнопку, которая тут появится.
Когда вода будет осушена, то прыгайте вниз и разбивайте три лего-детали, которые изображены в виде ящиков. Вместе с ними разбейте тележки, чтобы полностью очистить эту комнату. Просто разрушайте всё, что вам попадается.
Когда будете стоять возле кирпичных лего-деталей, то жмите соответствующую кнопку и собирайте один из объектов. Когда соберёте конструкцию, то переключайте на Робина и берите то, что построили.
Переключайтесь на Робина и задерживайте клавишу атаки, чтобы собрать кирпичики красного цвета, зелёного и жёлтого. Разрушайте вновь тележки и собирайте множество свободных лего-кирпичиков.Собирайте их при помощи Робина.
После того, как вы высосите всё сверху, то дальше держите клавишу действия, чтобы депортировать всё собранное барахло в машину. Её необходимо будет заполнить до 25, после чего образуется большая пушка.
Далее необходимо взаимодействовать с ручкой оранжевого цвета, которая светиться. Выбирайте Бэтмена и жмите на кнопку, чтобы активировать пушку. Вскоре вы уничтожите врата и откроете проход в правую сторону.
Врата падут и вы найдёте маркер с новым костюмом Бэтмена. Берите управление Бэтменом и забирайте этот новый костюм.
Икс-датчик имеет парочку функций. Одна из таких функций - сделать нашего Бэтмена невидимым. Следующая позволяет активировать функцию детектива, которая позволит Бэтмену видеть невидимые объекты. На платформе, где вы нашли икс-жетон, вы можете отыскать и зелёные искры. Когда блестят зелёные искры, то это значит, что неподалёку находится скрытый объект.
Активируйте детективное зрение Бэтмена и икс-датчиком определите скрытую точку. Ударьте разок и вскоре появится белый круг. Белый круг значит, что вы можете здесь чем-то воспользоваться. Далее придётся решить не слишком сложную головоломку.
Перемещайте курсор и активируйте две пробки. Одна находится на первой трубе, а другая находится на последней. Теперь, чтобы вода текла свободно активируйте изогнутые трубы. Подсоедините их.
Вскоре у вас появится новая проблема. Вам предстоит пройти огромную зелёную площадь с ядовитыми шлаками.Переключитесь на Робина и одевайте костюм, который сможет защитить вас от этой слизи и проходите вперёд. К сожалению, Бэтмена временно придётся оставить.
Робином вам придётся разнести четыре устройства на противоположной стороне. Под платформой с метро вам так же нужно определить зелёные искры, чтобы потом при помощи Бэтмена отыскать скрытые объекты.
Зажмите и удерживайте кнопку атаки Робина на пробках, которые светятся, после придётся разбить лего-кирпичики. Уничтожайте две колонки и всё остальное барахло.
После того, как вы соберёте конструкцию из кирпичиков, то лестница упадёт. Подниметесь наверх и жмите на светящиеся кнопки. Вскоре Бэтмен вновь сможет присоединиться обратно к вам.
Вернитесь обратно до разрушенного метро и с правой стороны воспользуйтесь датчиком в костюме Бэтмена, чтобы отыскать скрытую точку. Как отыщите объект, то вытащите его и поезд в метро будут убран.
Воспользуйтесь упавшим поездом, чтобы подняться выше, после пройдите ко второму поезду и прыгайте ниже.Проходите дальше и если вдруг вы упадёте в воду, тогда сможете в любой момент подняться обратно.
В этой области вновь переключайтесь на Робина, чтобы в его костюме можно было пройти по зелёной плесени и в конце ударить переключатель красного цвета. Вскоре слизь очищается и открываются два люка. Воспользуйтесь этими люками и проходите прямо. Поднимайтесь дальше наверх и тут вас ожидает новая проблема - решёточные ворота.
Отыщите две светящиеся коробки и ударьте по ним. Когда светятся объекты, то это означает, что с этими предметами необходимо взаимодействовать или же вовсе разрушить. Постройте кирпичную конструкцию и взаимодействуйте с объектами, после чего обнаружите Убийцу Крока. Далее двигайтесь следом за ним по тоннелю.
Убийца Крок будет не слишком тяжёлый противник. Он будет посылать на вас свои подопечных, чтобы те убили вас. Убивайте его подчинённых Бэтменом. Для того, чтобы скинуть злодея вниз, вам придётся разрушать объекты и собирать кирпичики в центре этой арены, чтобы открыть утилязационное устройство.
Примените датчик Бэтмена, чтобы отыскать кнопки на трубинах с левой и правой стороны. Жмите на кнопки, чтобы получать кирпичные блоки, а Робин сможет их всасывать. Во время этих действия Крок будет атаковать вас - просто уклоняйтесь от его атак.
После того, как Робин соберёт 25 деталей, то сдавайте их в машину. Вскоре вы создатите пушку, которой можно будет управлять. Переходите на сиденье и начинай атаковать с этой пушки. Стреляйте сетью по Кроку, чтобы временно захватить его.
Крок вскоре сбежит и вернётся обратно к злодеям, но борьба с преступностью на этом не закончится.

Проходим сюжет третьей части LEGO-серии о Бэтмене и супергероях DC - LEGO Batman 3: Beyond Gotham. В новой игре про Бэтмена большое внимание уделено истории корпусов Фонарей и инопланетному суперзлодею Брейниаку.

After arriving at Okaara, talk to Green Loontern and follow him after the conversation. You will be attacked by enemies several times. Get rid of them and continue to follow Green Loontern . When you reach your destination you will receive a Gold Brick .
Talk to Green Loontern and listen to what he has to say. Your task is to defeat a bunch of bad guys. After killing enough, the mission will end and you will obtain a Gold Brick .

Talk to Green Loontern . He will ask you to help him find a statue. To find it, you have to use Batman's Sensor Suit and follow the trail on the ground. After reaching the ruins, take the statue and bring it to Green Loontern to obtain a Gold Brick .

Talk to Green Loontern . You have to make Loontern wake up from the state that he is currently in. To do that, you simply have to hit him. When he wakes up, the mission will be completed and you will receive a Gold Brick .

Talk to Bat-cow . She will tell you about her dream which is to learn to fly. Follow her to a teacher and defeat against enemies. When you reach your destination, you will obtain a Gold Brick and also unlock Bat-Cow .

Lego games have grown out to become a lot more than what they originally sought out to be but all along the years, one thing has remained the same for all the titles: the collection of Minikits.
Even in Lego Batman 3: Beyond Gotham, Minikits are the main collectibles spread through out the game. Not to forget, collecting all of the Minikits also accounts towards the 100 percent completion of the game.
LEGO Batman 3 Minikits Locations
Minikits are in abundance in LEGO Batman 3: Beyond Gotham.
You can find 10 of them in every level. There are 15 levels so that makes a total of 150 Minikits spread through the game to keep you powered as you progress through the game.
In order to make it easier for you to figure out where and how to find the Minikits for each level, we have divided this guide among Levels and then explained the locations of every Minikit number wise.
Level 1 – Pursuers in the Sewers
Now fly up to the pipes to get your Minikit.
When you reach the end of the pipe you will get a Minikit.
Going inside you will reach a Free Play Room. Inside, blast open the gold wall and get the Minikit.
You will also get a Minikit out of it.
Level 2 – Breaking BATS!
Destroy the canisters to get the Minikit.
Use Alfred to dig and then use the bricks you get to make a Minikit.
Use the bricks you get out of them to make a duck that will give you a Minikit.
Level 3 – Space suits you, Sir!
Blast it ans use the bricks to make a Lantern Pad. Make a Rocket out of it, when the rocket explodes, it will give you a Minikit.
Blast the hanging planets and use the bricks to make a phone booth. Finally, blast the phone booth to get a Minikit.
Further in there you will find Minikit with some studs.
You will get a Minikit when you are done.
Shrink them to get a pipe that The Atom can get through. Smash whatever you meet to get bricks and then destroy the red cap on the end to come back out.
Now use the bricks to make a Minikit.
Level 4 – Space Station Infestation
Knocking them down will get you the Minikit.
You will be able to see the Minikit through the window, go get it.
Destroy all five signs to get the Minikit.
Inside you will find a gold crate, destroy it to get the Minikit.
Inside the cell you will get the Minikit alongside a Purple Stud.
Drop down the chamber and get your Minikit.
Now destroy the gold crate that appears to get the Minikit.
Level 5 – The Big Grapple
Now use Cyborg’s Giant Suit to break the right wall. Go ahead and stand on the button with his Sonar Suit; finally break the glass case and get the Minikit.
Locate a lever and pull it to drain the water. Blast the silver crate to get the Minikit.
Level 6 – The Lantern Menace
Shatter the glass case and destroy the gold city to get the Minikit.
Destroy all five to get the Minikit.
Break the glass case and use the bricks too make a Minikit.
Now shatter the glass on your left and sense a mound of dirt, dig it and you will get the Minikit.
Take on Batman’s power suit and take down all five of them in order to get a Minikit.
Before the satellite reaches, you will find a Minikit that you can grab.
Level 7 – Europe Against it
This will reveal the Minikit and some other things.
Use the bricks to make a helicopter, it will raise the fountain below and let you get another Minikit.
When the party gets going, you get a Minikit.
Level 8 – Big Trouble in Little Gotham
Pulling the hook will pull down the drum and get you a Minikit.
Destroy the gold part to get a Minikit.
You will get the Minikit inside the water drum.
Then hack the bumper cars with it to make them go running. As a result you get a Minikit.
Cut down all of them to get the Minikit.
Level 9 – Power of Love
Destroy all of them to get the Minikit.
Use the pad to make a hammer and smash the cliff to get a MinKit.
You will find all of the on the right side of the starting point and then further towards the right edge of the map.
Destroy the glass and get the Minikit.
Locate the dirt mound and dig to get a Minikit.
You will reveal a Minikit from behind the vines.
Use the bricks to make an oven that will give you a Minikit.
Now use his powers to bend the blue pipes that you find underground. Bending the pipes would let you reach another Minikit.
Level 10 – A Blue Hope
Destroy the gold orb you find to get a Minikit.
Enter the cave in the background, trace the lantern pattern on the gold wall you find and go through to get the Minikit.
Blast the gold orb to get a Minikit.
Level 11 – Jailhouse Nok
Now go in a third time and get a Minikit from the new room you emerge in. Go into the vent a fourth time to get back to where you started.
Destroy all of them to get a Minikit.
Break the crate you see and make a generator out of the bricks to get a Minikit.
Send in Toy Wonder who can get a Minikit out of the holding cell he appears inside.
Level 12 – All the Rage
The third is a little ahead of the huge rib case, on the right side. The other two are at the further ends of the map no the right.
Destroy the silver rock you find to get a Minikit.
Take the boat to the checkpoint and you will get a Minikit.
Now bring Green Lantern to dig the mound of dirt in order to get the Minikit.
After that, don the Illumination Suit at the charging station and go inside the cave. Destroy the gold object on the ceiling (find it with super senses) and you will get a Minikit thanks to Geoff Johns.
Dig to get bricks, make a Lantern pad, and make a tool out of it that gives you a Minikit.
Level 13 – Need for Greed
You still have to fly and grab it though.
Reveal a cave in the back by using lasers on the gold objects and go inside. Now switch to Robin and fetch the Minikit.
Shrink the black wall that comes next and use the Lantern pad you find to make a drill. It will get you the Minikit.
Hop up on the block and make the green side of the spinner to raise a pillar by pushing it. The pillar has a silver bottom, destroy it and destroy its blocks to get a Minikit.
Level 14 – Aw-Qward Situation
Shoot it with a missile to get a Minikit.
On the other side, destroy the rock you see in the cell and then dig the dirt that is revealed to get a Minikit.
Make a mine cart that will open your path to the next Minikit.
Level 15 – Breaking the Ice
The ice pick will reveal the path to the first Minikit of the level.
Follow the robot until it gives you a Minikit.
Now make the bricks into an ink pot; finally smash the ink pot to get your Minikit.
Once you have brought all of them to the pen you will get a Minikit.
Use the bricks to make a spinner and like before, make the green side raise a pillar by pushing it. Now destroy the glass on the pillar to get your Minikit.
There is a Minikit at the bottom.
If there is anything missing or confusing in the guide, let us know and we will help you with it!
Локации где можно найти красные блоки:
Swers Interchange - Helium Voices
Batcave - Bubble Attacks
The Batrocket Hanger - Studs x4
The Armory - Musical Attacks
The Weapons Lab - Confetti Attacks
Brainiac's Ship - Boogie Mode
Lego London - 1966 Batman Mode
Ace Chemicals - Studs x6
Zamaron Encounter - Stud Magnet
Odym Jungle - Unlimited Bombs
The Underground Caverns - Collectable Detector
Ysmault - Studs x8
Larfleeze's Vault - Super Attacks
The Mines of Qward - Invulnerability
Atrocitus Attack - Studs x10


Чтобы проще находить "Игральную карту Джокера", советую сначала, найти красный куб со "Сканером редких предметов. Так как в некоторых уровнях "Карта Джокера" лежит в разбивающемся объекте, его подсветит сканер.

! Трофей легко пропустить!
На уровнях есть терминалы, на которых нужно соединить линии 3-ёхцветов (миниигра).
Внимание! линии нужно соединить по цветам обязательно заполнив все поля квадрата! Если выпросто соедините цветовые точки, не заполнив линиями все поляквадрата, то трофей не дадут. В игре нет статистики, правильно Высоединили линии или нет. Если нет, то прийдётся проходить игрузаного, тк после однократного использованиятерминалы больше не открываются.
Терминалы не спрятаны, пропустить их практически не возможно.После прохождения игры посмотрите в Бэтпещере (2 терминала) +уровень Арсенал (в самом начале уровня находитсятерминал, который нужно открыть с помощью телепатическихспособностей. Если Вы всё делали правильно, то трофей откроетсяпосле прохождения этого терминала, уровень до конца проходить ненужно).
Терминалы располагаются в следующих миссиях:
Batcave: 4 (Бэтпещера)
The Bat Observatory (Бэтобсерватория)
The Batrocket Hangar: 2 (Ангар с бэтракетой)
The Armoury: 3 (Арсенал)
The Weapons Lab (Оружейная лаборатория)
The Docking Bay: 2 (Стыковочный отсек)
Brainiac's Ship (Корабль Брэйниака)
Ace Chemicals (Эйс Кемикалс)
The Underground Caverns (Подземные пещеры)
The Mines of Qward (Шахты Кварда)
Читайте также: