
Лего дименшенс портал 2
Обновлено: 29.04.2024
It’s day three of Lego Dimensions week on Tired Old Hack, and after reviews of the Simpsons and Back To The Future level packs it’s now time for the Portal 2 level pack to be scrutinised to smithereens.
Check back on Thursday and Friday for the final two level pack reviews.
The Portal 2 stage in the main story mode is probably the longest in the game, and there’s even an outstanding Portal-related surprise right at the end (click here for spoilers), which would probably be more well-known among the gaming community if more Valve fans played Lego games.
So what more can the separate Portal 2 level pack offer that isn’t already covered in the main game? Quite a lot, it seems.
The Level
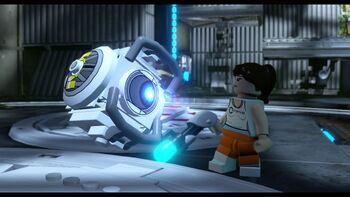
The level you get with the Portal 2 level pack is called Aperture Science, though you could probably get away with calling it Portal 3 if you wanted (GLaDOS even describes it as “round three” at one point).
Much like the other wave 1 level packs (The Simpsons and Back To The Future), it’s split into four main sections, with the first taking place in a series of test chambers in the traditional Portal style.
This section feels most like you’re playing a Portal game, with you using your Portal gun to solve puzzles while GLaDOS continually taunts you and Wheatley offers words of advice.


Before long you find an elevator and head down to the second section, where you have to explore the abandoned Old Aperture while old recordings of founder Cave Johnson play over the speaker system (courtesy of new dialogue by Portal 2 voice actor JK Simmons).
Make your way through here and you’ll find yourself in the third section, which gives you a bunch of new test chambers to play through, until finally you reach the fourth and final section: a boss battle against GLaDOS herself.
Of all five Lego Dimensions level packs to date, the Portal 2 level is the longest and most puzzle-heavy.
Although the environments look a bit samey (which can’t really be helped given the source material), the puzzle design and sensational dialogue still makes the whole thing a treat to play through.
The vocal talents of Ellen McLain, Stephen Merchant and JK Simmons all return to voice new dialogue for their respective characters, and you’ll constantly be chuckling away as you play, as is the Portal tradition.
The puzzles are perfectly balanced too. Naturally, given that Lego Dimensions is aimed at a younger audience you shouldn’t expect any of the properly brain-bending stuff you would have encountered in either of the main Portal games, but what’s there will give your noggin a wee workout without potentially frustrating any 11-year-olds who happen to be playing.


They’re relatively varied too, using not only your portal gun as a mechanic but also the provided Sentry Turret and Companion Cube gadgets, blue repulsion gel, orange propulsion gel and High Energy Pellets (the little glowing balls that are fired and can be diverted to trigger switches in the main Portal games).
Essentially, if you’re a Portal fan and you haven’t played this, you’re missing out on a cracking little mini-sequel that may look and play differently but still feels very much like part of the Portal universe.
Chell character
She’s armed with her trusty Portal Gun, which works just like it does in the games: using both action buttons you can fire orange and blue portals you can then travel between.
There’s one slight catch, mind: you can only fire portals onto special square tiles. Though this may seem a bit limiting, it’s understandable why it’s like this: Lego game stages are far less complex than Portal stages and being able to teleport wherever you like would have made things far too easy.
Thankfully the gun also doubles as a weapon, meaning Chell isn’t too useless outside of Portal environments. She isn’t exactly packed with character though, given that – as in the Portal games – she’s a mute protagonist.
Still, the fact she also has WyldStyle’s athletic ability (letting her double-jump and spin on horizontal poles) makes her a fun shooty/flippy character to play as.
Sentry Turret
It should come as no surprise then that Lego Dimensions has gone with the safe option, including both with the level pack as Chell’s two gadgets.
The Sentry Turret is used in the included extra level for firing at switches, ensuring they stay activated while you run over to the door they’ve opened.
Naturally, in other non-Portal stages it’s used to fire at any enemies who have the gall to come near you, and in this respect it gets the job done.
When you upgrade it to the Turret Striker it can still fire lasers, but it also runs faster on its little dinky legs and can even bust out physical attacks on closer enemies.


A further upgrade turns it into the Flying Turret Carrier. As the name suggests, this acts like a normal Sentry Turret but has the added power of flight, letting you soar around gunning down bad guys like some sort of airborne maniac.
The Sentry Turret is a decent enough gadget and is particularly useful in large combat areas where you know you’re going to be faced with a horde of enemies.
Its upgrades are nothing revolutionary (the power of flight aside) but it’s a solid enough piece of kit regardless. Plus it looks great in real life once it’s built.
Companion Cube
The Companion Cube proves this, offering a gadget that is undoubtedly adorable but stupendously rubbish.
In its initial form it does absolutely nothing. Its sole purpose is to be used as a weight you can sit on floor switches.
When you upgrade it to the Laser Deflector and realise that it still doesn’t move but can at least now divert lasers towards switches, you start to think “okay, maybe we’re slowly getting somewhere here”.
But then you upgrade it again to the Gold Heart Emitter, which removes the laser deflecting ability and does nothing again (other than, well, emit gold hearts), you realise that no, it is in fact rubbish.


In a way that’s sort of the joke, so you can’t be too harsh on the Companion Cube. The best thing you can do is buy the small upgrade that lets its follow you unaided and have it accompany you on your quest as a cute little chum.
Final Verdict
The Portal 2 level pack is easily among the best currently available, blowing the likes of the Back To The Future one out of the water in terms of content.
Meanwhile, Chell’s Portal Gun is a neat little weapon and the Sentry Turret is a cool gadget. Let’s just forget the Companion Cube.
It’s also worth bearing in mind that the Portal 2 level pack is the only way of accessing the free-roaming Portal 2 Adventure World, which offers a few more hours of puzzle solving and mission-based gameplay.
While the other level packs also offer access to their respective Adventure Worlds, they also have other standalone characters who can unlock them (Bart with the Simpsons world, Doc Brown with the Back To The Future one, etc). Of the level packs currently available, Portal 2 is the only one to feature exclusive access to its Adventure World too.
Ultimately, this is a no-brainer for Portal fans. There’s no drop in quality in terms of dialogue here, and while we’re looking at a third-person action platformer instead of a first-person puzzler, the look and feel of the Portal series is still masterfully maintained.
This is easily one of the best Lego Dimensions add-ons available.
If you want to buy the Lego Dimensions Portal 2 Level Pack and fancy doing it through Amazon, please do it using this link: Amazon UK. It won’t cost you any extra and a cut of the profits will go to me, letting me invest back into improving the site.
Disclaimer: This review was not based on a free promo copy. I bought this product myself.
GLaDOS is one of the non-playable antagonists/allies in LEGO Dimensions, from the Portal 2 franchise.
Contents
Background
Genetic Lifeform and Disk Operating System was a creation of Aperture Science Enrichment Center, a personality core designed exactly to be fitted as a central computer mainframe. The project began under the oversight of Cave Johnson over the company and was an attempt to create a fully functional, advanced artificial intelligence which was originally intended to be occupied by Johnson as one of his attempts to cheat death. After it became apparent to Johnson that he may die of moon rock poisoning before development on GLaDOS would be completed, Johnson motioned for the personality core to be based on his secretary and best friend, Caroline instead. After a decade's worth of hard work, GLaDOS was officially activated in 1998, as part of one of the many events during the company's "Bring Your Daughter to Work" day. Since she was able to take control of half of the facility's features, GLaDOS began killing most of its inhabitants by flooding the Enrichment Center with neurotoxin. However, only a few if not only one of the staff such as Doug Rattmann had survived her attacks. The destruction of the company also coincided with an invasion of Earth, which had occurred two days after at Aperture's rival company, Black Mesa. This ultimately led to the negligence of the outside world from realizing Aperture's fate, as all attention had been diverted to Black Mesa and the aforementioned invasion. Since the attack, she has managed the company to her limits. Her first test subject and the series' main protagonist, Chell, was given a warning of GLaDOS' true colors with the help of Doug Rattmann. She confronts GLaDOS in her chamber at the end of Portal, which allowed GLaDOS to develop an even deeper hatred for her after she was awakened at the beginning of Portal 2.
Dimension Crisis
GLaD to See You
After Batman, Wyldstyle and Gandalf arrived at the Aperture Science Enrichment Center in search for the cake (one of the Foundation Elements), GLaDOS initially mistakes the Wyldstyle for Chell. When the trio announced they are looking for a cake, she sends them to a course of 9 test chambers. In some of the tests, GLaDOS accuses them of cheating as they use keystones to pass them, rather than a portal gun, though congratulating them when they pass each one. After the 9th test, GLaDOS brings them to her chamber where she tries to "entertain" them with crushers and neurotoxin. The heroes summon H.A.L. 9000 to distract her, giving them the time to solve the Chroma puzzle behind her to get the pieces needed to build a ramp and drive a vehicle into her. GLaDOS responds to this by sending them to an oven, where the cake is located, but it is also another test chamber filled with flamethrowers. After the heroes reached the cake, she plans to send them to another test chamber featuring electricity, but X-PO opens a portal back to Vorton and the heroes make their escape, leaving GLaDOS to complain about being lonely.
Riddle-earth
GLaDOS appears through a rift during the invasion of Minas Tirith, where she converted an area into a test chamber. She claimed that if she can't take the trio to the tests, she will take the tests to them.
The End is Tri
After defeating the Tri, the trio returned to the Aperture Science Enrichment Center to ask for GLaDOS' help. She refuses, jokingly telling them to tell it to her morality core, before revealing that it was replaced with an amorality core. In response, Wyldstyle replaces her amorality core with an actual morality core, preventing GLaDOS from acting on her violent impulses. She demands they replace her amorality core, but Batman says they will do so if she helps them. She reluctantly agrees and appears on Vorton being examined by Egon Spengler. She asks the Doctor to repair her morality core, but he declines.
The Final Dimension
GLaDOS helps the heroes during the final battle by finding a safe way to Foundation Prime and then giving the heroes a Rocket Turret to blast part of the Foundation Baseplate after they construct a gateway.
After the final battle, she reviews information on Chell in her main chamber, singing the song You Wouldn't Know. After the song, a dimensional portal opens and her amorality core drops into the chamber. GLaDOS strokes the core with her head.
Aperture Science
Following the events of Portal 2, GLaDOS continues to rebuild Aperture Science Enrichment Center. However, Chell and a now anti-gravity Wheatley return. This causes her to be infuriated; to calm herself, she sends the pair to Test Chambers. After the pair complete some Test Chambers, she deliberately sends Chell and Wheatley to Old Aperture, but the pair quickly escape.
Back in a modern-test, GLaDOS subjects the pair to more tests. After completing the tests, Chell and Wheatley arrive at GLaDOS' Chamber where they discover Space Core showed up as well. This gives Wheatley an idea to initiate a Core Transfer. After GLaDOS is 100% corrupt, she is replaced by Space Core.
Aperture Science is a playable Portal 2 level in LEGO Dimensions, that can be unlocked through purchase of the 71203 Level Pack.
Contents
Level Pack Plot
Chell has returned to Aperture Science Enrichment Center and been reunited with the now anti-gravity Wheatley. Together with a Portal Gun, a Companion Cube, and a Sentry Turret, the pair attempt to finish the Test Chambers and defeat GLaDOS once and for all.
Walkthrough
Citizen in Peril
After the scene where Chell and Wheatley land in Old Aperture Science, you can hear Cave Johnson's voice ringing out, saying he was able to transfer his soul into a core and was trapped inside the vicinities ever since. You'll need a character with the Chi Ability (specifically one from Legends of Chima) to get the CHI fountain which is blocked by the portal pads that will need Chell to create portals on them to access the fountain. Once the CHI Ability character gained enough CHI, the player will then guide the said character to spot where Cave is trapped in with a CHI altar nearby, where the CHI Ability character will deposit the CHI from there, releasing Cave.
Rule Breaker
Abilities Needed to Complete the Level 100%
Section One
When approaching the ledge, use Chell's Portal Gun Ability to form portals on portal pads to get up onto the top of the ledge. There is a door with a nearby Weight Switch that will activate the door, and a building manual for the Companion Cube will appear to start with it. Once built, take the Companion Cube and put it onto the Switch to gain access to the next Test Chamber (Test Chamber 90).
Upon entering Test Chamber 90, get to the laser switch which will then prompt the building manual for the Sentry Turret; when it's done, lead the Sentry Turret to the switch and it will shoot at it to access a set of stairs. Climb the stairs and create a portal on a portal pad nearby, then head for a moving platform and create another portal on the portal pad from the opposite direction before entering into the first portal to get across to activate a button to release a High Energy Pellet to unlock the door leading to Test Chamber 91. But to get to it, you need to create a portal onto the portal pad hanging above the door to enter.
After entering Test Chamber 91, you'll encounter a group of Sentry Turrets blocking the way. Create portals onto the portal pads located on opposite sides to avoid the Turrets and get to the other side where a laser switch is waiting. Summon Sentry Turret to activate the switch to reveal another portal pad hanging from a high platform; create another portal from there to get to the Weight Switch and place a Companion Cube onto it to activate an Excursion Funnel to get across to the other side of the Chamber and the exit. Place the Companion Cube onto the Weight Switch there to get the elevator.
Section Two
While taking the elevator to get out of the facilities, Chell and Wheatley soon finds the elevator malfunctioning and fall down, finding themselves to have fallen into the ruined remnants of Old Aperture Science and they need to get back up to the surface. Get to the falling Repulsion Gel (the blue jumping gel) to jump higher to the platform where another laser switch is located for the Sentry Turret to activate, stopping a lowering ceiling from trying to crush you in order to jump onto a platform with a portal pad on top to create a portal and create another one with the portal pad nearby to get across. To jump higher to the next platform, create portals, then step onto a red rectangular button to send in more Repulsion Gel onto the floor, jump, grab onto the hanging bars and get up to reach for the next elevator.
Once arriving to the next portion, head for a button and press it to pour the Propulsion Gel (the orange running gel) onto the floor to avoid the crushing lowering ceilings. When reaching at the end of the Propulsion Gel trail, there is a portal pad waiting for Chell to create a Portal onto, then go down the stairs to shoot another portal onto a portal pad on the other side (lower position) and step on the red button to pour the Repulsion Gel onto the floor. Go around and head back to where the Repulsion Gel was poured onto to jump to the next portion of Old Aperture where you have to pour both Repulsion and Propulsion Gels to get out of there.
First, go down to press the button to pour the Repulsion Gel, then create to get to a caged platform to press another button to release the Propulsion Gel. Head back to the main platform to jump onto the Repulsion Gel to a tall platform and summon the Sentry Turret to press onto to reveal a hidden portal pad to create a portal onto, then run onto the Propulsion Gel to get to another platform and summon the Turret again to activate a laser switch to summon another portal pad leading to the elevator heading for Modern Aperture. Create a portal there, jump onto the Repulsion Gel to get to the elevator to Test Chamber 92.
Section Three
After getting back to Modern Aperture at Test Chamber 92, GLaDOS will greet you again and still informs you of the continuing renovations. There is a set of moving platforms to get across to the next side, but wait for that to stop opening and shutting as they can give way and send you down to the bottomless pit below. After crossing, Wheatley reveals that he managed to simplify the test there and that you may give it a try. Place the Companion Cube onto the Weight Switch to open a set of stairs to find GLaDOS.
However, she then finds out of Wheatley's manipulating the test there, interrupts, and rearranges the Test Chamber into a hard one. First, create a portal onto the first portal pad, then take the Turret to a laser switch which moves a movable floor panel to change its position to a 45° acute angle and create another portal on to the second portal. Press the button to release a High Energy Pellet into a core, causing a high platform holding the Turrets to drop them into the pit. Jump into an Aerial Faith Plate to get to the platform and take the Companion Cube to the Excursion Funnel at the other end to float onto the Weight Switch place above, releasing the stairs to get to the next Test Chamber.
Section Four
At Test Chamber 93, reach for the button to activate the Excursion Funnel, create a portal on the first portal pad, then take the Turret to the laser switch to activate an Aerial Faith Plate hidden in the wall. Jump onto two of them to get to the next part of the Test Chamber. Summon the Companion Cube, carry it while walking across a holographic bridge and drop it onto the Excursion Funnel to activate the ceiling Weight Switch. Walk back and find the second portal pad to create another portal for the Pellet to get across and open another portal pad. Go across by using one of two moving platforms, and once across, create two portals onto the last two portal pads, place the Companion Cube onto the Weight Switch located on a sunken floor of the platform to move one of the portal pads upstairs. Jump onto the portals to the upper floor and enter GLaDOS' chamber to confront her.
Section Five
With GLaDOS trying to exact revenge against Chell by attempting to kill her with neurotoxins and Space Core being present, it's time to put Wheatley's plan to have Space Core to replace GLaDOS by bringing damage onto her, hence starting a Core Transfer. In the first round, create two portals on the first set of portal pads, take the Companion Cube onto the Weight Switch to send in a High Energy Pallet to attack GLaDOS, damaging her at 25% Core Corruption.
With one of the portal pads damaged by falling debris from GLaDOS and another set forming a makeshift bridge at the left portion of the chamber in the second round, take the Turret to the laser switch to open an Excursion Funnel and jump onto the Aerial Faith Plate and onto the Excursion Funnel. Once there, press the button to reveal another portal pad. Jump down, create two more Portals, activate the Weight Switch again, sending another High Energy Pellet attack at GLaDOS, damaging her at 50%.
At the last round, GLaDOS knocks out another set of debris, causing the pipes to break and fill a portion of the floor on the right portion of the chamber with Repulsion Gel and revealing a platform with a button switch. Head for the button by jumping onto the Repulsion Gel, land on the platform and press the button to reveal the last portal pad. Go back down, create two last Portals and activate the Weight Switch with the Companion Cube to release the High Energy Pellet one last time to initiate the Core Transfer.
Starter Pack: Набор для начинающих для PS4

Fun Pack: Плохой полицейский
Fun Pack: Краггер

Team Pack: Гремлины

Fun Pack: Леголас

Starter Pack: Набор для начинающих для XBOX 360
Fun Pack: Инопланетянин

Level Pack - Балбесы

Story Pack: Фантастические твари и где они обитают


Fun Pack: Тина Голдштейн

71340 Супергёрл Dimensions

Fun Pack Охотники за привидениями: Зуул и Зефирный человечек

Fun Pack: Бэйн
Team Pack: Ниндзяго

Team Pack: Мир Юрского периода

Fun Pack: Старфайер

Level Pack: Гомер Симпсон

Fun Pack: Гимли

Fun Pack: Бенни

Team Pack: Джокер и Харли Куин

Fun Pack: Ниндзяго - Ния

Fun Pack: Эрис

Fun Pack: Ниндзяго - Сенсей Ву

Fun Pack: Зейн - Титановый ниндзя


Fun Pack: Лавал

Fun Pack: Красти
Fun Pack: Гермиона Грейнджер

Fun Pack: Барт Симпсон
Fun Pack: Доктор Кто - Кибермен
Team Pack: Суперкрошки

Level Pack: Время приключений

Fun Pack: Команда А - сержант Баракус

Fun Pack: Супермен

Level Pack: Доктор Кто

Fun Pack: Лего Фильм Бэтмен и меч короля Артура

Fun Pack - Чейз Маккейн

Starter Pack: Набор для начинающих для XBOX ONE

Team Pack - Время приключений

Level Pack: Соник
Level Pack: Охотники за привидениями


Team Pack: Скуби Ду
Level Pack: Миссия невыполнима
Fun Pack: Чудо-женщина

Fun Pack: Пестик

Fun Pack: Эммет

Fun Pack: Аквамен

Team Pack: Гарри Поттер и Волан-де-Морт

Fun Pack: Лего: Фильм - Кисонька

Fun Pack: Марселин - Королева вампиров
Story Pack: Охотницы за привидениями

Fun Pack: Рыцарь дорог

Fun Pack: Золотой ниндзя

Fun Pack: Битлджус

Fun Pack: Киборг
Fun Pack: Джей

Team Pack: Юные титаны, вперёд!

Story Pack: Лего Фильм Бэтмен
Fun Pack: Волшебник Изумрудного города - Злая Ведьма

Fun Pack: Охотники за привидениями - Лизун

Level Pack: Midway Arcade
After almost 5 years, Portal 2 is back as one of Lego Dimensions' launch Level Packs. If you've been wondering what figurines and abilities are included in the pack, I'll break it down for you along with an exploration of the new story level and adventure world.

Putting Portal figures on your Lego portal will blow your mind
The following abilities become available for you to use throughout the Lego Dimensions universe when you purchase this Level Pack:
- Chell: Double jump and use acrobatic poles (the same abilities that Wyldstyle has) and shoot portals onto white surfaces with the Portal Gun
- Vehicle transformations: Sentry Turret (rideable turret that can open switches), Turret Striker (destroy gold blocks), Flying Turret Carrier (destroy silver blocks and fly to reach high-up locations)
- Companion Cube transformations: Companion Cube (weight switch), Laser Deflector (deflect lasers), Gold Heart Emitter (refill characters' health when close by)
The Portal 2 pack includes 5 test chambers and a boss. There were more chambers included in the base game story level, though it took me about the same time to complete both. However, I would have liked to have seen extra effort put into the pack along with a longer level compared to the base game seeing as I purchased this separately. If you played the Portal 2 level in the base game then you'll know what to expect. These puzzles are around the same difficulty level, but with more use of the blue and orange paint that is used to speed up your character or make them jump really high. The Sentry Turret is used in a few places to trigger switches that move pieces of the wall, and the Companion Cube is used throughout to trigger buttons. On the presentation side, Wheatley follows you through the entire level with his typical funny banter, and GLaDOS doesn't stop with her sarcastic and equally humorous lines. The look of the level (and the adventure world that you unlock with the purchase of Chell) is spot-on as it mimics the Portal 2 universe very accurately. One problem I had while playing the level through a second time would have been game-breaking if I wasn't able to fix it. After being upgraded, the Sentry Turret stopped triggering switches. I had to quit out of the level and reset the Sentry Turret's default toy tag in order to fix it. Hopefully they patch this soon.
To be honest, playing the Portal 2 adventure world had me quite confused. It's seemingly very large and sprawls horizontally and vertically. All of the vertical traversing had me lose my sense of direction within a couple of minutes each time I entered the world. Having a map here seems almost necessary in order to explore every area. When you compare it to the other adventure worlds that have a natural progression between areas and a less vertical landscape, it comes across like a mess of platforms and puzzles. I was excited to be able to play more puzzles while in the adventure world which somewhat made up for the lesser number of puzzles included in the story level. They aren't quite as complex, but still fun to complete nonetheless. The world combines designs of Portal 2's early levels (plain white test chambers) and later levels (brown decaying rooms covered in greenery) to create an interesting mix.

Portal 2's adventure world is more layered than GLaDOS' much sought-after cake
The fact that this Portal 2 Level Pack closely matches its blockbuster counterpart means that fans of the series will absolutely have to pick it up. The same could be said for anyone looking for a bit more of a challenge in the Lego Dimensions universe. However, when you finish the short story level and arrive in the adventure world, you run the risk of getting lost forever in GLaDOS' dastardly test chambers.
Читайте также: