
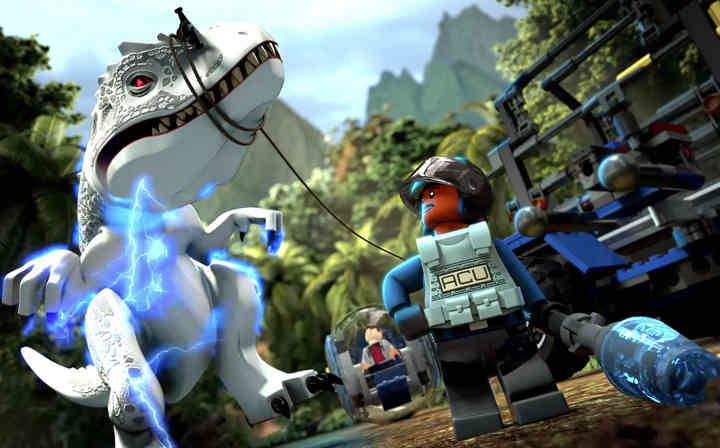
Lego jurassic world red bricks
Обновлено: 15.05.2024
Through the Story Mode, you will unlock various areas, game is divided into two main islands with two movie hubs on each island. Each movie hub is divided into several different areas which are related to the levels of the game. In these areas, you can collect Red Bricks and Gold Bricks, complete races, heal dinosaurs, take photographs, and save Workers in Peril. In these areas you can find these Red Bricks hidden, Red Bricks can bestow powerful abilities on your characters.
How to active:
Go to a Holoscape terminal and purchase the ability associated with that Red Brick. You find Holoscape terminals in the Visitor Center on Isla Nublar or in the Innovation Center on Isla Sorna. Activate the purchased ability for your characters. Select “Extras” in the pause menu and then toggle on/off any Red Brick ability you have purchased.
There are total 7 Hidden Red Bricks in Jurassic Park hub that you can find, below you will find out the locations and also how you can get them.
Jurassic Park – Visitors Center
Location: Go to the back of the Visitor Center, there is an open door on your left; you can see a blue target. Select a character with an electric rifle to shoot on it and a dark garage will open, now select someone who can go into dark to go inside the garage to collect Red Brick.
Jurassic Park – Dilophosaurus Territory
Location: This is on the right side of this area; you will find a cracked log there, which can be break down with a dino with this breaking ability, now select Dilophosaurus and spit at the large black rock. Once done, water the flower to grow to find the hidden brick.
Jurassic Park – Triceratops Territory
Location: This location if on the left side of the map, there is a building near sick Triceratops, and next to it you can see some crates, break them and assemble pieces into a computer. Now hack computer systems with someone who can do it. Move the cursor over the x-ray and select the different parts of the Triceratops as required until Red Brick will revealed.
Jurassic Park – Herbivore Territory
Location: This is in the middle of the map, left side of the road, there is a cracked rock which can be break with a dino who can break cracked objects, once it’s down, select someone to go into the dark tunnel to find the hidden Red Brick.
Jurassic Park – Carnivore Territory
Location: In this area you need to find three dinosaur eggs, lost by workers to get the brick.
- First can be found behind some vines located in the right side of the area.
- Second is on a tree stump near the middle of the area.
- Third is inside a large rock of amber. Use a custom dinosaur like T. rex with roar. Use roar to break the amber.
Jurassic Park – Gallimimus Territory
Location: It is located on the right of the road, there is a yellow feeding device with some crates, break them and assemble pieces into a raptor rail. As a raptor, grab onto and pull the rail. Switch to a character and turn the crank on the side of the device. Swap back to the raptor and release the rail.
Note: You need to do it 3 times to get the brick. 1 is done and two more to go.
Jurassic Park – Tyrannosaurus Territory
Location: This one if located in a cage on the right upper corner of the map, you need a strong dinosaur to pull apart the cage, in-order to get it.
Jurassic Park: The Lost World – Stegosaurus Territory
Location: You need to smash 5 cracked walls to get Red Brick. For that you need a dinosaur that can smash cracked objects as well as jump with Pachycephalosaurus head. You can create one like it. Once started, hit the first wall and then hold down the Attack button to run and smash the second wall, charge on third wall. Jump onto bouncy mushroom and bounce to the higher level. Smash two more walls there and you will received the brick.
Jurassic Park: The Lost World – Hunting Plains
Location: There is a huge rock in the middle of this area and brick is right under it, there is a tech that you can break with Use the Gyrosphere and roar on amber revealed and collect the Red Brick.
Jurassic Park: The Lost World – Long Grass
Location: In this area if you go up, keep an eye on the left side, now to find the brick switch to a raptor and follow a scent trail around the area to find it.
Isla Sorna – Spinosaurus Territory
Location: There is a little maze along the right side of the map in the middle, now for the brick you have to go through it, for it. Spawn a Compsognathus and find the opening in the logs. Once you make your way through the maze you will find the brick.
Isla Sorna – Ankylosaurus Territory
Location: There is a big nest, which is almost hidden, on the right side at the start of this area. To get the break you need to find the missing eggs from the nest.
- First one can be found on the terrace near the nest.
- Second one is behind the vines near sick dino.
- Last one is on the ground at the base of the tree not far from the kiosk.
Isla Sorna – Isla Sorna Aviary
Location: Fly a Pteranodon across the aviary to the three-level mesh corridors to find the switch, pullit to lowers the lifts one level. Now switch to baby Pteranodon and move it left through the opening. Keep going left until the baby drops down to second level; then move left again into the brown cage to drop the baby down to the third level. Now walk the baby to the right; then tag back to the adult Pteranodon. Pull the switch again to lower the lift. Tag back to the baby and go all the way right to find Red Brick.
Jurassic World – East Boardwalk
Location: There is Pachy Arena in East Boardwalk, go there and pull and release the dino switch to bring up a black LEGO target with raptor, now switch to Dilophosaurus and complete the challenge to win the red brick.
Jurassic World – West Boardwalk
Location: It is located at the upper left side of the map, to get this brick, with T. rex bite the boulder to get access to rock platforms under the left tower. Now select human follow the path to a green plant. Smash and reassemble it into a bounce pad, make your way till the end and find the brick.
Jurassic World – Mosasaurus Arena
Location: Roar to shatter all three amber rock clusters in the tank to get the Red Brick.
Jurassic World – Gyrosphere Valley
Location: It is located at the upper-middle area of the map along the edge. Go there and with the help of Dilophosaurus hit on black LEGO block dew times with amber wall. A Red Brick will appears but you cant get it yet, so go and heal the sick dino on the dino spawner and spawn a dinosaur with roar ability, with it you can shatter the terrace’s amber wall. Now assemble pieces into a raptor rail. Switch to a Velociraptor and use Pounce on the rail to swing onto the terrace to get the brick.
Jurassic World – Safari Plains
Location: It is located at the upper left corner of the map, after finishing the race; you end up next to a shack with a red-striped awning folded up and a Red Brick on the roof. Use raptor to pull dino switch on the shack’s left side, follow the way to the roof and get the brick.
Jurassic World – Isla Nublar Aviary
Location: Go to the observation deck, there is a stream on the right side, from here fly Pteranodon down to the dino switch on ground next to the blue and white platform, pull the switch to raise and reveal another dino switch on next platform. Now fly new platform and pull the switch there, which will raise and reveal the new platform with switch. Go there and pull that switch to reveal the another platform across the river. Go there and pull the switch to raise the final platform near the observation deck. Go there and pull the switch to open the cage with the brick.
Jurassic World – Indominus Territory
Location: Use the dino spawner out in the main yard to conjure up Indominus Rex. The security gate to the paddock’s back area closes. Use the roar ability to shatter 3 amber blocks. Then use the beast’s fearsome bite to chew off the dino-strength gate of the cage with red brick.

Scattered throughout the four HUB worlds there are twenty red bricks to find. When you have found one you can then go to the Visitor’s Centre in Jurassic Park, or on Main Street in Jurassic World, and purchase the brick. When you have purchased a brick you can turn it on by pausing the game and choosing Extras from the list.
Score X2
Cost: 1,000,000
Location: Jurassic Park I – Visitor Centre
Head round the back of the building and you will find an electrical target near a worker in peril. Shoot this with the stun gun to raise a door, then light up the space behind to find the brick.
Score X4
Cost: 2,000,000
Location: Jurassic Park II – Hunting Plains
Near the InGen Arrival level marker there is a vehicle pad. Use this to summon a Gyrosphere and move to the open plain. In the middle you will see a launch pad for you Gryosphere, which will launch you into the rock wall and expose an orange brick. Summon T.rex from the pad nearby and roar at the orange brick to destroy it and get your red brick.
Score X6
Cost: 3,000,000
Location: Jurassic Park III – Isla Sorna Aviary
Head inside the building and use the stairs in the centre of the room to reach the lower level. Here you can summon a Pteranodon to fly around inside the aviary. Fly to the right where you will see a structure on the side of the aviary. At the top of the structure is a red level that the Pteranodon can pull to raise parts of the structure. There is also a baby Pteranodon that you can switch to and move around in the structure. You need to get the little on to the bottom right hand corner by lowering and raising sections of the path to clear the way. When the baby reaches the bottom it can collect the brick.
Score X8
Cost: 4,000,000
Location:Jurassic Park I- Herbivore Territory
Inside the empty paddock there is a cracked rock on the left wall. Crack this rock open to reveal a large pipe. Get a character with a light to go into the pipe and pick up the brick.
Score X10
Cost: 5,000,000
Location: Jurassic World – Indominus Territory
Go inside the Idnominus paddock and locate the dinosaur summoning pad in the back, right hand corner. Summon the Idnominus and use it’s stealth ability to become invisible. You can then get through the gate on the right without the security camera shutting the door. In this area use the Idnominus bite to destroy one of the cages to get he brick out.
Invincibility
Cost: 5,000,000
Location: Jurassic World – Isla Nublar Aviary
Inside the Aviary you can summon a Pteranodon. Take control of the dinosaur and head down into the aviary. On the floor there are four blue pads and one has a red lever in front of it. Get the Pteranodon to pull it and one of the pads raises into the air with another lever on it. You need to land on each pad and pull the lever before time runs out to opent he cage with the red brick in it.
Minikit Detector
Cost: 200,000
Location:Jurassic World – East Boardwalk
Head up into the Pachycephalosaurus arena by charging and using the yellow elevator. On the arena wall there is a Raptor switch which will reveal a sign in the audience. Get Dilophosaurus to spit at it and another will appear. Do this eight times and you will get the brick.
Red Brick Detector
Cost: 200,000
Location: Lego Jurassic Park I – Tyrannosaurus Territory
From the level marker for Restoring Power, head south crossing rivers as you go. You should then stumble on the T.rex territory. To the left of the marker for this area there is an electrical target. Shoot this and climb the ladder to get over the wall. Summon a large dinosaur such as T.rex to break a large Lego cage to the right of the summoning pad. You can then collect the brick from inside.
Gold Brick Detector
Cost: 200,000
Location:Jurassic Park II – Long Grass
Head north on the map from the marker for the bonus level Tyrannosaurus Rex Escape and look for a dinosaur summoning pad. Opposite this there is a scent trail for a Raptor that will lead you straight to the red brick.
Amber Brick Detector
Cost: 200,000
Location: Jurassic Park III – Ankylosaurus Territory
Knock down a Lego tree so you can reach a nest of dinosaur eggs. There are some eggs missing and you need to return them to the nest to get the brick.
The first egg is lying out in the open, to the left of the nest.
Another egg is in the open, lying at the foot of a tree near the dinosaur summoning pad.
The last egg can be found behind some vines that you can cut through with a knife or Raptor claw.
Fast Build
Cost: 100,000
Location:Jurassic Park III – Spinosaurus Territory
Look for some hollow fallen trees near the dinosaur summoning pad. Get a Compsognathus to travel through the hollow logs and collect the red brick.
Attract Studs
Cost: 100,000
Location: Jurassic Park I – Carnivore Territory
Locate a dinosaur paddock near where the East Docks, that has a man in it complaining that he has lost some eggs. You will need to locate and return all the missing dinosaur eggs. To do this you will need access to a small or medium dinosaur that can roar. I used a customer Raptor dinosaur with the T.rex ead. When you return all three missing eggs the large egg will hatch and reveal the red brick.
The first one if behind some vines that you can remove with Dr Grant’s Raptor claw.
Grab the Raptor bar next to the agility poles to turn off the electricity. You can then use the poles to reach the egg.
Use the dinosaur pad to call your custom Raptor in and locate a large, orange rock. *Press and hold X when in front of the rock to roar and crack it open.
Collect Ghost Studs
Cost: 100,000
Location: Jurassic World – West Boardwalk
Head to the observation deck for the T.rex paddock and use the security panel in the corner to open a lift and uncover an electrical target. Use the lift to head down into the enclosure and hit the target on the wall below the observation deck. This releases the T.rex into the arena. Go over and switch to the T.rex, then use it’s strength to destroy the Lego objects behind it. You can then use the rocks to reach the brick above you.
Compy Mode
Cost: 100,000
Location: Jurassic World – Mosasurus Arena
Head inside the entrance between the stands. In this small room there is a dinosaur summoning device that you can build and use to take over a Mosasaurus. Swimming about you will find three orange rocks. Use the Mosasaurus roar the same way you would the T.rex and break all three rocks.
Destroy on Contact
Cost: 100,000
Location: Jurassic World – Safari Plains
Look for a small building with the red brick on top. Get a Velociraptor to pull the handle on the side of the building, which will extend the red and white awning. You can then get a female character to jump onto this so they can reach the brick.
Cost: 100,000
Location: Jurassic Park I – Dilophosaurus Territory
Inside the enclosure there is a large fallen tree. Break through the cracked part and get the Dilophosaurus to break the black rock behind it. Finally, get Ellie to water the plant to get he red brick from inside.
Nedry Disguises
Cost: 100,000
Location: Jurassic Park I – Triceratops Territory
Head to the Triceratops paddock and find an enclosed Triceratops right at the back. Break two crates to the left of the hut and build a hacking terminal from the pieces. Use this to X-ray the dinosaur. Click on its head, back leg, and body to get the brick to appear.
Fast Interact
Cost: 100,000
Location: Jurassic World – Gyrosphere Valley
Look for a large orange rock embedded in the rock face and above it there is a black rock. Summon a T.rex using the pad nearby and roar to destroy the orange rock. (You will need to heal the sick Gallimimus first before you can summon the T.rex) When the orange rock is destroyed build the Lego into a Raptor grab bar, then use it to get up to the black rock. Finally, get a Dilophosaurus to destroy the black rock so you can get the red brick.
Hybrid Disguises
Cost: 100,000
Location: Jurassic Park I – Gallimimus Territory
Inside the Gallimimus enclosure there is a dinosaur feeder and a guy who doesn’t know how to use it. Destroy the small crate beside it and build a Raptor bar, then get a Raptor to pull the lever and hold it there. Switch to the other character and turn the crank on the other side of the device. Get the Raptor to release the lever and you will get loads of stud. Repeat this process twice more and you will get a red brick.
Helium Voices
Cost: 100,000
Location: Jurassic Park II – Stegosaurus Territory
Head away from the dock until you find a blue dinosaur summoning pad. Just south of this pad there is a cracked wall sticking out of the ground. If you destroy it another will appear and a timer will start. Destroy finve cracked walls before time runs out. I recommend using the Pachycephalosaurus for this.

There are a total of 275 gold bricks to be found and collected throughout this game. Half of them will be given to you for completing certain tasks, such as completing a level, healing a sick dinosaur, or saving a worker in peril. However, there are 133 gold bricks scattered throughout the 4 HUBs for you to find. This guide will show you how to find all of the gold bricks for this game.
Throughout the HUBs there are map location posts that you should activate as you go. If you activate one of these map posts you will see icons appear on the map for bricks, dinosaurs, races, and more. If you click on the map point you will also see a list of items that can be found within this area. I have listed the gold brick locations by the map pointer they are included in.
There are three glitches that I know of, relating to gold bricks and one of them will stop you from completing the game 100%. As yet I do not know of a fix for it. The other two are annoying, but they will not stop you from collecting the brick.
The first glitch prevents a sick dinosaur from appearing on the Hunting Plains in the Jurassic Park II HUB. Some say you should heal this dinosaur in story mode but I have not yet verified this. The dinosaur did not appear for me and nothing I tried would make it appear. This is the only brick I could not collect.
The map pointer for Eric’s Hideout in the Jurassic Park III HUB shows there are only four bricks to collect here, but I have found five. If you think you have completed everything but you still have one brick remaining, this is likely to be the cause. Go back to Eric’s Hideout and look for the bricks listed below. (An update was released on 29th July that fixed this bug)
Finally, some people have reported that when completing a race and collecting the brick, the gold brick detector still shows an arrow pointing to the location of the brick. This is an annoying bug but it won’t prevent you from completing the game.
The list below shows where bricks can be automatically collected:
26 bricks are given for completing each level (including six bonus levels)
26 bricks are given for achieving true survivor on each level (including six bonus levels)
20 bricks are given for completing the minikit for each of the main levels
20 bricks are given for taking twenty photos around the HUBs
20 bricks are given for saving twenty workers in peril
20 bricks are given for completing each race throughout the HUBs
10 bricks are given for healing sick dinosaurs throughout the HUBs
This leaves 133 more bricks that can be collected throughout the HUBs, as shown in the table below:
Closest Hub: Herbivore Territory?
Required Characters: Charging Dinosaur, Illuminating Character
How: After you summon the Triceratops to fight the Dilophosaurs, there is a storm pipe covered in a breakable rock. Break it by charging it as a Charging Dinosaur, then go inside with a character that can illuminate dark areas to find the Red Brick
Red Brick Quality: Studs Score Multipler X8
Closest Hub: Visitor Center
Required Characters: Electricity Shooting character, Illuminating Character
How: Shoot the Electric Target and then send a character that can go into the dark in to get the brick
Red Brick Quality: Studs Score Multiplier X2
Closest Hub: Tyrannosaurus Territory
Required Characters: Tyrannosaurus Rex
How: Bite the Rex Switch as a Rex and pull it free to get to the brick
Red Brick Quality: Red Brick Detector
Closest Hub: Carnivore Territory
Required Characters: Customiazed Rex-Roar small dinosaur, Vine-cutting character, Velociraptor, Agility Character
How: Find all the lost eggs to get this brick
1. Using a small dinosaur customized with the Rex Roar, break the amber to get the egg
2. Hidden in bamboo. Use any Vine-Cutting character to get it
3. Along the fence is a series of pink-blue agility poles and a Velociraptor switch. Pounce the switch, then use a Agility character to go get the egg (pictured)
Red Brick Quality: Attract Studs
Closest Hub: Dilophosaurus Territory
Required Characters: Charging Dinosaur, Dilophosaurus, Watering Can Character
How: There will be a log with the orange cracks, charge it to reveal a new area. Go inside to destroy the black Dilo rock as a Dilophosaurus. This will reveal a plant to grow.
Closest Hub: Triceratops Territory
Required Characters: Hacker Character
How: Repair the X-Ray, then use a hacker character to click on the skeleton and turn the head, Hind leg, and body green
Red Brick Quality: Nedry Disguises (Puts bright Hawaiian Shirts on all characters)
Closest Hub: Gallimimus Territory
How: Break the crate nearby to finish the control panel. Use the switch as a Velociraptor. Do NOT let go of it. Switch to another character and go to the right side to rotate a lever. If you do this 3 times, a Red Brick will appear
Red Brick Quality: Hybrid Disguises (All characters in dino costumes)
Closest Hub: Stegosaurus Territory
Required Characters: Charging Dinosaur
How: On a timer, smash all 5 walls. The first three are fairly easy, the other two are up on a ledge. You have to jump on red mushrooms to get up (this can require a few tries to get it done in time)
Red Brick Quality: Helium Voices
Closest Hub: The Hunting Plains
Required Characters: Gyrosphere, Tyrannosaurus Rex
How: Use the Gyrosphere pad to launch the Gyropshere into the rock wall, breaking it. Then use a Tyrannosaurus Rex roar ability to break the amber and get the brick
Red Brick Quality: Studs Score Multiplier X4
Closest Hub: Long Grass Territory
Required Characters: Velociraptor
How: Follow the scent trail to the final spot, and dig up the brick
Red Brick Quality: Gold Brick Detector
Closest Hub: Anklyosaurus Territory
Required Characters: Charging DInosaur (to get access to the nest), Vine-cutting character
How: Find all 3 eggs to get the brick
1. Lying at the bottom of a tree
2, Near the sick Anklyosaurus is a patch of bamboo you can cut to get this
3, Lying near the nest
Red Brick Quality: Amber Brick Detector
Closest Hub: Spinosaurus Territory
Required Characters: Compy
How: Go into the maze as a Compy and navigate it to the red brick
Red Brick Quality: Fast Build
Closest Hub: Isla Sorna Aviary
Required Characters: Pteranodon
How: Go inside the Aviary and down the stairs. Summon a Pteranodon and pull the red lever that operates the elevators. You are then given a baby Pteranodon to play as. Use the two alternately until you can navigate all the way down the maze (using the big pteranodon to pull the level and lift the elevators up and down to open pathways)
Red Brick Quality: Studs Score Multiplier X6
Closest Hub: Gyrosphere Valley
Required Characters: Dilophosaurus, Tyrannosaurus Rex, Velociraptor
How: Use a Tyrannosaur Rex to break the amber, freeing the Velocriaptor pounce bar. Use the Velociraptor to pounce up, and switch to Dilophosaurus to break the black rock
Red Brick Quality: Fast Interact
Closest Hub: East Board Walk
Required Characters: Velociraptor, Dilophosaurus
How: In the arena will be a Velociraptor Switch. Pull it to start the challenge. As a Dilophosaurus, shoot each of the 8 targets that spring up
Note: the 6th one (pictured below) has some trouble registering being hit. If you are having trouble with this one, try standing where i am in the 2nd screenshot
Red Brick Quality: Mini-Kit Piece Detector
Closest Hub: Indominus Territory
Required Characters: Indominus Rex
How: Inside, there is a gate guarded by a security camera. Use the Indominus Rex's cloaking ability to sneak past it. Once past the gate, there is a cage with a Rex Switch on it. Bite the switch to open it and get the brick
Red Brick Quality: Studs Score Multipler X10
Closest Hub: Safari Plains
Required Characters: Velociraptor, Agility Character
How: Pull the Velociraptor Switch to lower the awning, then leap on it with an Agility Character to get the brick
Red Brick Quality: Destroy on Contact
Required Characters: Tyrannosaurus Rex, Agility Character
How: Bite the switch, then leap up the ledges, build the bounce-pad, then climb the ladder
Red Brick Quality: Collect Ghost Studs
Closest Hub: Isla Nublar Aviary
Required Characters: Pteranodon
How: As a Pteranodon, you will see an upraised platform with a Pteranodon Switch. Pull it to begin the countdown clock. You need to fly to and lift every switch that is revealed to open the cage and get the brick
Red Brick Quality: Invincibility
Closest Hub: Mosasaurus Arena
Required Characters: Mosasaurus
How: Break all 3 pieces of Amber for this brick
Red Brick Quality: Compy mode (all characters the size of Compies)
You will find a total of 20 Red Bricks scattered across the four Hub Areas in LEGO: Jurassic World. These rare bricks are hard to come by in the game and are only located inside the Hub Areas.
Unlike other collectibles in the game, Red Bricks require some effort put into finding them. For more help on Lego Jurassic World, read our Photographs Locations, Workers in Peril Locations and Minikits Locations Guide.
LEGO: Jurassic World Red Bricks Locations
You will have to acquire certain Dinosaurs, solve vexing puzzles, and gain access to other inaccessible areas to find these rare items. Following is the location of all 20 Red Bricks that can be found inside the Hub Areas of LEGO: Jurassic World:
Hub Area – Jurassic Park
Visitors Center
Red Brick
You need to head to the gate at the backside of the Visitor Center and use a rifle-wielding character to shoot a blue target located on the left-hand side of the door. After that, switch to a character that can walk in darkness to enter the area to collect the Red Brick.
Dilophosaurus Territory
Red Brick
You need to break a cracked log using a dino and use a Dilophosaurus to spit on the large black rock. After that, water the spot to make a flower grow in the area containing a Red Brick on top of it.
Triceratops Territory
Red Brick
You need to reach the building right next to a sick Triceratops and break open the crates lying there. After that, assemble the pieces into a computer and switch to a computer hacker. Select the x-ray and select various components of the Triceratops until you acquire the Red Brick.
Herbivore Territory
Red Brick
This Red Brick is located in the area where you come across a trapped worker. You need to use a dino that can break cracked objects to smash a rock to reveal a hidden tunnel. After that, use a character that can walk in the darkness to head inside the tunnel and find the Red Brick.
Carnivore Territory
Red Brick
In order to find the Red Brick, you need to find three dinosaur eggs to earn the Red Brick. You can refer to the locations below for all the locations:
Egg 1 – cut the vines on the right-hand side of the area
Egg 2 – placed on a tree stump in the middle of the area
Egg 3 – hidden inside a large rock of amber
After finding all the eggs, take them back to the worker and he will reward you with a Red Brick in return.
Gallimimus Territory
Red Brick
You need to smash a crate near the yellow device and reassemble the pieces to create a raptor rail. As raptor, pull the rail and switch to a character to turn the lever on the side of the yellow device.
After that, switch to the raptor and release the rail. Keep on repeating the same process until you get the Red Brick.
Tyrannosaurus Territory
Red Brick
You simply need to use a strong large dinosaur to rip apart the cage and find the Red Brick lying inside.
Hub Area – Jurassic Park: The Lost World
Stegosaurus Territory
Red Brick
You need to smash five different cracked walls to find this Red Brick. Do note that you will have a timer to smash all the walls. Lastly, it is better to use a strong dinosaur for the purpose and keep on spamming the attack button.
Hunting Plains
Red Brick
You need to use the Gyrosphere fling pad to break tech and reveal Amber. After that, use a dinosaur with the roar ability and use it on the Amber to reveal a Red Brick.
Long Grass
Red Brick
You simply need to switch to a raptor and follow the scent scattered around the area to find the hidden Red Brick.
Hub Area – Isla Sorna
Spinosaurus Territory
Red Brick
First off, you need to spawn a Compsognathus and find some openings in the logs. Break through the openings and make your way through a small maze to find the Red Brick located near the end.
Ankylosaurus Territory
Red Brick
Just as you enter the area, head right to find a big nest neatly hidden on a narrow terrace. You need to deliver three lost eggs to receive the Red Brick in return.
One egg is located at the base of a tree near the nest, one is behind some vines near the sick dinosaur, and the last one is located on the narrow terrace across the nest.
Isla Sorna Aviary
Red Brick
You need to fly a Pteranodon across the Aviary to the three-level mesh corridor and pull the switch to lower the lift to one level. Once you are down, switch to the baby Pteranodon and head left and drop to the second level.
Once you arrive at the second level, keep moving toward the left side to drop to third level. After arriving at the third level, move toward the right-hand side and switch to adult Pteranodon once again.
Pull the switch to lower the lift, switch to baby Pteranodon, and find the Red Brick on the far right-hand side.
Hub Area – Jurassic World
East Boardwalk
Red Brick
You need to head over to the Pachy Arena and use a raptor to release the dino switch and reveal a black LEGO target. After that, change to a Dilophosaurus and spit at the eight targets within the time limit to earn a Red Brick.
West Boardwalk
Red Brick
As T-Rex, smash the dino-strength boulder and gain access to the rock platforms under the left-hand side tower. After that, change into a human character and reach the spiky green plant.
Smash the plant and reassemble it into a bounce pad. Scale the tower to find the Red Brick at the top.
Mosasaurus Arena
Red Brick
You need to use a dinosaur with roar ability to smash all three Amber rocks inside the tank to find the Red Brick as a reward.
Gyrosphere Valley
Red Brick
You need to use a Dilophosaurus to spit goo at the black LEGO block on the terrace with the Amber wall which will reveal the Red Brick. In order to acquire the Red Brick, you will have to use a dinosaur with roar ability to break the terrace wall and acquire the desired item.
Safari Plains
Red Brick
Start the race located in the large clearing and you will finish near a shack. You need to climb to the roof and find a Red Brick there.
Isla Nublar Aviary
Red Brick
You need to acquire a Pteranodon and fly to the Dino Switch on the ground right next to the white/blue platform, on the right-hand side of the Observation Deck. Raise the platform to reveal another switch and complete the puzzle within 01:30 timer to find the Red Brick in the end.
Indominus Territory
Red Brick
You need to get yourself an Indominus Rex and use it camouflage ability to hide yourself while moving through the security gate. Once you are on the other side, use the dinosaur’s roar ability to shatter all three Amber blocks and chew the cage to find the Red Brick inside.
Found anything missing or confusing? Let us know in the comments section below!
Читайте также: