
Lego mindstorms ev3 puppy program
Обновлено: 02.05.2024
Перевод на русский язык с изменениями и дополнениями:
Проектирование и конструирование
Программирование
Имитационное моделирование (симуляция)
Анализ
- MINDSTORMS EV3 / NXT — Ультразвуковой датчик
- MINDSTORMS EV3 / NXT — датчик касания
- MINDSTORMS EV3 — ИК-датчик
1. Введение
- Возможно, наиболее очевидным преимуществом является то , что при использовании моделируемого робота мы можем писать программы для работы с роботом, даже если он физически не доступен. Например, ваш клуб робототехники может иметь только один комплект для сборки MINDSTORMS ® робота, но вся команда может работать и программировать на цифровую версию такого же комплекта MINDSTORMS ® робота в классе или дома.
- Когда речь заходит о средах (реальных и виртуальных), моделирование предлагает гораздо большее разнообразие решений, чем это будет возможно физически. Это может быть даже слишком дорогим , чтобы протестировать наш робот в ближайшем невесомом космическом пространстве, в нашем случае мы могли бы легко имитировать его.
- С помощью виртуальных робототехники, вы никогда не потеряете детали LEGO ® MINDSTORMS ® , и их всегда легко найти, а кроме того у Вас будет своя библиотека деталей, узлов и готовых роботов и программ к ним.
- Работая в полностью цифровом пространстве, мы можем построить Вашу модель один раз, а затем сохранить её навсегда. Что дает нам возможность гораздо легче конкурировать и делиться своим роботами с другими пользователями по всему миру.
2. Установка и настройка
2.1 Минимальные системные требования к компьютеру
- Intel Core Duo или лучше
- 2 Гб оперативной памяти
- 1,3 Гб свободного пространства на жестком диске
- Windows 7 или выше
2.2 Рекомендуемые системные требования к компьютеру
- Intel ISeries, i3 или лучше
- 4 Гб оперативной памяти
- 1,3 Гб свободного пространства на жестком диске
- Dedicated видеокарта
- Windows 7 или выше
2.3 Поддерживаемые платформы Robotics
2.3.2 LEGO ® MINDSTORMS ® EV3 ™ — (3 — е поколение роботов)
На рисунке (Figure 2.2) приведен список датчиков EV3, которые поддерживаются в тренажере.
2.3.1 LEGO ® MINDSTORMS ® NXT ™ — (2 — е поколение роботов)
На рисунке (Figure 2.1) приведен список датчиков NXT, которые поддерживаются в тренажере.
2.4 Дополнительные ресурсы
2.4.1 LEGO ® среда программирования как дополнительный инструмент для работы в Virtual Robotics Toolkit ™

Рисунок 2.3 Пример кода программы робота в среде программирования ev3.
2.4.2 Среда моделирования LEGO ® Digital Designer ™ как дополнительный инструмент для работы в Virtual Robotics Toolkit ™
LEGO ® Digital Designer ™ (или LDD, так он обычно называется) является свободно доступным CAD инструментом. Если у Вас есть серьезный интерес в разработке собственных цифровых роботов, то Вам будет полезным рассмотреть вопрос о более близком ознакомлении с этим инструментом проектирования.

LDraw
В дополнение к LEGO Digital Designer, вы можете также рассмотреть вопрос установки LDraw «все-в-одном» библиотеки деталей LEGO ® . LDraw поддерживает многие форматы файлов, поддерживаемых LEGO Digital Designer, и, вероятно, самый популярный формат файлов для создания и совместного использования 3D моделей LEGO между программами САПР.
Virtual Robotics Toolkit содержит мастер импорта, который может быть использован, чтобы импортировать LDraw файлы в тренажер. Правда, нет необходимости устанавливать эту библиотеку, но она предоставит намного больше возможностей для различных типов LEGO ® деталей, которые могут быть приведены в тренажере.

После установки LDraw «все-в-одном» библиотеки, вы также можете, обновить LEGO Digital Designer , так что вы можете экспортировать свои модели на SIM — карте. Для этого достаточно в меню Virtual Robotics Toolkit нажать на Help и выбрать пункт Patch LEGO Digital Designer .

Рисунок 2.5: Применение заплатки для LEGO Digital Designer
2.4.3 Дополнительные Интернет ресурсы
3. Экран приветствия
В этой главе рассмотрим проекты по умолчанию, которые включены в базовую установку Virtual Robotics Toolkit, и будем рекомендовать курс обучения. Мы завершим эту главу, продемонстрировав, как интерфейс Тренажера может быть настроен, чтобы наилучшим образом удовлетворить ваши потребности.
3.1 Установка Virtual Robotics Toolkit

Рисунок 3.1.1 При первом запуске Virtual Robotics Toolkit введите лицензионный ключ если Вы приобрели лицензию или выберите радиокнопку Continue with trial period. (14 days remaining) — продолжить 14 дневную пробную версию — > нажать OK
Далее, через 30-40 секунд появиться экран приветствия с открытой вкладкой Sim Basics — Базовые Симуляции:

Рисунок 3.1.2 Вкладка Sim Basics — Базовые Симуляции.
3.1 Проекты
3.1.1 ПомощьСправка Virtual Robotics Toolkit

Рисунок 3.2: Вкладка SimBasics (Базовые симуляторы). Прокрутите справа движок окна вниз и вы увидите 8 проектов виртуальных миров (сред обитания роботов) из них 4 мира спроектированы для LEGO ® EV3
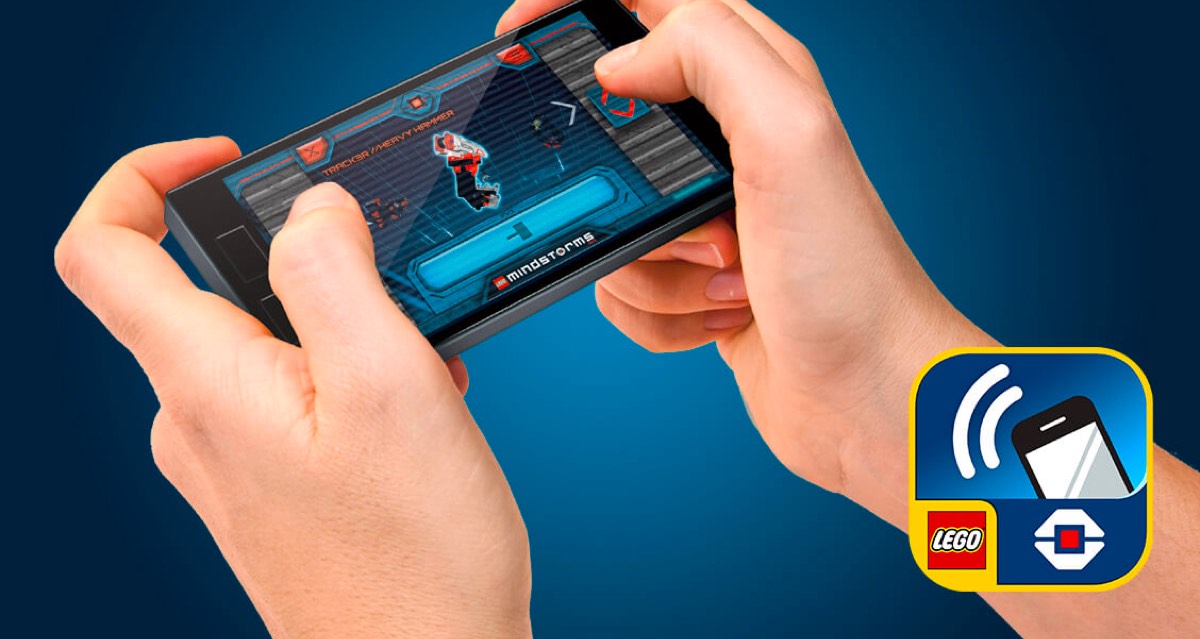
Robot Commander представляет собой управляющее приложение для LEGO® MINDSTORMS®. БЕСПЛАТНАЯ загрузка для большинства смартфонов и планшетов; Robot Commander подключается к модулю EV3 по Bluetooth®. Это простое в использовании приложение позволяет взаимодействовать с вашими уникальными роботами EV3, даже не подключаясь к компьютеру! Это означает, что вы можете мгновенно начать игру с вашими собственными роботами!
Приложения для компьютеров и планшетов
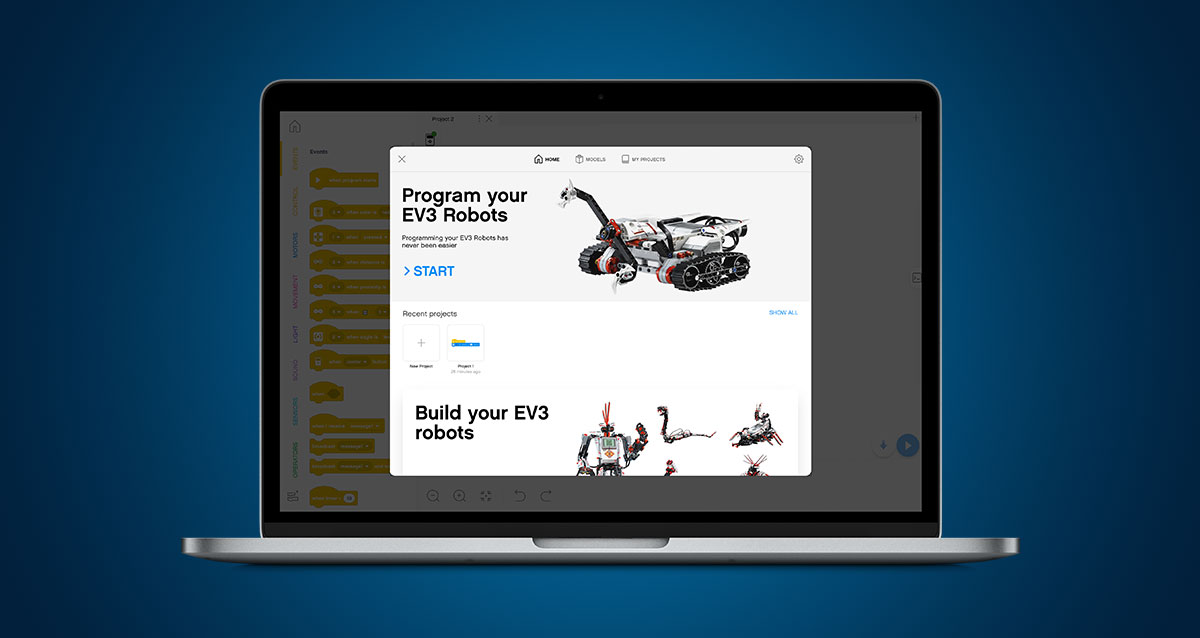
Приложения LEGO® MINDSTORMS® EV3 Home для macOS, Windows 10 и планшетов на iOS и Android
Загрузите, установите, подключите и выполняйте задания по программированию. Для пяти основных роботов есть до пяти задач по программированию. Благодаря более продвинутому, но хорошо знакомому интерфейсу программирования и пяти сложным заданиям для вас и ваших роботов-героев, приложение EV3 Home для PC, Mac и планшетов сможет поднять ваши навыки робототехники на новый уровень!
Важная информация относительно программного обеспечения и приложений LEGO® MINDSTORMS® EV3!
Мы рады сообщить, что пользователям LEGO MINDSTORMS EV3 теперь будут доступны новые возможности при сборке и программировании их творений.
Новое приложение LEGO MINDSTORMS EV3 Home с языком программирования на основе Scratch заменит используемое в настоящее время ПО LEGO MINDSTORMS EV3 Home Edition (Labview) для Windows 10 и macOS, а также приложение LEGO MINDSTORMS EV3 Programmer для планшетов на iOS/Android.
Приложение LEGO MINDSTORMS EV3 Programmer будет удалено из магазинов приложений в конце июня 2021 года.
Выведенное из эксплуатации ПО LEGO MINDSTORMS EV3 Home Edition (Labview) для Mac и PC можно найти ниже. Обратите внимание, что это ПО больше не поддерживается LEGO Group.
This commit does not belong to any branch on this repository, and may belong to a fork outside of the repository.
Latest commit
Git stats
Files
Failed to load latest commit information.
README.md
The Puppy Robot is one of the robots that can be built with the LEGO Mindstorms EV3 Education kit. I wrote a small leJOS program for it to entertain my children. :) The implemented behaviour is rather simple. Anyway, it may serve as a starting point for further experiments with this robot.
Here is a short video demonstration on youtube:

How to get it run
You should have a LEGO Mindstorms EV3 brick with leJOS installed and an Eclipse working space where the leJOS plugin is available (see the leJOS wiki page for details). Instructions:
- Build the robot (building instructions can be found in Fabian Deitelhoff's Blog (x)
- Checkout the code and import it into the Eclipse Workspace.
- Use the EV3control GUI tool that comes with the leJOS eclipse plugin to connect to the brick and move the head (Motor 3) all the way down.
- Right-Click on the wav-files in the sound folder and upload them via leJOS EV3 -> Upload.
- Run the program (Run as -> LeJOS . )
(x) I am not responsible for the content of this external link
You can wake the puppy by pressing the touch sensor on the back. When the puppy is awake, you can present the different colors from the bone (green color is not implemented yet) and the puppy reacts differenlty. After 10s idle time, the puppy sits down and starts to sleep.
Note: The most difficult part is the stand up procedure. Since I've build the robot using the rechargeable battery pack, its head is very heavy and so the puppy easily falls on his face. You might need to tweak the standUp() method when you are using batteries (see Legs class).

In the previous post, I analyzed the existing code of the demo project Puppy. The initial code is not easy to read, and has not used any parallel mechanism to run the code. When the program is running, the performance of the robot is not stable, that means, it could not respond to player well. In this post, I will rewrite the program and enhance the functionality of the pet puppy. At this moment, I will only change the program, and keep all the mechanical structure as it is.
Let’s first look at the final effect of the puppy.
Initialization
The initialization part is similar to the old version. It sets a sitting gesture as the initial status. If Up or Down brick button is pressed, the program will adjust the angle of head. When Center brick button is pressed, the program will make the puppy stand up and bark. It will then sets Timer 3 to zero and sets variable waking_up to True. Done for the initialization!

Sleeping and Waking Up
After initialization stage, one code line will enter into a loop in which the program will wait till Timer 3 exceeds 20 seconds, then it will make puppy sit down and call “Sleep_mode” block to make the dog snoring.
The “Sleep_mode” block is designed to check touch sensor status continuously. If the touch sensor is pressed, it will set “Waking_up” variable to True, so that the sleeping loop is interrupted and the puppy will wake up.

Identify Color
Identify color block simulates the feeding of puppy. It should happen when puppy is awake and “feed_time” value

Nodding Head and Walking
In these two code lines, the program adds more features for the pet puppy. When Up brick button is pressed, the puppy will nod head three times. When Right brick button is pressed, it will run three steps by switching rear leg positions. To make things more reasonable, those actions should be done when “waking_up” variable is True.
Since the code lines could run parallel, the puppy could do several actions at one time.

Other Actions
In my program, I add Passing Urine behavior, and Sit Down and Stand Up behavior. You could add other actions you’d like.

Code Overview
So how to combine the above code segments together to form a complete program? The following is an overview of the code map. Through using parallel running method, different functions are separated clearly but can be run simultaneously.
Please pay attention that parallel running does not mean that each code line has to be completely independent. For example, after each action (e.g. identify color, nodding head, walking step, etc.), the program will reset Timer 3 to zero. The resetting will influence the code segment of “Sleeping and Waking up”, so the counting of Timer 3 will restart and delay the entry of sleeping mode. A more precise way to describe the relationship between different code lines is interdependent.

That is all for this post. In the final post of this series, I will introduce those block definitions used by this program. Stay tuned for our further update!
Today I will analyze another demo project included in LEGO MindStorms software – the Puppy. The model is complex, including 134 steps in total. I will analyze its mechanical structure briefly, and then turn to its code analysis. At the end of the post, I will put forward some areas to improve, in terms of code segment. I will redesign the code to realize the effect mentioned in the below video in the next post, so keep patient and let’s start!
Mechanical Structure
The mechanical structure of the model is not difficult to understand. One highlight is that it looks really like a puppy by using the smart hub as the head and having two ears, designing four legs, and the rear legs being able to sit down and stand up.

The other highlight is the use of worm wear to change rotation direction and increase output torque. The model is heavy, especially the head which is made of the smart hub. As we know, the advantages of worm gear is that it increases the torque dramatically. Therefore, it is suitable to be used in such a scenario.
Pay attention to the assembly structure of the worm gear and see how it uses various connectors to assembly the worms and gears together. Such a structure could be used in many other scenarios.

Program
Main Code Line
The main code line is shown below. It looks simple because many functions are wrapped in blocks. However, the name of those blocks are not straightforward at all, so even you look inside those blocks carefully, it is not easy to understand their meaning. Here I will give a brief introduction of the code.

The above code section initializes the big motor and medium motor by setting their rotation sensor value to zero in block “DN”. This is to ensure that the puppy sits up as the default gesture. In block “MNRH”, it waits for the player to press down the center button on the brick to start off the program. After that, it displays an image of Sleeping Eyes on the screen in block “IS” and makes the puppy stand up in block “UP”. Finally, it resets all the relevant variables in block “RST”.
Main Code Line (Continue)
Continue the above main code line. After the above initialization, the program will enter into a forever loop, in which the puppy will have different behaviors. The same as above, it wraps the behavior in different blocks and the block names are nothing short of vague. the functions of each block are listed below as a reference for you.
The execution of block is determined by the value of variable “DB_S”. The value of “DB_S” is not increased or decreased continuously but will be changed in the behavior blocks. Therefore, one behavior of puppy will influence the subsequent behavior. In another word, those behavior blocks are not totally independent, making the analysis especially difficult.

In the following section, I will explore the interior of several blocks. I will not explain in detail since I don’t think many of them good examples for learning. In the next post, I will redefine the whole program and rewrite many blocks.
DN Block
This block first uses MoveTank block to rotate two big motors by 1 second, and then resets the rotation sensors of the two big motors to zero. Its purpose is to make the puppy keep a sitting gesture as the initial status.

MNRH Block
This block displays EV3 icon on the screen and lights up the brick button. After that, it waits for players to press Up or Down brick buttons to adjust the angle of puppy head. When center brick button is pressed, it resets the rotation sensor of medium motor and then lights up the brick button in green, indicating that the program is ready for next action.

IS Block
This block is a display block. It depends on a numeric input parameter to display various images on screen.

UP Block
This block is supposed to make the rear legs of the puppy stand up. It does not use Move Tank block since in practice, this method could not make the legs stand up successfully each time. The reason might be that the body is too heavy, so sometimes the torque exceeds the load of the motor. To overcome this problem, this block simulates the Move Tank block by using parallel code. Each motor calls Big Motor block to run a small degree of 25 and then switches to use Unregulated Motor block to run another 35 degrees.
The Unregulated Motor block does not include automatic motor control, like the normal Medium Motor block and the Large Motor block. This means that no automatic regulation on motor power will be included. The specified Power Input is what is used to control the motor. Power Control will compensate for any resistance or slippage that the motor encounters. Power control will also try to compensate for battery levels, when possible. Because of the features of Unregulated Motor blocks, the puppy could stand up stably each time.

Areas to Improve

The above points summarize some areas where the program could improve. There are other good points, but I will address those issues first in the next post. Before this post finishes, let me show you what the puppy could do after I update its program. Take a look at the below video and don’t forget to enjoy the coding and have fun!
Читайте также: