
Lego off road chassis
Обновлено: 22.04.2024
Our next 2021 LEGO® Technic review comes from Omid (@nwbricks) who takes 42124 Off-Road Buggy for a spin. Buying this set when it is released on 1 January 2021? Consider using our affiliate links: USA LEGO Shop at Home|UK LEGO Shop at Home. New Elementary may get a commission. The products in this article were provided for free by LEGO; the author's opinions are not biased by this.
Hot on the wheels of 2019’s 42099 4x4 X-Treme Off Roader comes the equally extreme (but slightly less off-road) LEGO® Technic 42124 Off-Road Buggy. It contains 374 pieces, will set you back US$129.99/ £119.99, and you’ll need a smartphone and 6 AA batteries to run the Control+ hub.
There’s a lot to digest here including plenty of new and unusual parts, Control+ elements and the accompanying app – so let’s get stuck in!
New parts and colours
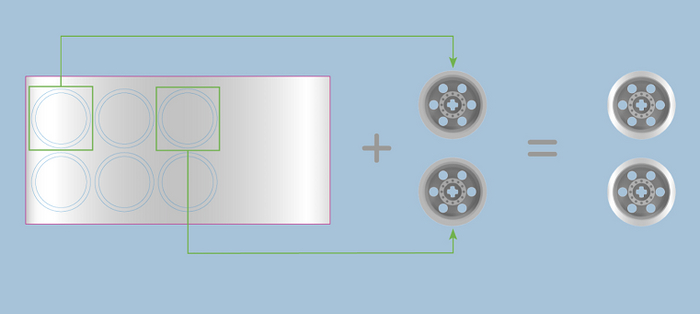
The hubs are recolours of Wheel 43.2mm D. x 26mm Technic Racing Small, 6 Pin Holes (56908) available for the first time in White (6331047) – but right off the bat, the first thing that screams BUY ME are those fantastic chunky, knobbly tyres, which are fresh off the production line.
I suppose this will be called something like Tyre 71.6 x 26 Technic, Knobbly (69909 | 6321710). I like it. Let’s be honest, nothing will ever quite compare to the iconic Power Puller tyres, but this stacks up nicely against the current offering of Technic rubber. “About time” was my first reaction; to be honest it’s hard to imagine this model working with anything else.

We’re also treated to a tasty new flavour of beam: Technic Liftarm 1 x 15 with alternating pin holes (71710 | 6321716). This one feels like a bit of a game-changer; ever since I was a kid I recall coming up against the problems this element solves. Serious Technic nerds will no doubt be getting excited right about now.

Not strictly new to this set but seen in only two other 2020 sets so far is the spanking new compact Technic Gear Differential Housing in Medium Stone Grey/ Light Bluish Gray (65414 | 6285647) and accompanying driving gear, Technic Gear 28 Tooth Double Bevel with Pin Hole in Bright Red/ Red (65413 | 6285646). As someone whose entire armchair understanding of mechanics was gleaned from asking far too many annoying questions as a kid, this gear housing is a really neat evolution of a fundamental element.

Again, I’m sure there are some hardcore Technic builders absolutely losing their heads over this. I didn’t quite lose mine so much as spent a good two minutes scratching it, before realising you’re meant to put 5 of the small tan bevel gears in, not 4. Bonkers! But really, really cool.

It’s always interesting to see different takes on the same problem — there’s even a couple of other variants too from over the years. Explaining how a differential works is slightly beyond the scope of a LEGO review, so I’ll defer to this great Chevrolet film from 1937 that breaks the concept down nicely.

Next up is a new panel mould, Technic 3 x 7 x 1 in Dark Azure (71709 | 6331049). Alexandre Campos introduced us to this part in his recent review of the 42122 Jeep Wrangler, where it appears in both yellow and black. It’s a welcome addition to the lineup of Technic panels and I’m sure we’ll be getting a plethora of recolours in future.

Building the 42124 Off-Road Buggy
The build process for this model is pretty straightforward, with under 400 parts across 5 assorted bags. The subtle differences between the packaging of System and Technic sets always intrigue me; it’s becoming more and more common for even the smallest System builds to have numbered bags (even those swept up in the new 18+ branding) whereas Technic seems to have a higher “no numbers” limit; even this set which is marketed as only 10+.

The new Control+ elements are where most of your money goes, and while I secretly miss the old line of studded 9V motors there’s no denying these are pretty nifty. Their ability to report position and speed back to the controller is awesome.

The build starts at the front of the vehicle with one of the motors utilised for the steering. The entire front assembly feels really compact and sturdy, and no matter how old I get I’ll never stop loving LEGO shock absorbers.

The hub slots into the chassis nicely and when filled with batteries gives the whole model a low centre of gravity. Thankfully the battery compartment is easily accessed from the underside.

The new differential housing can be seen in place here; a marked difference from the older, simpler versions that felt almost ubiquitous on big Technic vehicles from the last 40 years.

Bolting the rear assembly onto the chassis really brings the model to life, and I’m happy to report I got the same “can I put the wheels on yet?!” feeling that all good sets evoke.

And it’s fair to say the completed model certainly looks the part! Classic RC styling shines through, and the addition of the fake antenna is a really nice touch. I deliberately avoided adding the stickers.

Roadtesting
There’s an argument that lots of the bigger Technic models are really more display pieces than anything; certainly I had the 42009 Mobile Crane and 42043 Mercedes-Benz Arocs 3245 on display for the best part of 4 years. The same can’t really be said for these remote control offerings however, with relatively low piece counts and a huge focus on playability thanks to the Control+ app.

Now back in my day, when phones had buttons and teachers confiscated things, you could write a text message in your pocket and no-one would be any the wiser. Try doing that today with an iPhone and you’ll end up ordering a takeaway or ringing the police. Even when you’re typing a message, you have to be looking at the screen constantly to see what you’re doing.
Which is a roundabout way of saying it’s more than a little frustrating using the Control+ app. I first encountered it a year or so ago with the 42099 4x4 X-Treme Off-Roader, and unsurprisingly it’s not been improved, mainly because it can’t. This is nothing to do with the app itself, which works fine – it looks cool, calibrates quickly, and generally does what it says on the tin.
 |
| ©2020 The LEGO Group |
But you can’t use it without looking at the screen, because your thumb will slide off the tiny control wheel. And if you can only look at the screen, you can’t see where you’re driving the vehicle. And my phone kept thinking I was swiping in from the edge and pulled in the notification drawer. Thin glass rectangles do not good controllers make.

There is definitely a place in the LEGO universe for RC models and this has been proved time and again. There’s a whole host of excellent offerings: take 1998’s fantastic 5600 Radio Control Racer, or the early 2000s lineup that gave us the legendary buggy motor, or the more recent 9398 4x4 Crawler.
But all of those had controllers. With a tiny, virtual pad it is impossible to quickly snap the steering from full-lock to full-lock in the same way as “proper” sticks — and you are forced to hold the phone in an irritatingly specific way. The problem is even worse on larger devices like the iPhone Pro Max or Galaxy Note. If you really want to get the most out of this set I’d highly recommend using a third party app to get a gamepad to talk to the hub, such as Brick Controller. It takes a few minutes to set up the profile but it’s well worth it to use a PS4 controller!
Conclusion
These days most of my building time is spent working on my LEGO town, but until fairly recently Technic was pretty much all I built. I got a good start as a kid, with the 8479 Barcode Multi-Set from 1997 being one of my all time favourites, followed closely by classics like the 8459 Front End Loader and 8286 3-in-1 Car (thanks for the metal hook, Mum!).
All of that is to say: Technic has a special place in my heart and I firmly believe there’s no better way to teach kids about engineering principles, motors, gearing, forces, physics and any number of other problem-solving challenges than getting them playing with LEGO. Technic only serves to hone those skills. So there’s perhaps a debate to be had here that abstracting everything away behind a fancy bluetooth hub is depriving kids of a more fundamental understanding of electronics and mechanics, one that can only come from tactile play.

That being said, I do really like this set: it looks great and the new tyres and other parts are fantastic. On a technical level, the app works fine and perhaps for smaller fingers the virtual controller would be adequate.Sure, it’s possible to get a Bluetooth gamepad working to control the set, which instantly makes the experience a lot more entertaining - but we shouldn’t have to jury rig a controller via a phone and a third party app to do that. I dug that old RC chassis out with the intention of taking a couple of comparison shots — then ended up spending a good fifteen minutes driving the 22-year-old set around my living room. It’s just way easier, faster and more FUN with physical joysticks — a dedicated Control+ pad would make an already fun set immeasurably better.
On 1 January 2021, 42124 Off-Road Buggy is released priced US$129.99/ £119.99. Consider using our affiliate links: USA LEGO Shop at Home|UK LEGO Shop at Home. New Elementary may get a commission.
Help New Elementary keep publishing articles like this. Become a Patron!
Massive thanks go to our 'Vibrant Coral' patrons: Jorgito Mozo, Mevits Bricks, Font Review Journal, Baixo LMmodels, Andy Price, Anthony Wright, Chris Cook, London AFOLs, Gerald Lasser, Big B Bricks, Dave Schefcik, David and Breda Fennell, Huw Millington, Neil Crosby, Antonio Serra, Beyond the Brick, Sue Ann Barber & Trevor Clark, and Kevin Gascoigne. Vale Iain Adams, a great supporter of New Elementary.
It has long been a dream of mine to build a remote controlled LEGO car. LEGO has many Technic cars in their program that use the Power Functions to remote control certain functions, such as opening doors or lifting an arm. Power Functions use infrared light for communication between the sender and the receiver. In the past, LEGO also had remote controlled cars that use radio frequencies, which is much better, since it does not require a line of sight and has a much further reach.
Recently, LEGO released the 4×4 Crawler and it really triggered something inside of me. I ordered the set, but when it arrived I never put it together. I started to build my own cars right away. I looked for inspiration on the internet and found many great off road cars, trial trucks and multi purpose car technology. In particular the work Pawel “Sariel” Kmiec. Check out his book “The Unofficial LEGO Technic Builder’s Guide” or visit his website. LPE Power also has some wonderful instructions on how to build real car technology with LEGO.
Conceptual Ideas
Speed, torque, weight, balance, clearance and grip are the key factors when designing an off road car. Your choice of motors, gears, wheels, and chassis all influence these factors. Four wheel drive is a must for off road cars. Differentials are a big no-no due to the slip. A wheel detached from the ground would spin freely, while the wheel still on the ground will receive not torque at all. I also do not believe that a suspension system is necessary for a LEGO off road vehicle. There are no passengers that require comfort and the big tires already absorb enough energy.
Motors and gears
LEGO has many motors in their program. The most recent Power Function Motors come in three sizes that vary in terms of rotation speed and torque. The higher the speed the lower the torque. You can find out about the exact characteristics in this web page. For the steering you might also consider using the new servo motor.
You can change the speed/torque ration through the usage of gears. Sariel is offering an excellent tutorial on gears. More importantly, you can build gear boxes to shift gears. This enables you to have a lot of torque when you go uphill and more speed when you go down the hill. Again, Sariel is offering instructions for a heavy duty gear shift. I tried other compact gear boxes, such as smooth three gear box, but they all failed under a lot of torque. Here is my extension of the slfroden’s original design. I used a linear actuator to switch the gears remotely and you can now use two motors on it. I left out the neutral gear to make it more compact. It is a nice design, but not suitable for off road vehicles:
Next, I expanded Sariel’s original design since I did not want to move the motors around. Moreover, I wanted to attach two motors directly onto the gear box without the need of extra gears. You can use a linear actuator attached to another motor to shift the gears through a remote control. Here is a video of the gear box:
First Model
So here is my super ambitious first model. It has two XL motors, a gear box that can be operated remotely, four wheel drive, lots of clearance. The battery pack is all the way in front, making it a good climber. I used the servo motor to steer the front wheels and the 8879 to remote control the servo.
This was an complex design and in the end pretty useless. The steering was difficult to control. Most of all, it was slow. Turning the wheels from left to right took forever. Hitting the red stop button to bring the wheels back into the neutral position was often the fastest way. The gear shift also turned out to be problematic. Sometimes the gear was in a “in-between” state. The only solution would have been to glue the tooth wheels onto the axis to prevent them from changing their position on the axis.
Due to the lack of a suspension system, wheels did also occasionally lift from the ground, which resulted in a lack of grid. In conclusion, this is a far too complex design. There are numerous places where problems can occur. Back to the drawing board!
All wheel drive
I radically changed my approach. Instead of building a steering system and a propulsion system separately, I took the “all wheel drive” approach. It works similar to a continuous track, often found in tanks. Electrical cars also use the idea. In essence, you attach each wheel to a dedicated motor. My first design, however, ended being extremely wide:

First all drive vehicle
In the next design iteration I placed the motors along the main axis of the car. This was a much better climber since I could also place the battery pack right on top of the front axis:
The main drawback with this design was the small clearance. The car could not drive over obstacles easily. So, in the third design, I put the motors up and used the angled bars to bring up the chassis. This was an even better climber but the M motors are very difficult to mount.

Third car design
In the fourth iteration I used the L motors which gave me nice and compact car. It could easily get up slopes and drive over obstacles:

Fourth car design
But why stop at 4WD when you can go 6WD? My 6×6 ATV vehicle used six motors. Worked perfectly fine, but was slower than the 4WD. The battery can simply not provide enough juice to run more than four motors simultaneously.

Six wheel drive
This six wheeler got pretty heavy and complex again, so I thought it was time for some minimalism. I tried to build a slightly geared down vehicle. The building instructions for this ultra light car are available and you may consider using the L motors instead to get more power. You could then use bigger wheels which does enable the car to drive upside down.
Super light weight 4WD off roader Ultra Light LEGO Car
Here is a video of the car driving around:
This was a lightweight and working model, but due to lack of suspension, wheels could still be lifted from the ground. It is desirable to have as many wheels on the ground as possible. Individually suspended wheels, such as in the super car, have a tendency to be fragile and pendular suspension systems are a better option. The 4×4 Crawler uses such a system. The same effect can be achieved by using a joint in the middle of the car that allows it to twist along is main axis.
Final Design
My final design iteration included a joint in the middle of the car that allowed it too twist. You can download the instructions as LXF file for LDD. Check out the model at Rebrickable.

Wheel lifting
This design still did not have a good clearance, so I lifted the axis a little bit and got to my final design “RACE“:

Ultra Powerful 4WD Off Road Vehicle “RACE”
Each wheel is powered by one L motor. This design eliminates any loss of power due to tooth wheels. It is fast and at the same time it has enough torque to go up steep hills. The short wheel distance and the large wheels gives it the ability to climb over objects. Here is the car, named “RACE”, from the bottom view.

Final car “RACE”, bottom view
Here is a video of RACE in slow motion:
UPDATE:
I build a more robust and simpler version called RACE2 (how surprising). I added a roll over cage, bumpers in the front and the motors are now better attached to the chassis. Building instructions and more photos are available.
Tracks
After completing this RACE car, I had one week left to try out continuous tracks. The first thing I noticed was that the LEGO tracks are extremely smooth and have very little grip. They could hardly get up and obstacle or hill. My first attempt at improving the tank was to rise its front wheels:

Tank with raised front wheels
This design was still a failure, since the front had now a high level of attack, but still no grip at all. In an act of desperation I decided to “spike” my tracks by adding 3/4 Pins into it. With this small change, the tracks could bite into every little crack or edge. Finally it could get up anywhere, although I am pretty certain to ruin all the pins in the process. The building instructions are available for LDD.
Spiked tracks “Mr. Plow” Mr Plow (in this image with m motors)
Notice the two L motors and the low position of the battery pack. Only very few pieces were necessary to build this model. I used the Steering Portal Axle to give the vehicle a better clearance. Here is a video of Mr Plow in action:
Results
I spend two months building the fast RACE All Wheel Drive Off Roader and one week to build Mr. Plow. Guess which one won the Off Road Challenge today? MR PLOW! RACE shared the second price with another vehicle. It all came down to a 3 centimeters that another vehicle was able to climb higher on the Muddy Hill Trial. Here is the video of the event:
16 thoughts on “Building an off road car with LEGO Technic”
I started basically at your first model and simply made it good enough to work. I also tried the Servo motor, but it does not have enough torque. I used suspension from Nico71’s Trial Crawler and Sariel’s two speed gearbox exactly as he designed it, the gears do not need glue to stay in place. The 88000 battery box is light enough to simply clip on the side.
Thanks for the great post! I have tried building the Race 2 and the wheels are spinning in opposite direction. Could you give some insights as to why is this happening?
On your IR remote there are two dip switches. Use them to set the direction.
I was curious if you are only using once receiver on your final “race” design? I am getting parts in the mail and on;y have one remote so wondered if you can stack two motors on one side of the IR then two on the other..making 2 motors move together with one control switch?
Yes, it is possible to put two motors onto one output of the IR receiver.
Hello, I just bought power functions pieces, but I still missing construction parts especially to build steering and (possibly) suspencions. Where are you taking these special pieces? Could you please recoment a shop? or a lego set which is a good start for small simple remote controlled car? … Thanks. W
Bricklink might do the job.
I Only have 2 L motors and 2 M motors, the M motors doesn’t fit. dode anyone has a solution?
Hello, could anybody help me to find the “joint” part placed to the middle of RACE(2) car? I do not know how to find it on blicklink or another place. Because I do not know the proper name. Any help is appreciated. Thanks. W
Answer my own previous question about “middle joint” part.
At the end of lego instructions is list of parts… where is “TURNTABLE 4.85 – Black,Medium Stone Grey”
I just build RACE2 and that is a BEAST, great!
But I have a little problem to controll it. Are you using some “custom” controler to control 4WD machines? Could you please gave us a build instruction? or link? Thanks a lot!
My son and I want to sincerely thank you for building such amazing models and making these plans available at no cost. We want to try to build all of them or at least as many as we can. So far the Race2 has been a huge success but now we’re getting in all the various different PowerFunctions motors along with more technic parts. As we become more knowledgeable about what we’re doing we would like to bring this into our local Cub Scout Pack – which I happen to be the Cub Scout Master too. Just curious by do have anything to do with Augmented Reality in your work? If so we ought to talk some time. I work for Cisco Systems (Information Security – Education and Awareness) and I have dabbled in the AR and Augmented Learning space. Plus I own a small start-up that’s involved in software that I’m gearing towards the AR space.
These creations are amazing, thanks! I also tried making a off-road car with buggy motors and a M motor for steering, and it worked out well.
Часто в комментариях у меня спрашивали как собрать модель, с чего начать.
А начать стоит с основы, с шасси. Сделано оно для новичков у которых мало деталей и опыта.
Инструкции можно скачать по ссылкам:
Изначально это шасси сделано для соревнований Rig&Roll competiton в котором я участвовал на грузовиках о которых у меня есть посты:
Видео с пояснением к инструкциям и моделью на основе шасси из этой инструкции:
От использования серво мотора пришлось отказаться из-за его редкости, да и если у вас есть серво мотор, значит собрать свою машинку из лего для вас не должно составить труда, тут же всё для новичков ограниченных в деталях.


Если у вас есть вопросы, с радостью отвечу на них в комментариях!
Спасибо за просмотр!

1.9K поста 6.2K подписчика
Правила сообщества
- Уважайте друг друга.
- Не присваивайте чужие работы.
- Тематика группы: LEGO. Аналоги допускаются.
- Не спамить, не флудить, не вбрасывать.
- Если правила сайта не понятны, я пропишу отдельно в правилах сообщества: НИКАКОЙ РЕКЛАМЫ. Вообще. Реселлеров, магазинов, частных лиц и прочего.
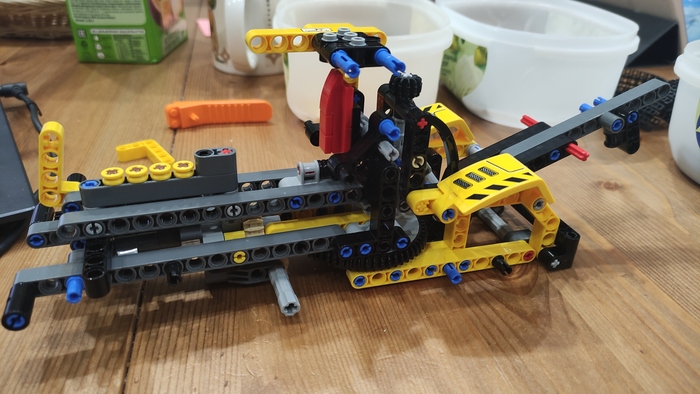
Я ведь правильно понимаю, что тут нет автоматического возврата колес в изначальное положение, после поворота?
Собирал как-то подобное, но с добавлением резинок, чтоб колеса сами возвращались в изначальное положение. Было бы интересно посмотреть подобные варианты решения, наверняка их существует не мало.
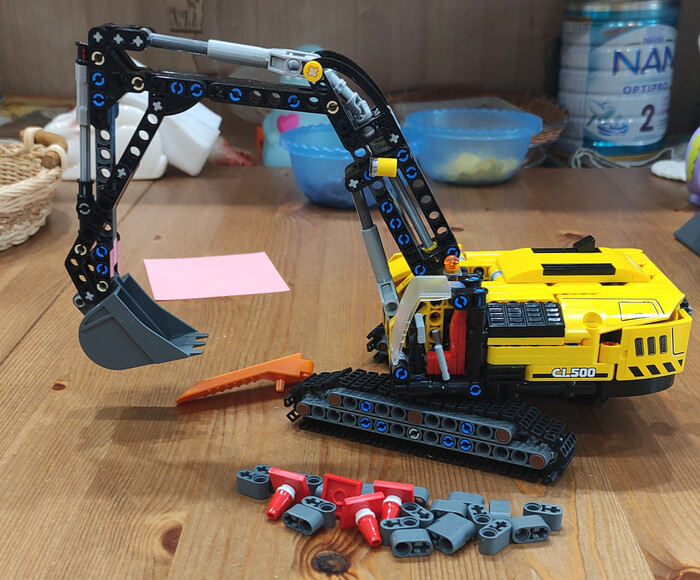
Тяжелый экскаватор Lego 42121 модель Б
Тяжелые времена настали для поклонников лего в России. Поэтому сегодня мой пост будет посвящен не новинке, а альтернативной модели на которую я уже делал обзор. Ссылка на обзор ниже.
Что в итоге должно получится.

Разбираем на запчасти. В ход пойдут даже детали балок на 2, которые внизу кадра.
Так как это альтернативная модель, то этапов сборки не будет. Привожу несколько фотографий процесса.
Вот что в итоге получилось. Экскаватор теперь больше похож на трактор на четырех гусеницах. Задняя часть может поворачиваться. Есть подобие мотора. Из конусов осталось только два, маленькие балки на 2 были задействованы в модели.

Деталей после сборки осталось не много.
Что имеем в итоге. Модель не дурна и задействует почти все детали из основного набора. Появился макет двигателя. Но при этом в конструкции ощущается, что модель сделана по остаточному принципу. Некоторые детали крепятся свободно и могут легко перемещаться, от сиденья в кабине осталась лиши спинка. Участь данной сборки уже предрешена - ребёнок поиграет несколько дней и соберу назад.
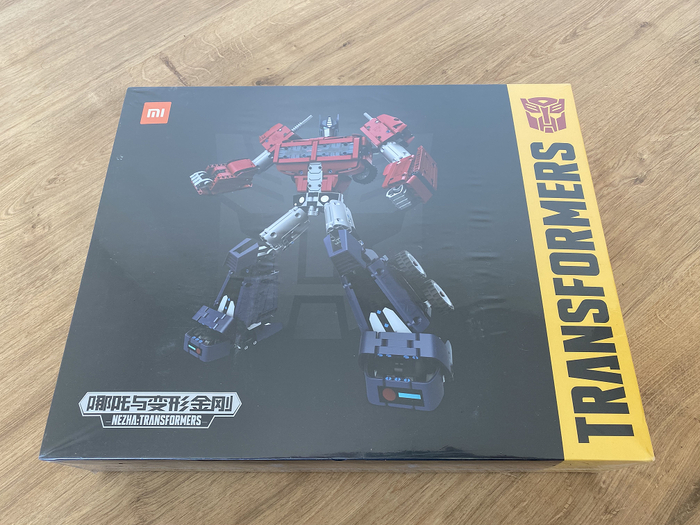
Xiaomi Mitu Transformers Optimus Prime QTZ011QI
В начале года появилась неожиданная новость, что Lego в коллаборации в Hasbro (по факту конкурентом) выпустит сборную модель Оптимуса Прайма в серии Creator Expert. Я начал гуглить хоть какие-нить изображения будущего набора, и обнаружил что уже существуют лицензионные lego-like трансформеры от Xiaomi. Правда официально лицензия распространяется только на рынок Китая и, как и другие наборы от Xiaomi, эти конструкторы выполнены в формате Technic. Причем по мимо собственно самого Оптимуса Прайма в это серии есть еще четыре трансформера – Бамблби, Мегатрон, Старскрим и Гримлок.
В прочем, в наших магазинах в наличии был только Оптимус Прайм, а так как новые официальные наборы Lego мы в России похоже увидим еще не скоро я решил посмотреть на модель от Xiaomi.
Коробка достаточно большая, сравнима с топовым наборами Lego, при этом никакого нездорового гигантизма присущего китайским наборам. Все свободное пространство забито деталями. Количество деталей – 1280 шт. Для сравнения – это уровень Lego Technic 42126 Ford F-150 Raptor, в котором всего на 100 деталей больше. При этом внутренняя компоновка больше походит на эксклюзивные наборы вроде Lego Technic 42115 Lamborghini Sian FKP 37. Плюс уже после сборки набора, я обнаружил, что внутренние отсеки коробки трансформируются (ха!) – их можно дополнительно разделить пополам для более удобной сортировки уже распакованных деталей. Определенно, в плане упаковки Lego есть чему учиться у Xiaomi.
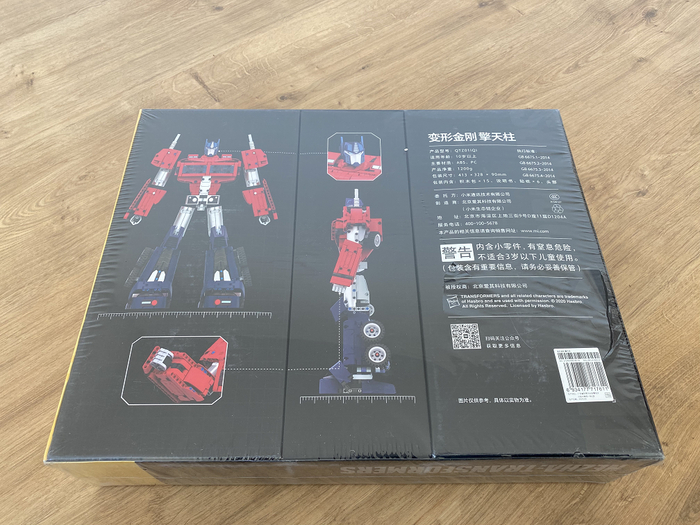

Два больших лотка с помощью лепестков в стенке разделятся на два лотка по меньше.
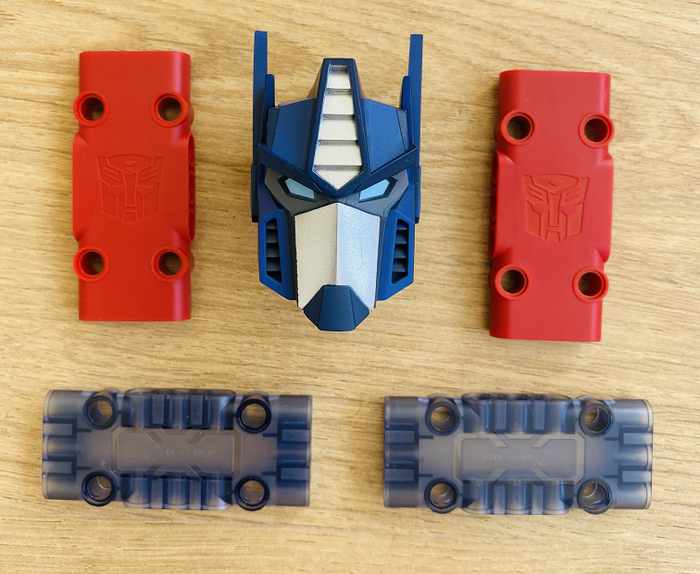
В основном это обычные техник-детали. Качество самих деталей нареканий не вызывает, разве что некоторые коннекторы слишком тугие. Светлое серые и черные детали совпадают со цветами Lego, а вот красный не такой как в Lego, он ближе к томатному (в прочем у Lego такой цвет иногда встречается в виде различных коннекторов, но по факту это считается браком колеровки, так как официально это тот же красный цвет), а темно синий, насколько я знаю, и вовсе отсутствует в палитре Lego.
Слева деталь Lego, справа - Xiaomi. Это не разница в освещении, они действительно отличаются по цвету.
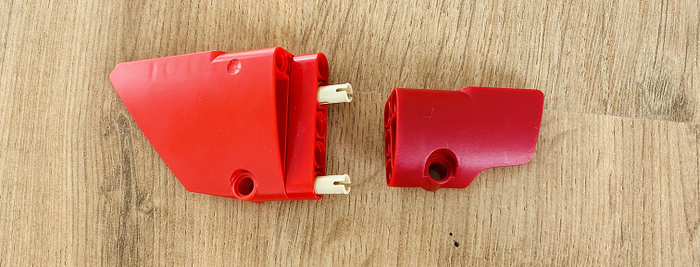
Есть несколько деталей, которые у Lego я ни разу не встречал, не уверен, что они вообще в Lego существуют. Шарниры, как вилки, так и розетки, сделаны из какого-то другого пластика, не из такого как остальные детали, и не такого из которого делает Lego. Он как будто прорезинен. Шарниры достаточно тугие, для вставки требуется усилие, сколько они продержатся – покажет время.
Также в наборе есть проприетарные детали. В первую очередь это конечно голова Оптимуса Прайма – это цельная неразборная деталь, которая крепится с помощью вилки большого шарнира. Есть пара панелей 3x7 цвета trans-blue (в Lego прозрачные панели на данный момент вообще не существуют, а жаль), а также пара обычных панелей 3x7 с выштамповкой (!) знака Автоботов. Честно говоря, я не ожидал, что Xiaomi настолько заморочатся, Lego бы просто сделали наклейки.
Кстати, о наклейках. В наборе они есть. В первую очередь это наклейки на серые детали, которые превращают их в серебристые (ну или в металлические). Клеить наклейки – это та еще задача. У Lego если наклейка клеится на всю деталь, то обычно сама наклейка чуть меньше по размерам чем деталь. Xiaomi вырезала наклейки четко по размерам – если не приклеить наклейку точно к краю, значит с другой стороны она будет выходить за пределы детали. И это с учетом того, что большинство деталей имеют форму отличную от прямоугольной, либо имеют различные закругления или выступы на плоскости. Кому и этого будет мало – есть задача со звездочкой – наклеить круглую наклейку с толщиной в пару миллиметров на круглый обод колеса той же толщины. Так же, уже после окончания сборки, часть наклеек предлагается наклеить сразу на несколько деталей, а часть наклеек вообще не встречается в инструкции. К цвету наклеек никаких претензий нет (камень в огород Lego, которые уже много лет не могут разобраться как печатать наклейки того же цвета, что и детали).
Кто там жаловался, что Lego делает круглые наклейки на круглые детали?
Несмотря на то, что детали расфасованы по примерно двадцати пакетам ни о каких этапах сборки речи не идет. Все пакеты нужно вскрывать сразу. Поэтому перед сборкой лучше заранее все рассортировать. Благо разные пакеты содержат разные детали, и даже парные (левая и правая) панели разложены по отдельным пакетам.
Бумажной инструкции в наборе нет, только QR-код со ссылкой на приложение, в котором можно эту инструкцию скачать.
Пару лет назад у меня уже был опыт сборки конструкторов от Xiaomi, и вот тогда для получения инструкции нужно было пройти целый квест. В тот момент у Xiaomi было два приложения – международное, в котором были инструкции на наборы, которые официально продавались в России, и китайское – в котором были инструкции на все наборы. Естественно, в нашем регионе скачать можно было только международное, в котором нужной мне инструкции не было. А китайское приложение надо было ставить на Android в виде скаченного со стороннего сайта apk. Если у вас было только устройство с iOS, то вы оставались без инструкции.
Поэтому я уже морально подготовился снова походить этот квест, но оказалось, что новое приложение доступно в российском App Store. Оно хоть и на китайском, но за счет картинок никаких проблем в использовании нет.
В прочем другой недостаток инструкций Xiaomi никуда не делся. Каждый шаг сборки занимает равно одну деталь, в редких случаях две. Поэтому количество шагов примерно равно количеству деталей. В данной инструкции их 1233. Естественно, каждый шаг занимает одну страницу, после чего ее нужно перелистнуть. Все это сильно замедляет сборку, по сравнению с наборами от Lego. Так что, если вы уже собирали Lego со схожим количеством деталей – можете смело умножать затраченное время на два. Зато все в 3D, и если вдруг что-то не понятно, то можно посмотреть с разных сторон. Опять же, в отдельных случаях есть дополнительные пояснения по правильному порядку сборки.

Позади примерно 5-6 часов сборки.
При самой сборке каких-то сложностей не возникло, разве что уже упомянутый момент с наклейками.
Собранная модель имеет подвижность во всех нужных местах – голова, плечи, локти, запястья, пояс, колени и голеностоп. За счет резиновых вставок на ступнях модель не скользит. Поэтому с устойчивостью никаких проблем нет. Но это все-таки больше полочная модель, чем игрушка.
Хоть это и трансформер – он ни во что не трансформируется. Для того, чтобы получился тягач – робота нужно разобрать и собрать грузовик уже по другой инструкции, которая так же есть в приложении.
Для оценки размера поставил рядом минифигурку.
Даже с учетом всех вышеописанных недостатков модель мне понравилась, думаю при возможности куплю и другие наборы из этой серии. Ну и будет интересно сравнить с моделью от Lego, там вроде как обещают возможность трансформации без пересборки.
World's No. 1 source for LEGO news, reviews, and fan creations.
Here is a simple truth: these days LEGO remains one of those few common activities that give you a rest from a smartphone. For me and for many of our readers, building with LEGO has always been a pastime that requires no downloads, installing or updates; you open a box and the play begins. Obviously, winning over modern-day kids who love digital entertainment and touchscreens is a tough challenge for a toy manufacturer. They say if you can’t beat them, join them, but LEGO thinks differently: if you can’t beat them, build them into the play experience. Along comes LEGO Technic Powered Up — the first generation of LEGO Technic electric elements that bring smartphones and tablets into play. With a whole lot of sensors and features, the new smart hub and motors are among the most advanced LEGO pieces ever produced. LEGO Technic 42099 4×4 X-treme Off-Roader introduces the new play system. The set includes just 958 pieces, but the new expensive electric elements are to blame for the price tag of US $249.99 | CAN $299.99 | UK £199.99. It is available starting today, so we are building and testing the model in an attempt to discover the limits of the new Powered Up system and Control+ smart app.
Packaging, stickers, and building instructions
Since the off-roader rides on four huge 107x44R tires, the box is quite massive. All the 958 pieces are distributed among just 6 plastic bags, but the electric elements come in a dedicated box the size of a small LEGO set.
A large sticker sheet immediately strikes the eye. Just like the last year’s 42077 Rally Car set, the X-treme off-roader is a “victim” of stickers: more than 30 decals stick all over the vehicle’s body. Although the bright-yellowish-orange design looks fresh and cool, I won’t stop criticizing long and narrow stickers that are designed for 1×11 liftarms.

The abundance of stickers results in “building” steps that involve no new pieces. Bright and screaming design coupled with the toy’s functionality gives a hint about the products target audience; probably, kids and teenagers are much more easy-going about countless stickers than adult collectors.
The surprisingly thin building guide is only 220 pages long, which feels like a quick read after the recent Technic 42098 Car transporter’s 550-page-long monstrosity. Since the set includes no overcomplicated structures and consists of the most common LEGO Technic parts, assembling takes 4 hours, tops.
Another mildly interesting thing about the set is the color asymmetry of the core structures. Having the same pieces of different colors helps a lot when you struggle with the model positioning. This will definitely help younger builders complete the set without any mistakes.
New LEGO Powered Up electric elements
For over the last decade LEGO Power Functions remained the prime electric system across multiple LEGO themes. This year, the system is being replaced with the brand new LEGO Powered Up electric elements. From dedicated presentations held by the developers, we have learned that, unlike the older motors, with the new smart hubs and more advanced connectors the new motors will also function as sensors. Bidirectional data communication will bring much more advanced models, and the new 4×4 X-treme off-roader is just a glimpse at the new possibilities. Among other innovations is Bluetooth connectivity, which we already tested while building and playing with the LEGO 76112 App-Controlled Batmobile set.
While the said Batmobile included a smaller hub and a couple of smaller motors, the new off-roader comes with a massive tech-laden smart hub and 3 motors of two types.
Compared to the Power Functions elements, the new hub is a single unit combining a battery box and a receiver. The smart hub is the heart and the brain of the new model. It features a processor, a Bluetooth module, as well as a 6-axis sensor, consisting of a 3-axis accelerometer and a 3-axis gyroscope. The new system can indicate the model’s orientation, acceleration and even detect bumps. Four motors/sensors can be connected to the ports in the upper part of the hub. The former Power Function connectors can be stacked on top of one another, which makes them suitable for custom builds of any scale and concept. Obviously, the new connectors don’t allow staking; in this sense, they work a lot like LEGO Mindstorms RJ-12 connections.
Inside the hub, there is space for 6 AA battery elements, which is a standard for a LEGO RC system. You will also note that the hub has only 12 Technic pinholes. It’s important to mention that all of those pinholes sit right above the center of gravity of this heavy hub.
The smaller of the two electric motors is used for wheel steering. The motor looks and feels very nice and robust, however, only further testing will show how durable it is. We are pretty positive that this motor can function as a servomotor (allowing for precise control of the angular position, i.e. as a steering motor) as well as a regular motor. This is possible thanks to the new smart hub.
The off-roader is driven by a couple of larger and more powerful motors. The larger motor feels quite bulky and heavy, but its proportions are close to the old Power Functions XL-motor. Unlike the older XL-motor, the new one has more pinholes on opposite sides of its body.
No doubt, both types of motors require further testing including speed and torque characteristics. While you are reading this review, we are busy putting the new system to the test, so stay tuned for dedicated analysis of the new elements!
NB: during the period of reviewing the set we discovered that the Powered Up elements that come in 42099 set are programmed in such a way that the application won’t let you connect to the model unless all the motors are plugged into the right ports. Even if one motor is missing the app will inform you that the model is out of reach. The current way of controlling the Powered Up elements via Control+ app doesn’t let you run your own models with a different set or number of motors connected to the hub.
New elements and part in new colors
As was mentioned above, the two main selling features of the set are its design and its functionality. While the latter is all about the new Powered Up control system, the model’s unique look is being achieved with the introduction of a new color. This is the first LEGO Technic set to include liftarms and panels in bright orange. There are not that many panels in the set, but surely enough to build a custom vehicle of a smaller scale.
Another unexpected element that we found in the set is the new 3×3 frame (aka “biscuit”) that we first met in LEGO Spike sets presented back in April. One of these in black can be spotted in the back of the rear end of the chassis, covering the tan gear. This relatively small piece helps to create a very compact yet sturdy structure.
Those who are fond of building custom crawlers will be happy to see hard shock absorbers in red. There are only 2 other sets where you will find the absorbers in this color, making them some pretty rare elements.
Finally, one of the biggest innovations of the set is the brand new wheel hubs with a planetary reduction gearbox (if you have no idea what this mechanism is, here’s a nice gif for you). Basically, this round piece houses a set of at least 5 gears that sit tightly inside and make a very soft rumble when you spin the knuckle.
The introduction of this piece is some very big news for all LEGO Technic builders. The important thing with planetary reduction gears is that it can significantly increase the motor’s torque. In this case, the gear ratio is 1:5, so the torque is 5 times more compared to direct transmission. The price for this is loss of speed, but an off-road crawler like this isn’t designed for cross-country racing. Of course, such a gearbox can be built with the regular LEGO Technic elements, but very often a massive turntable piece is required. The new pieces will anyone build a very compact off-road crawler with a very realistic drivetrain.
The chassis
The off-roader is being built in 3 major steps: the front axle, the rear axle, and the body. The chassis is practically being built around the motors; you can see exposed electric elements from all four sides of the structure. I must admit at this point I wasn’t impressed by the structure at all. It all feels very flimsy and unsuitable for outdoor testing.
But here’s a building solution that I find particularly interesting: the whole middle part of the chassis including the front axle is mounted on two turntables, so it can swing from side to side. The purpose of this structure is to give the off-roader an even wider suspension travel. This way the crawler must be able to cope with even larger obstacles than it would be using shock absorbers only.
The body
Assembling the body of the off-roader is a short, but a very enjoyable journey, stickers aside. The color of the new pieces is truly stunning, and I wish I could apply no stickers at all. Probably the model looks even wilder with all the numerous logos and patterns, but I’m happy it doesn’t feel overloaded with design elements.
The inside of the body looks very neat. No safety arches and no excessive structure elements. The body is a very light, yet solid structure.
Finally comes the “marriage”, the moment when the chassis and the body become a single whole. The body is fixed with just a pin in the front and two more axles on each side.
It took me a moment to figure out the whole wire management thing in the back of the car, and I’m still not quite happy with the result. Unfortunately, the building guide gives no hint about the best way to fold the wires inside the body.
Complete model
Once the wheels are on the off-roader is complete. Massive tires completely change to look and the character of the model giving it somewhat untenable proportions. But, again, kids will know better.
There are no large panels in the back of the car. On the one hand, an open structure gives easy access to the smart hub and the power button on the top, but on the other hand, I’d prefer some kind of protection for the wires in case the off-roader rolls over on its roof.
The bottom view of the chassis reveals a practically exposed motor. My own experience of using Power Functions motor in RC models tells me that placing the motor like this may lead to scratches and other damage to the motor’s body. However, the road clearance of the crawler shall keep the electric elements undamaged.
Exterior design
The appearance of the model is pretty questionable. Unlike many other LEGO Technic sets that are based on existing machines, this off-roader seems to be a copy of a gasoline RC truck, i.e. a LEGO version of another “toy” car.
However, I really like the front guard. This is a very simple and subtle part of the design, but it contributes a lot to the model’s aggressive character. Moreover, this part indeed acts as a safety element protecting the panels behind it.
The most ridiculous part of the car’s design is the widows, thanks to a chopped roofline. Tiny openings on both sides of the car look very questionable; obviously, the problem can be fixed by lifting the roof up. Right now the seats and the steering wheel inside the car look absurd for a serious off-roader rather than a hotrod.
LEGO Control+ app
Once the model is finished it’s time to download and install the Control+ app. The app is available for both iOS and Android, but we tested it on iOS only. Control+ is a pretty heavy app (more than 400 MB), so make sure you have a WiFi connection and plenty of room on your device. It’s also important to mention that at the moment, the app is the only way to control the model; no physical controller has been announced yet, so it looks like a smartphone or a tablet will be an essential part of the play experience.
The first time you start the app it will calibrate the steering motor and give you a quick tutorial on how to control the off-roader.
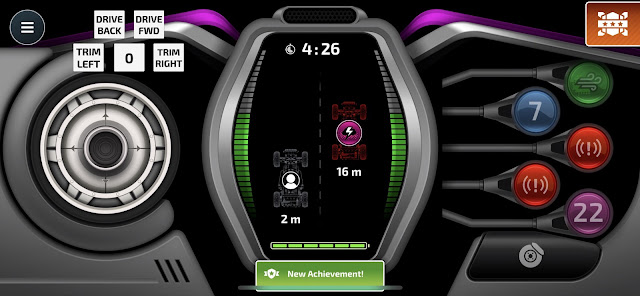
The app’s home screen is the control panel with a couple of levers, fake tachometer and a couple of tilt indicators.

I’m not sure about the purpose of the speedometer as it never shows the actual speed of the car. It indicates speed up to 33 km/h (20 mph) when the car is going full-speed on even surface, but the model’s actual speed is much, much lower. Unlike the speedometer, the tilt indicators work just perfectly. They constantly indicate the car’s position and warn you if it is tilted more than 30 degrees in any direction.

The biggest surprise of the set is the one-touch control. This is an alternative way to control the off-roader. Instead of using levers you can simply tap anywhere around the car and it will immediately drive in that direction. It sounds like magic and it works like magic. You rotate the car on the screen so that it faces the same direction as the actual model, and that’s it. Now both cars are in sync; if you rotate the model, its picture on the screen will rotate, too. If you rotate the phone, the picture of the car on the screen will rotate, too. The only thing I can compare this is to the way the Nintendo Switch joy-cons work. High-tech gyroscopes in the smart hub and in the smartphone/tablet allow for amazingly precise positioning of the digital image of the car on the screen.
Controlling the car with the one-touch mode is a lot of fun. Kids and teenagers who will build and play with this set have no idea how lucky they are to play with toys like this one. Also, the speed of the car depends on the distance between the center of the screen and the place you tapped. By tapping right by the picture of the model you can make it crawl really slowly.

Another major part of the app is the challenges. Each consists of a sequence of actions that your off-roader must perform to unlock the achievement. The easiest of them is the Hairpin, which has three steps: drive forward, make a U-turn, drive forward some more. Once you chose to complete a challenge, you can follow the progress on the screen of your device. The more complicated challenges include short video tutorials demonstrating how to accomplish the mission.
Besides the basic ones, there are many additional challenges and achievements. For instance, we managed to get “8 Bumps in a Row” and “Rolled It!” while testing the car. Unfortunately, the full list of achievements is nowhere to be found, and you also can’t see detailed info on every achievement. We hope this will be fixed with future updates.

And while the motto of the set is Build for real, we had no choice other than putting the car to the test in the wild environment. A short video report captures the best moments of outdoor testing.
We used 6 fully charged IKEA rechargeable batteries (2450 mAh each). It was not before than 45 minutes of active driving that we started to notice a significant power loss due to batteries discharge.
Final thoughts and recommendations
Kids love cars and especially cars that can be remotely controlled. LEGO knows it and has been releasing proper RC car sets since 2001. The constant introduction of more and more advanced RC systems resulted in LEGO becoming one of the major players in the remote control toys market. The new LEGO Technic 42099 4×4 X-treme Off-Roader is yet another step forward: Bluetooth connectivity opens fantastic possibilities for indoor and outdoor play, while new pieces like planetary reduction gears will find their ways in many fan creations.
Although the status of Powered Up elements is yet unclear (the Control+ app is locked to the model and can’t be used in custom creations at the moment), the model offers a lot of value for its price: enjoyable assembling experience, fresh design and tons of playability including in-app challenges and free driving using one-touch control. Once again, LEGO prepared not just a toy or a set of plastic pieces, but rather a very impressing experience from the second you open the box till the moment you have to take a break to replace the batteries; this is a smart toy that is very hard to stop playing with.
LEGO Technic 42099 4×4 X-treme Off-Roader comes with 958 pieces and is available starting today, August 1st for US $249.99 | CAN $299.99 | UK £199.99. as well as some third parties on Amazon, Bricklink and eBay.
The LEGO Group sent The Brothers Brick an early copy of this set for review. Providing TBB with products for review guarantees neither coverage nor positive reviews.


Егор Фалков запись закреплена

Максим Емельянов ![]()
запись закреплена


Максим Емельянов ![]()
запись закреплена

Lego /off-road /drift /castom запись закреплена
LTR (LEGO Technic Russia)
Полно-приводный внедорожник БАРС .
Зависимая подвеска ( неразрезные мосты ) с заблокированными дифференциалами . Передние и задний габариты ( стоп сигналы и т.д. )
1. 4Х4 - XL
2. Рулевая - Servo
3. Li-Po , V2 .
4. 3 PF Lights.
Lego /off-road /drift /castom запись закреплена
filsawgood Lego Technic Creations
Внимание! Конкурс!
Привет всем любителям Lego!
Сегодня в моем сообществе filsawgood Lego Technic Creations стартует небольшой конкурс. Сейчас я готовлю к релизу инструкцию для своего пикапа Lego Nissan Datsun в формате PDF, 3D lxf + стикеры в одном комплекте. Инструкция будет опубликована в конце февраля и будет платной, но для подписчиков моего сообщества ВКонтакте я провожу конкурс репостов. Победители получат инструкцию по сборке совершенно бесплатно.
Показать полностью.
Для участия в конкурсе необходимо поделиться данной записью у себя на стене
Призеры будут определены случайным образом

Количество победителей зависит от числа репостов
До 10 репостов - 1 победитель
От 10 до 20 репостов - 2 победителя
От 20 до 30 репостов - 3 победителя
.
От n до n+10 репостов - (n+10)/10 победителей

Итоги конкурса будут опубликованы 28 февраля 2017 года.
Читайте также: