
Lego robot how to build
Обновлено: 09.05.2024
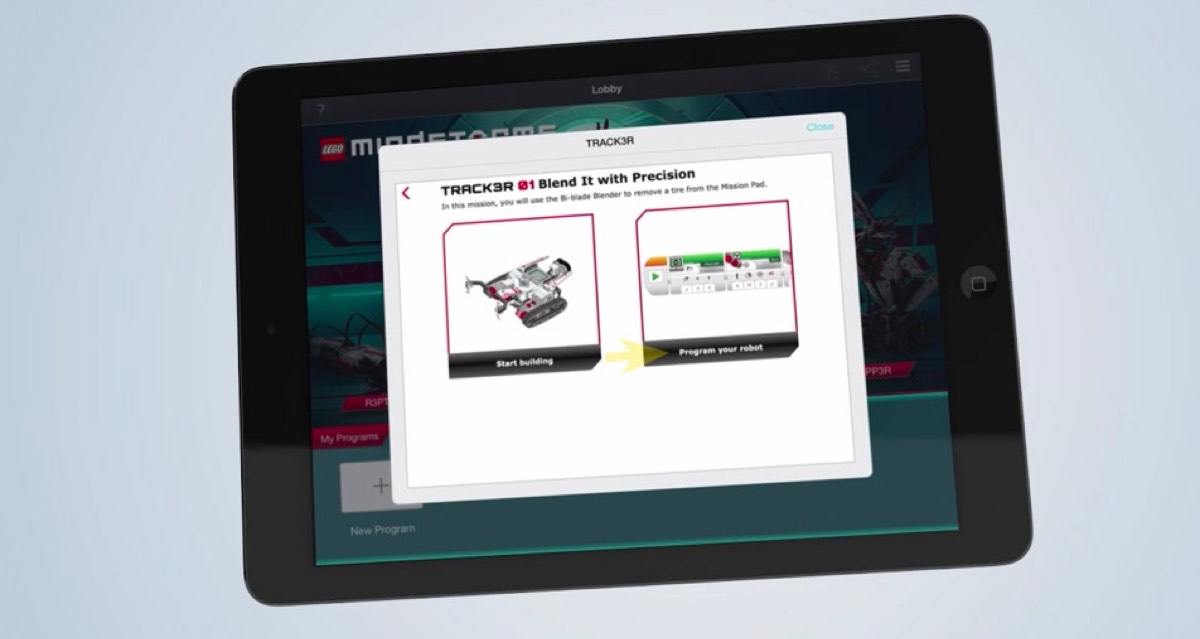
These robots give you the full EV3 experience, complete with building instructions, programming missions and the programming tool included in the new free EV3 Programmer App. New robot builders begin here!
If you have never built a LEGO MINDSTORMS robot before, we recommend you start by building this one! TRACK3R is a crawler-mounted, all-terrain robot with four interchangeable tools. Start by building the body of the robot, then discover the possibilities of the four different TRACK3R tools: the bi-blade blender, the blasting bazooka, the gripping claw, and the hammer.
Control TRACK3R with your smart phone or tablet with the free robot commander app.
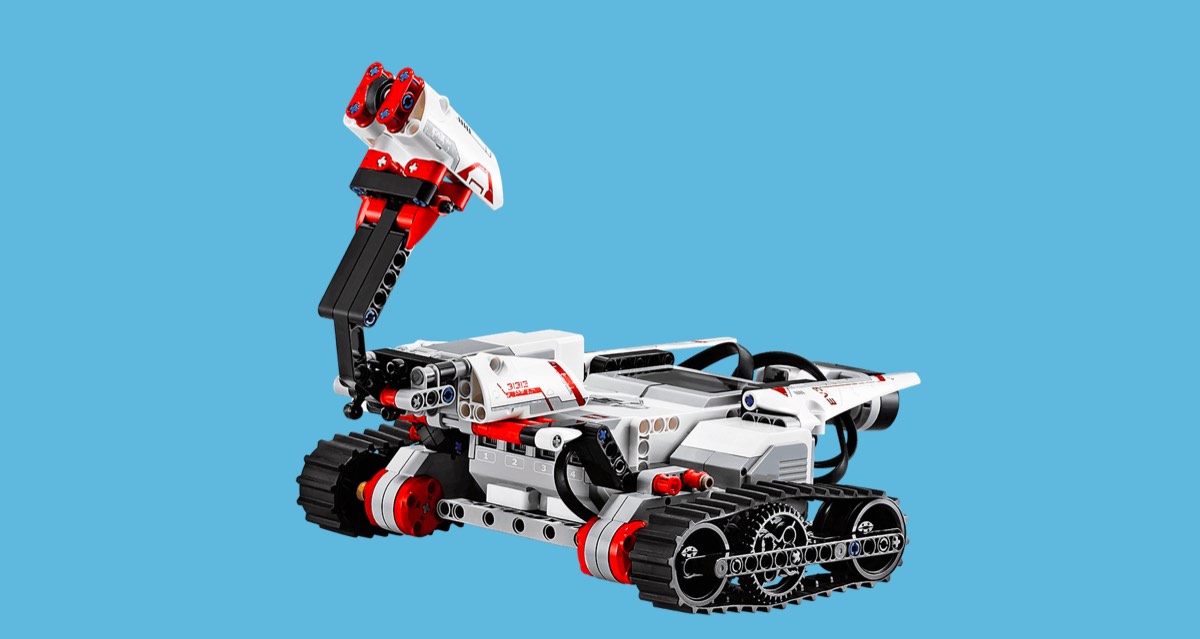
This six-legged creature doesn’t just look like a scorpion, it also acts like one. It turns sharply, snaps with it’s crushing claw, and it’s lightning tail is ready to fire at anyone or anything that gets in its way.
Control SPIK3R with your smart phone or tablet with the free robot commander app.

One of the most loved robots, the standing 35 cm. / 13.8 inch tall R3PTAR robot slithers across the floor like a real cobra, and strikes at lightning speed with it’s pointed red fangs.
Control R3PTAR with your smart phone or tablet with the free Robot commander app.

The GRIPP3R robot is constructed for some heavy-duty lifting. It’s got the muscle to grab and drop a can of soda with its powerful grasping grippers.
Control GRIPP3R with your smart phone or tablet with the free Robot commander app.

EV3RSTORM is the most advanced of the LEGO® MINDSTORMS® robots. Equipped with a blasting bazooka and a spinning tri-blade, EV3RSTORM is superior in both intelligence as well as in fighting power.
Control EV3RSTORM with your smartphone or tablet by downloading the free LEGO® MINDSTORMS® Robot Commander app from your app store.

Fan Robots
These robots have been created by the most dedicated fans and offer fun new building and programming experiences. We recommend you build these robots after you have built 2-3 hero robots.
Designed by Kenneth Ravnshøj Madsen
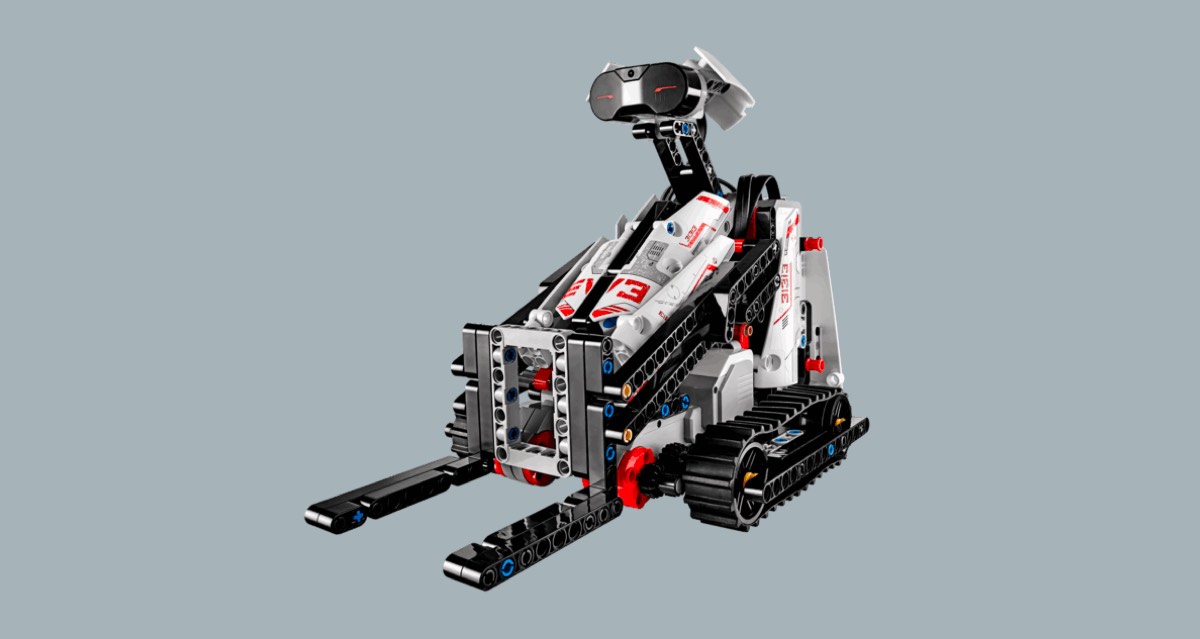
This remote controlled Bobcat® can be steered to move and lift objects with the control buttons on the IR Beacon.
Designed by Ralph Hempel
A robot that can draw? That’s right! Using a standard marker pen, this printer draws lines on a roll of standard calculator or cash register paper. Use the provided program to make the printer draw “EV3”, or customize it to draw whatever you imagine.

Designed by Laurens Valk.
Want a remote controlled truck? Got it! This is one fun cool ride. You can modify the truck to make it go faster by adding gears, and you can add a custom-built trailer so the truck can be used as a transport vehicle.

Designed by Lasse Stenbæk Lauesen
This charming robotic triceratops dinosaur is capable of walking and turning on all fours.

Designed by Marc Andre Bazergui
This robot is fun companion with a crazy attitude that reacts to it’s little IR Beacon bug friend. You can control it with the custom program, the IR Beacon, or simply set it to follow it’s little friend around the room.Designed by Marc-Andre Bazergui.

Designed by Vassilis Chryssanthakopoulos
Inspired by R2D2 from StarWars, this robot can interact with you, follow you wherever you go or move around the room wherever you want – all via the IR Beacon. The EV3D4 supports a wide set of behaviors that can easily be programmed or extended in the EV3 software.

Designed by Daniele Benedettelli
Ready to to rock’n roll? This LEGO Guitar can be played almost like a real guitar. Stroke the string, slide your fingers across its fretless neck, and bend the notes using the tremolo bar to produce the most amazing guitar solos!

Designed by Martyn Boogaarts
This friendly helper robot loves nothing better than to use its light sensor to follow lines of different colors, detecting and reacting to objects blocking it’s path. It can run on it’s own or be controlled with the IR Beacon.

Designed by Ricardo Oliveira
This robot is all set to play tricks on you. Hide the red ball under the shell, use the IR Beacon to set your level, and watch the robot shuffle and hide the ball – but where? Challenge your friends to see who can find the red ball first!

Designed by Kenneth Ravnshøj Madsen
This funny-looking robot is ready to organize all your LEGO® Technic beams. Simply insert the beams into the machine, and MR B3AM will detect their color and size.

Designed by Mark Crosbie.
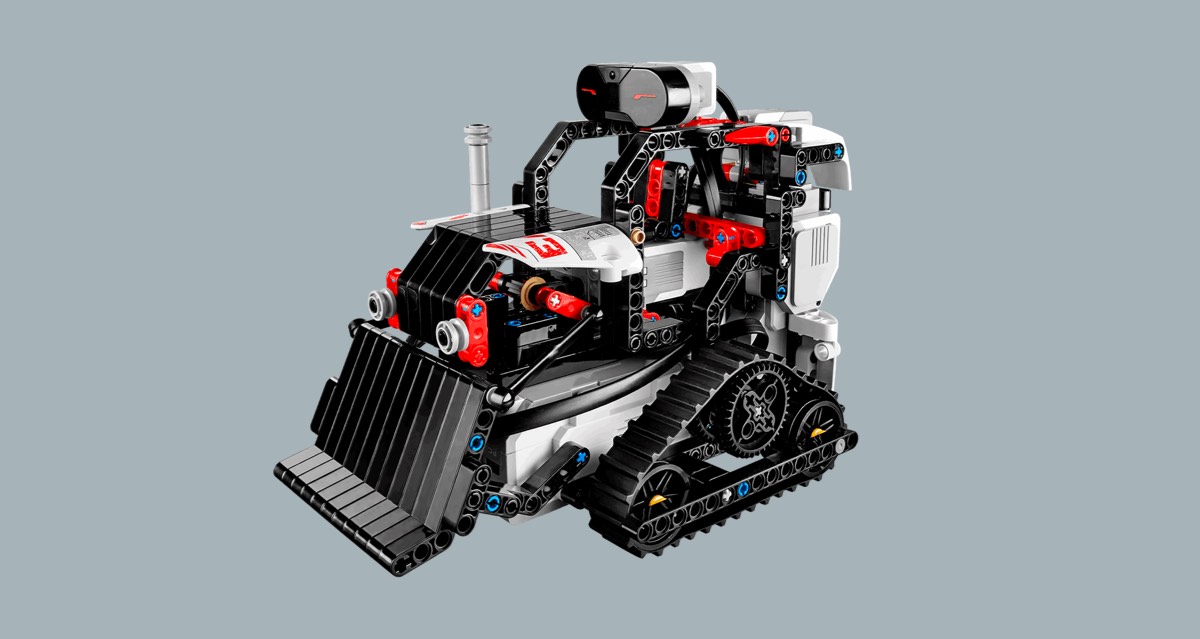
This robot bulldozer can be controlled using the IR Beacon or it can drive on it’s own, avoiding obstacles while clearing and pushing things with its bulldozer bucket.
Designed by Martyn Boogaarts
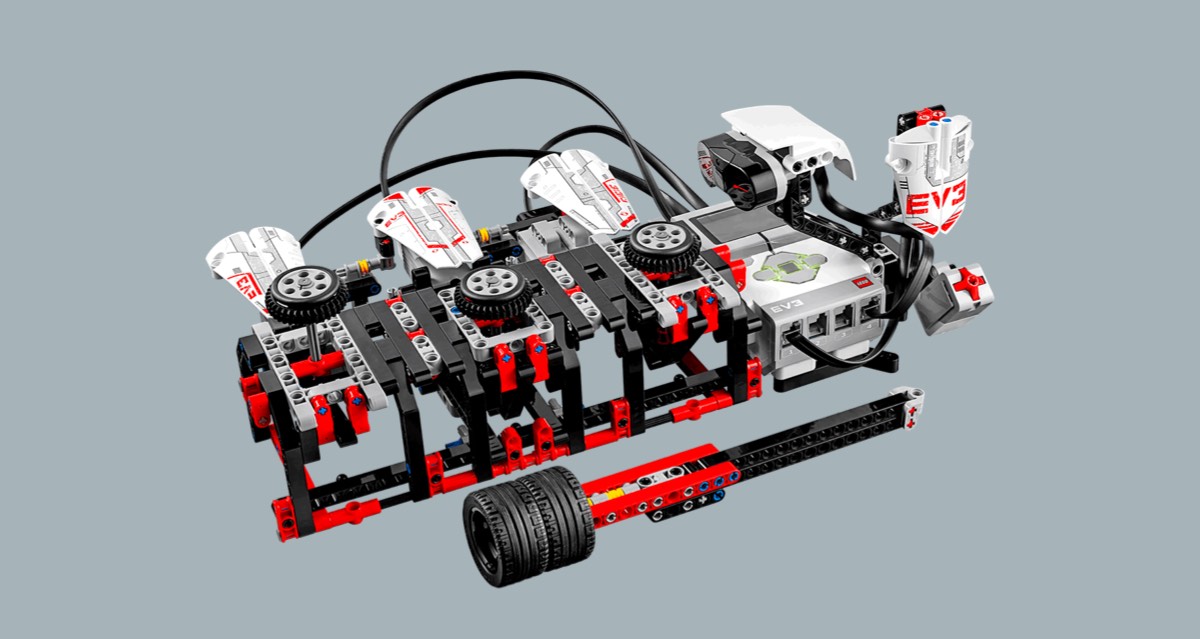
This is an arcade-style game that tests your reaction speed. The robot pops up disks that you have to whack as quickly as possible using the wack-wheel hammer. Challenge your friends and see who wackedy-wacks the fastest!
Remix Challenge
Build fun, new robot creations by mixing your LEGO® MINDSTORMS® with your favorite LEGO Technic sets. LEGO MINDSTORMS and LEGO Technic make a perfect match and allow you to create an entirely new breed of LEGO robots with cool designs and abilities. Click on the images below to explore and build the winners of the annual LEGO Remix Challenge: the Cuckoo Clock, a remix of EV3 (31313) and the LEGO Technic Heavy Lift Helicopter (42052), and the DOODLEBOT, a remix of EV3 and the LEGO Technic Extreme Adventure (42069).
Use the LEGO® MINDSTORMS® DOODLEBOT to draw your own artistic doodles – or set it in self-portrait mode for a drawing of itself, by itself. Place paper under the robot, position a pen in its arms, and use the EV3 remote to draw your own fanciful works of art. The robot comes preprogrammed with three different drawing modes.
The DOODLEBOT is the winner of the 2017 LEGO MINDSTORMS Remix Challenge and was built with a mix of elements from the popular LEGO MINDSTORMS EV3 (31313) and LEGO Technic Extreme Adventure (42069) sets.
On these pages we will show you how to get started programming your EV3 robot on your tablet and on your computer. Watch the videos and follow the instructions to get started and set up your EV3 robot for lots of programming fun!

Programming on Tablet
This video shows you how to download the EV3 Programmer App, connect your tablet to EV3 robot, and get started on your first programming mission.
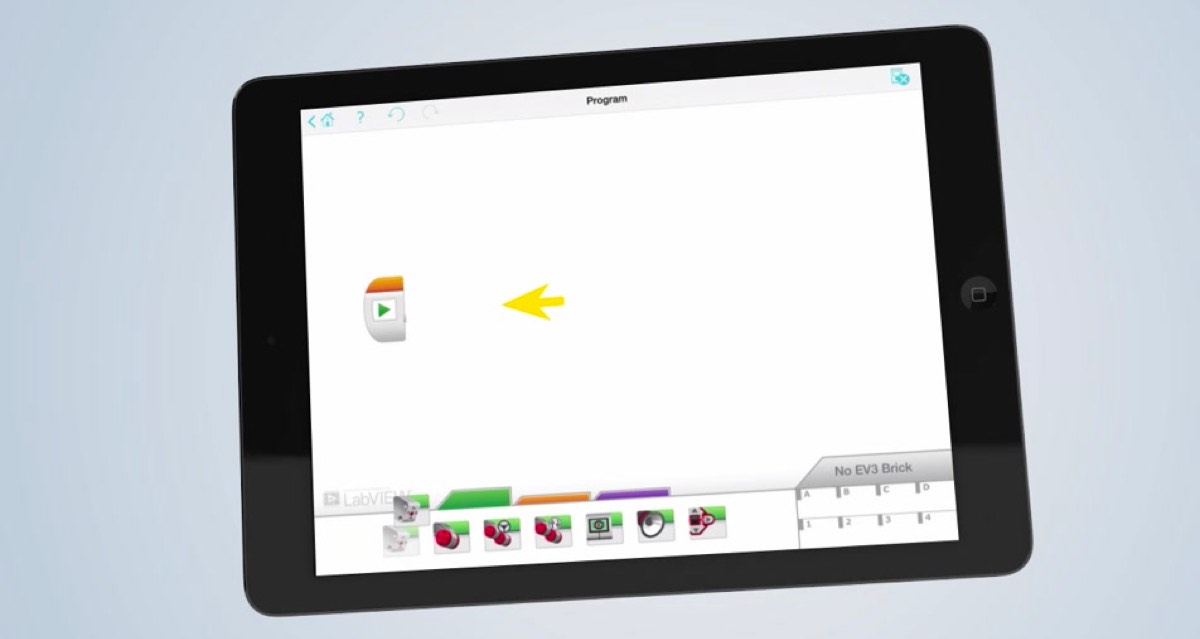
Create Your First Program on Your Tablet
Watch this video to learn how you create your first program with the EV3 Programmer App and bring your LEGO® MINDSTORMS® robot to life.
Watch this short introduction to programming on your PC or Mac. Then download the software and proceed with the tutorial videos further below to learn how to connect your computer with your EV3 robot and create your first programs.

Use the EV3 Programming tool to build a program for your robot and bring it to life. This short video explains how you create your first program and how you transmit the program from the App/Programming software to your robot’s EV3 P-brick (the brain of your robot).

Make Your Robot Move
Make your robot move with the EV3 motors. Check out this video to learn how you create a program that makes your robot move.

Make Your Robot Respond to Touch
Make your robot respond to touch with the EV3 touch sensor. The touch sensor makes your robot react when you push or release sensor in front. Check out this video to learn how it works.


5-step guide to updating your LEGO® MINDSTORMS® EV3 firmware. Updating your firmware ensures that you can use the new features in your projects, and increases stability and security.
About Us
Support
Attractions
More From Us
About Us
Support
Attractions
More From Us
LEGO System A/S, DK-7190 Billund, Denmark. Must be 18 years or older to purchase online. LEGO, the LEGO logo, the Minifigure, DUPLO, LEGENDS OF CHIMA, NINJAGO, BIONICLE, MINDSTORMS and MIXELS are trademarks and copyrights of the LEGO Group. ©2022 The LEGO Group. All rights reserved. Use of this site signifies your agreement to the terms of use.

Introduction: How to Build and Program a NXT Lego Robot
Lego’s are a big attraction to many young children. FIRST (For Inspiration and Recognition of Science and Technology) has created a program for young children who can create robots out of Legos using a kit. As a team, kids create a robot out of this kit to perform a simple daily task. In this tutorial I will teach you how to build a robot out of the NXT Mindstorm kit. I will teach you how to write and run a program on how to move the bot forward and backward.
NXT Lego Robot Kit depending on the kit >$100
Depending on how steady you hands are and you easily frustrated you get: :30 – 1:30
*Caution: Lego pieces are small and children may swallow*
Step 1: The Kit
After obtaining a NXT Lego robotics kit, lay out all of the pieces in the kit. The supplies should contain all that is in the above photo
Step 2: The Arm
Take one of the arm pieces, two of the smaller gray couplings, and four of the large black couplings as shown in the top half of the photo. Place the two gray pieces into the last two holes of the arm piece on the long side of the arm. The gray pieces should have an even amount on either side of the hole. Place the four black couplings over the ends of the gray couplings with the crown side closest to the arm. A finished product will look like the bottom half of the photo.
Step 3: The Chassis Part 1
Take the two NXT axles, the big gray coupling and two of the black couplings. The correct parts are shown in the top photo. Connect the two black couplings to the end of the gray piece. This is shown in the top half of the second photo. The ends of the black crowns should be placed through the middle hole of the group of three holes on the axle next to the orange circle. The completed product for step three will look like product in the bottom half of the second photo.
Step 4: The Chassis Part 2
Take the completed products from steps two and three. Flip the product from step three over so that the piece that you inserted will be on the bottom and the empty holes next to the larger circle are on the top. The black crowns will go in the back two holes of the group of three. Perform this for both sides of the product from step two. The finished product will look like the photo above.
Step 5: The Wheel Axle Part 1
Take two of the L-shaped pieces with five holes and the longest dark gray pieces with the bridge as shown in the top half of the photo. Place the longer side of the dark gray piece through the first hole on the shorter side of the bend. This will look like the bottom half of the photo. Push the dark gray piece all the way to the bridge.
Step 6: The Wheel Axle Part 2
Take the finished product from Step 5 as well as the large gray gears shown in the top half of the photo. Stick the long end of the large dark gray piece through the center cross hole in the gear. The gear should be on the same side of the bridge as the L-shaped piece. The Final product of this step should look like the bottom half of the photo.
Step 7: Fitting the Axle to the Tire Part 1
Take the finished products from step 6 and the tires. Insert the finished piece from step 6 into the center cross hole in the tire. The tire should be on the same side as the gear and L-shaped piece. The finished product should look like the photo above.
Step 8: Fitting the Wheel Axle to the Tire Part 2
Take either the gray hub caps or the yellow hub caps. These are interchangeable. Insert them over the end of the dark gray piece that is sticking out through the cross hole in the tire from step 7. The finished product will look like the right half of the photo.
Step 9:
Take the finished chassis product for step 4. Take the small blue pieces that were in the photo from step 1. Place the two blue pieces in the third hole of the group of three next to the orange circle on the chassis. In this group of three, the blue pieces will go in the hole furthest from the orange circle. One blue piece on each side of the chassis. The final product will look like the photo.
Step 10: Building the Axle
Take the small gray gear, the small black couplings, and the finished product from step 9 as shown in the top half of the photo above. Insert the black couplings through one end of the small gray gear. Take these two pieces and insert the other end of the black coupling into one of the cross holes in the orange circles on the chassis. Repeat this with the other coupling. The finished product is shown in bottom half of the photo.
Step 11: Connecting the Wheels
Take the finished products from steps 10 and 8. Take one of the wheels connected to the L-shaped piece. Connect the longer side of the L-shaped piece to the blue and black couplings from the product of step 10. The blue piece will connect to the cross hole on the L-shaped piece and the black coupling will go through the hole next to the cross. The finished product will look like the photo. Repeat this for the other wheel. The small gear connected to the orange circle will connect with the large gear connected to the wheel. After finishing with this step, the body of the robot is now complete.
Step 12: Prepping the NXT Brick
Take the NXT brick and four small black couplings. Put the brick on its side like what is shown on the left side of the photo. Take the black couplings and place them in the first and third holes that are in a horizontal line to you as the brick is place like it is in left side of the picture. The finished product should look like the right side of the picture.
Step 13: Prepping the Bot for the Brick
Take the finished problem from step 11. Take four of the small black couplings. Let’s say that the arm is on the front of the bot and the wheels are on the back of the bot. Find the group of three holes in the front of the bot. They are located in the top half of the photo. Place two of the four black couplings into the back two outside holes of the group of three holes. The finished product will look like the bottom half of the picture.
Step 14: Connecting the Brick to the Bot Part 1
Take the NXT Brick, the remaining two arms, and the finished product from step 13. Place the brick on top of the bot. Make sure the black couplings are on the same half of the bot. This set up should look like the top half of the picture. Take one of the arms and connect the shorter side of the arm to the chassis of the bot and the longer side of the arm to the NXT brick. On the shorter side of the arm, the bot couplings should go through the two holes that don’t have a cross hole. On the longer side, the couplings should be placed in the third and fifth hole down from the cross hole at the top. The finished product should look like the bottom half of the photo.
Step 15: Connecting the Brick to the Bot Part 2
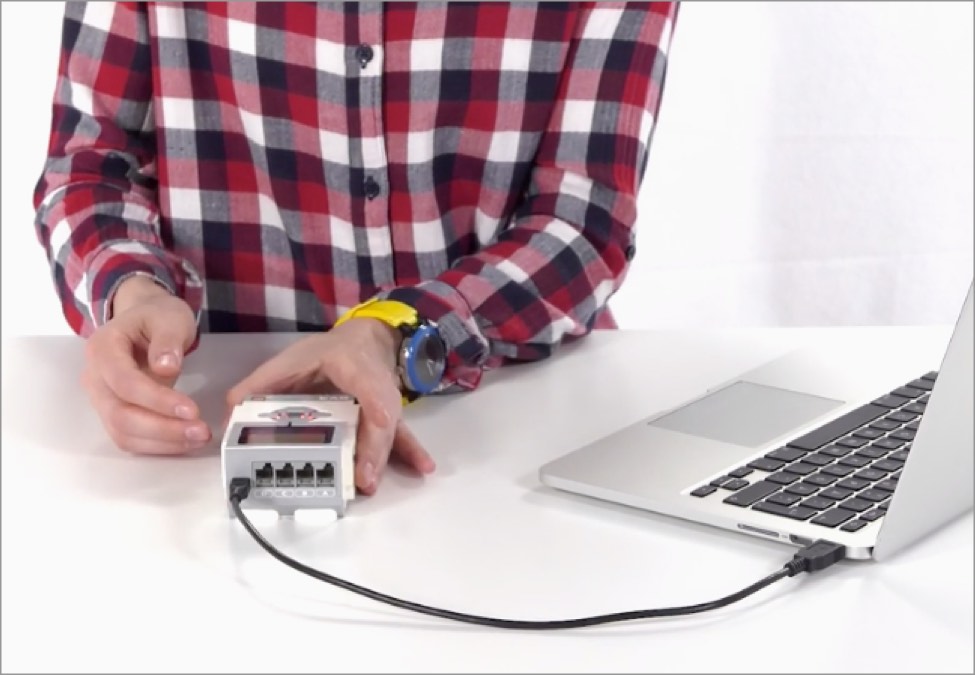
In order for the bot to move from a program, it must be connected to the command Brick. Flip the bot on its side so that it sits on it back end with the front end up in the air. This should look like the left side of the photo. Take notice of the ports that are on the side of the Brick. These are where the cables will be connected to the bot. Take one of the cables and place one of the connectors in the port labeled “A”. Connect the other end of the cable into the port on the right side of the front of the bot. Take the other cable. Place one of the connectors into the port labeled “C”. Connect the other end of the cable into the port on the left side of the front of the bot. The finished product will look like the right side of the photo.
Step 16: Bricx Command Center
Step 17: Open a New Program
First open up BricxCC. BricxCC will ask you to connect to the robot. Take the USB cord that came in the kit and connect one end to a USB port on your computer and the other end to the side of the Brick. Turn on the robot by pressing the orange button on the Brick and press OK on the computer screen. BricxCC should connect to the robot automatically. To start a new program select “New File” on the main screen.
Step 18: Naming the Program
There are various things that you can program the robot to do. We will just cover the basics of making the robot move forward and backward. To program for a NXT Lego robot we will have to program in Next Byte Codes (NBC). This program that you write will be changed from NBC to binary code by BricxCC which the robot will then be able to read. Begin with a name for the code. In mine, I chose to name it “task main()”. Next we will need to open the program for coding. to do this we enter < below the name of the program.
Step 19: Moving the Bot Forwards
19) First we will start with getting the robot to move forward. BricxCC has some already written programs that will help us here. OnFwd(x,y) is an already written program that will move the wheel forward. Notice that after the command, there are two inputs. The x refers to the motor that the command will be sent to. For motor A, x would be OUT_A; For motor C, x would be OUT_C. The y refers to the percentage that you want the motor to move at. I chose 100% for this, so y would be 100. The next line will be for how long you want the robot to move for in milliseconds. The command for this is Wait(z). So if we want the robot to move for 5 seconds, we would input 5000. We will then turn the motors off. This command is Off(x). Write this code twice for both motors on separate lines. After turning off the motors, typing Continue(z) will shut them off for a certain amount of time before the Brick reads the next line of code. For the program to output this code, place a ; after each line of code. If the ; is not there the program will not run properly and the Brick will be overloaded.
Step 20: Moving the Bot Backwards.
Next we will move the robot backwards. For the bot to go backwards the command is OnRev(x,y) the inputs are the same as in the previous step. To make it easier on us, we can start both motors at the same time. In step 18, we created two separate steps to turn the motors on. To turn both motors on at the same time, we would instead write OUT_AC in the x input location. For the power input, we will leave it at 100% so y will still be 100. The next line of code will have the time commitment. We will again leave it a 5 seconds. The command is the same as previously stated. Wait(5000) for the motors to move the wheels for 5 seconds. When the robot is done moving, we want to turn the motors off. We can combine the multiple steps that were used in step 18 to turn the motors off into one step by using the same shortcut we used earlier in this step. Off(OUT_AC). This turns both motors off at the same time.
Step 21: Closing Out the Program
To finish the program, we need to close it out. To do this all we do is hit “enter” or “return” a couple of lines to show that there is no more code and enter the > key. The finished code will look similar to the figure above. The figure has comments as to what the robot will do during each section of code. We did not talk about how to do that in these instructions.
Step 22: Running the Program
We have now built the robot. We have created a program that will make the robot move. Now all we have to do is get the robot to move. First we need to compile the program so that it can be read by the Brick. On the main screen of BricxCC there is a group of four buttons and a drop down menu. It will look like the figure below. The farthest left button will compile the program, the second to the left will download and rewrite into binary for the Brick, the drop down menu should show the name of your program, the second from the right is the run button, the farthest right is the stop button. Assuming there were no errors in the program click the second to the left button. This will download the program to the Brick. If there are errors, you will be notified of them. After the download is complete, click the second from the right or the “run” button. This will run the program from the Brick.
Step 23: Conclusion
Congratulations, were finished! Did the robot do what we wanted? If not make sure to check the wiring to make sure the cables are connected to the correct ports. If there were errors in the program, check what you have written with mine from step 21. If everything went to plan, you have built a NXT Lego robot. You have written the program that will move the bot. If the code was written correctly, the bot would have moved forward for five seconds, then waited another five seconds before going backwards for five seconds. If the timing needs to be changed, more or less time can be added. If the direction needs to be changed to go right or left, only one of the motors needs to be turned on for a certain amount of time. Now you know how to change up the code for changing direction as well as timing.


This is a fun design that should be no trouble to build.
Step 1: The Pieces
The pieces can be any color yo'd like them to be.
Step 2: Legs
Take two of your head light pieces and place them down.
Step 3:
Put your white studs on the front side.
Step 4:
Then put your blue studs on the bottoms.
Step 5:
Step 6:
And place it on the tops.
Step 7:
Add your two 1x1 slant pieces and you may Want to turn the feet a bit for detail.
Step 8:
Get your camera piece and place it down.
Step 9:
Put your other 1x1 piece and put it on the front Side away from the lens.
Step 10:
Put another 1x3 and put it right bellow the slanted piece.
Step 11:
Flip the model over and take a 1x2.
Step 12:
And place it stud down.
Step 13:
Take your cone piece and place it on top.
Step 14: The Arms
Take another two headlight pieces.
Step 15:
And place these weird beak pieces and put those on the stud side.
Step 16:
Step 17:
Add to dark grey studs to the back stud in. Note:once you put those pieces in the are hard to get back out
Step 18:
Add your blue cone pieces to the bottoms.
Step 19: Yay
Now that you have every thing to gather It's time to combined.
Step 20:
First start out with your body.
Step 21:
Step 22:
Place the arms on the side by the head.
Step 23:
Make sure to adjust the antenna.
Step 24:
Step 25:
Put them to gather.
Step 26:
Turn the model over.
Step 27:
Now just plop the wings on.
Step 28: Who Wo.
Now you are done! I hope you enjoy'd this instructable I hope I spelled that right.oh what ever thanks for reading or well doing.you can also put this on a lego plate.
Free shipping on order above $150 USD (~$191 CAD) within Canada
![]()
You are all set. Your robot is ready to go.
Join the Mailing List
You can subscribe to get the latest news, product updates, offers, and more from Tart Robotics.

Cherry Tart Kit Teaches Robotics and Engineering to Elementary School Students (6-12)

Orange Tart Kit

LEGO®-compatible Zipline Robot

Orange Tart - Classroom Pack | LEGO®-compatible Soccer Robot for STEAM

STEM Building Blocks Set | Humanoid Robot Kit

STEM Building Blocks Set | Monkeynoid Robot Kit
Join the Mailing List
You can subscribe to get the latest news, product updates, offers, and more from Tart Robotics.
Products
Resources
Our Compony
2022 Tart Robotics Inc. All rights reserved.
LEGO® is a trademark of the LEGO® Group, which does not sponsor, authorize or endorse this website and Tart Robotics Products.
Apple and the Apple logo are trademarks of Apple Inc. registered in the United States and other countries. App Store is a service mark of Apple Inc.
Android and Google Play are trademarks of Google Inc.
Читайте также: