
Lego star wars return of the jedi
Обновлено: 28.04.2024
From Minikits smuggled in ships to hidden deep in the jungles of Endor, this guide will help you find them all.
Quick Links
Bringing the original trilogy to a close, The Return of the Jedi is a triumphant finale. Thankfully, we now have the opportunity to relive this thrilling conclusion in Lego Star Wars: The Skywalker Saga. But with this new episode comes along another series of Minikit pieces scattered through each stage. Related: Lego Star Wars: The Skywalker Saga - All Challenges In Every Episode 6 Level From playing a game of whack-a-mole to uncovering smuggled cargo, these Minikits are stashed away deviously. Thankfully, we have gone through the trouble of tracking them all down so that you can have a smooth ride on your journey to face the emperor himself.
A Plan To Save Han
There is only a single Minikit piece that is obtainable during the story mode run of this mission. During the section with Leia and Chewbacca, when you get the power core needed to thaw out Han, take it into the previous room and use it to power the DJ station first. This will provide you with the “Max Rebo Band Roadie” Minikit piece. From here on out, every Minikit will need to be acquired in the free play mode.
At the beginning of the stage, take a right. Use an astromech droid to get through the door. Then switch to a Jedi. You will have to go through a mini obstacle course. At the end of it, you will start following Salacious Crumb, he will lead you to a set of six grates. Here you will play an impromptu game of whack-a-mole. Whenever Crumb pops out of a grate, give him a whack. After five hits or so he will be defeated and grant you the “Trail of B. Crumbs” Minikit Piece.
Next, in the prison section, where you can set the prisoners free to start a distraction, use a villain-type character to throw a grenade at the door with a silver lock. The “Jabba’s Palace Redemption” Minikit piece is waiting inside. Leave the room with the prison cells and enter the area where the two guards are hauling the junk bin. Use a protocol droid to input the password from earlier. Now, in this room, you need to complete the half-finished picture on the wall by finding the other pieces of it hidden in the junk in this room. Once you complete the picture, you will be given the “Photogenic” Minikit piece.
Now, while in the room with the picture puzzle, use an astromech droid to open the back door. In this room pull the lever to pull apart the droid (oh my god). Using the pieces left behind, assemble the “Major Malfunction” Minikit piece.
The Copa-Khetanna
Once you have beaten Boba Fett, a staircase leading up to the second floor of the ship will open up. Now, on the first floor there is a Gonk droid; ride it up those stairs. From there, use Luke to build a staircase using the blocks. Ride the Gonk droid up those stairs. Finally, on the third level, destroy the junk and build an energy plate. Park the Gonk droid on the plate and you will receive the “Where has it Gonk?” Minikit piece.
From the third floor, jump over the edge of the ship. You will land on a ledge. The “Trailing Behind” Minikit piece is located on this ledge.
If you man the turret at the bow of the ship, five droids will pop up and start flying around. You simply need to shoot them out of the air in order to obtain the “Target Practice” Minikit piece. Now look up top; you will see a lever (on the ship’s mast) that can be grappled to. Use R2-D2 to grapple this lever, which will lower a section of the floor. Switch to another character and have them jump into the hold to collect the “A Simple Smuggle” Minikit piece.
Star Wars Episode VI: Return of the Jedi is the third chapter of LEGO Star Wars II: The Original Trilogy and the sixth chapter of LEGO Star Wars: The Complete Saga.
Contents
Story
Darth Vader arrived on the Death Star II to see the Imperial Engineers having a coffee break instead of working. Vader was angry about their lack of progress. Meanwhile, on Tatooine, C-3PO and R2-D2 arrived at Jabba's Palace. Princess Leia and Chewbacca followed them in. Leia disguised herself as the Bounty Hunter Boushh. They met up with Luke Skywalker, who is now a Jedi knight. They fought through Gamorrean Guards and rescued R2 and 3PO. They eventually found Han Solo. Leia freed Han but was caught by Jabba the Hutt. Jabba decided to feed Luke and the gang to his Rancor. They defeated the Rancor by closing a door on it. Leia then became Jabba's slave.
They were taken to The Great Pit of Carkoon where Jabba plans to feed Luke to a Sarlacc. Luke goofed around on the plank on the Skiff while R2 threw Luke his lightsaber, but the lightsaber was caught by a Skiff Guard. Luke asked the guard for his lightsaber and pushed him off. Luke, Lando, Han, and Chewie fought through the skiffs until they met Boba Fett. They defeated him, causing his jetpack to malfunction. He then landed in the Sarlacc, which burped when it swallowed him. They got in the Sail Barge where they met up with C-3PO and R2-D2. They activated a dance floor and got to the deck of the ship. Leia strangled Jabba to death and joined Luke and the gang. They blew up the sail barge and escaped.
The Rebels went to the forest moon of Endor to disable the shield generator of the new Death Star. Luke tripped, alerting the Scout Trooper of their presence. Luke and Leia chased Scout Troopers on Speeder Bikes, and destroyed a Landing Platform.
They met up with Han, Chewie, R2, and 3PO. Chewie smelled a bone on a string and pulled it. The Rebels were captured by Ewoks who thought C-3PO was a god. At the Ewok village, 3PO told them about how Ben Kenobi was struck down by Darth Vader. The Rebels were accepted as part of the tribe but Luke left as he was endangering the mission. An Ewok named Wicket decided to help the Rebels disable the Death Star shield generator. They fought to the bunker and blew up the generator, although a satellite dish fell on Han.
Luke went to confront his father Darth Vader. Vader took his son to The Emperor who used Force Lightning on him. Vader became Anakin Skywalker once again and blocked the Lightning from killing Luke. Luke and Vader teamed up to fight the Emperor and his Imperial Guards. Vader threw the Emperor down a shaft. The Force Lightning had however weakened Anakin. Luke removed Vader's helmet to get one look at Anakin. Anakin then dies. Luke left the Death Star with Anakins body in his ship.
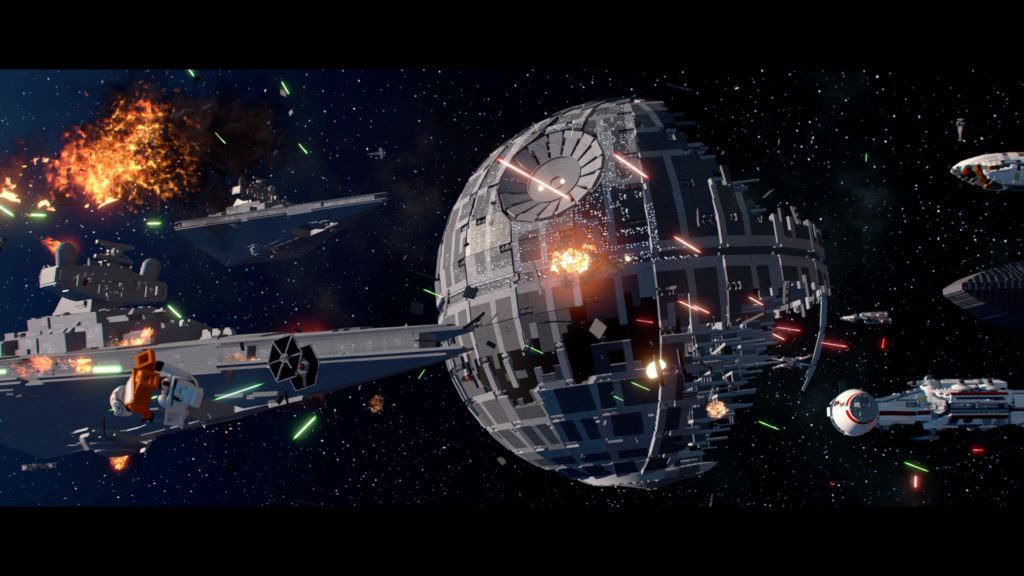
The Rebel Fleet arrived near the Death Star. Lando piloted the Millennium Falcon and sunk four Star Destroyers. The Falcon went into the Death Star and blew it up, escaping with flames chasing it as it blew up. The Ewoks celebrated as Han and Leia kissed.
Luke cremated Vader and Anakin's ghost came out. As the Ewoks celebrated, Luke saw the ghosts of Ben, Yoda and Anakin together.
This article covers a subject containing comic or obvious non-canon material or that Lucasfilm otherwise declared non-canon in the canon continuity.

Return of the Return of the Jedi
Production information
Series
Season
Episode
Air date
Run time
Episode chronology
Timeline
Previous episode
"Return of the Return of the Jedi" is the thirteenth and final episode of the second season of LEGO Star Wars: The Freemaker Adventures. [1]
Contents
Official description [ ]
The Freemakers wind up in the middle of the Battle of Endor where Rowan has his final confrontation with M-OC.
Plot summary [ ]
Rebuilding the StarScavenger [ ]
Following the Skirmish on Shantipole, the Freemakers and Quarrie rummage through the wreckage of the StarScavenger and the Arrowhead. Kordi Freemaker says they are stranded on Shantipole but tells them not to panic but to assess. Zander Freemaker points out that they have destroyed the StarScavenger. Roger tries to strike a positive note by saying that they destroyed the Arrowhead as well. However, Kordi points out that M-OC took its kyber crystal which he can use to protect the second Death Star.
Rowan Freemaker adds that the second Death Star works because he gave Darth Vader the location of the crystal planet. Quarrie says that they have no way of warning anybody. Roger says that the good news is that the odds of things getting worse are 7,826 to one so that things can only get better. Kordi tells Roger that he needs to work on his pep talks while Quarrie adds that certain defeat comes from not trying at all. Rowan says that M-OC took all the important parts and asks what can he build.
Zander tells his brother he can build another "Ugly" while Kordi adds he can do it. Rowan decides to picture what he is building and not the pieces that he is building with. Using the Force, Rowan builds a new ship out of the wreckage. At Roger's request, he agrees to build a wider charging station so that Roger doesn't bump his elbows. Rowan builds an elongated version of the StarScavenger, earning the praise of Kordi and Quarrie. Quarries tells Rowan that the ancient Force Builders would have approved. Zander praises his little brother for incorporating the best of both ships and says let's go save the galaxy. Roger is delighted by the wider charging station.
M-OC's mission [ ]
Exiting hyperspace in his hyperspace transport ring, M-OC flies to the second Death Star, which is orbiting Endor. Aboard the Emperor's Tower, the Emperor Palpatine walks to his throne, flanked by two Imperial Royal Guards. He is pleased that everything is unfolding as he has foreseen. He believes that the Arrowhead is his and that the Freemakers are gone. He is hopeful of luring the rebels into a trap by attacking his fully-operational Death Star. The Emperor is also pleased that Darth Vader is bring his son Luke Skywalker whom he hopes to turn to the dark side of the Force.
The Emperor's good mood is interrupted when he discovers that his throne is squeaky. A Royal Guard oils his throne. Before the Emperor can bask in his glory, M-OC appears outside the tower's viewpoint and tells him that there is a flaw in his plan to defeat the Rebellion. The Emperor believes his plan is flawless because he came up with him. When the Emperor says that M-OC can't be here because he is expecting company, M-OC tells his master that he has secured the Arrowhead crystal but the Emperor is preoccupied with Skywalker.
M-OC tells the Emperor that he plans to use the Arrowhead crystal to defend the Death Star's main reactor from rebel attack should the shield generator on Endor fail. Preoccupied with Skywalker, the Emperor tells M-OC to do whatever he wants to do and that he doesn't care. M-OC departs, leaving the Emperor to receive Darth Vader and Skywalker whom he has been expecting. Shortly later, M-OC flies into the second Death Star's main reactor core in his arachnid starship and uses the Arrowhead ' s kyber crystal to form a deflector shield around it. He vows to serve his master well.
Departing Shantipole [ ]
Back on Shantipole, the Freemakers prepare for their stomach-churning ride to breached the planet's charged upper atmosphere. Kordi quips about leaving her stomach behind while Roger says that they have to break through the atmosphere. Quarrie calculates that they have enough momentum to break through. As the StarScavenger ascends into the charged upper atmosphere, the StarScavenger loses power due to the electronic storms and plunges downward. Roger tumbles as the ship descends while Quarrie quips about his preparations.
Zander struggles with the control. Fortunately, the StarScavenger regains power and narrowly avoids crashing into the Shantipole landing field. The Freemakers rocket through Shantipole's atmosphere into space. As they ascend, Kordi tells Zander that she teases him a lot but that today he really is "Zander Freemaker Superstar Pilot Guy." Zander thanks Kordi and asks where they are piloting to. Quarrie tells them that they are heading to Sullust where the rebel fleet is massing.
Retrieving the Kyber Saber [ ]
However, they find that the rebel fleet has already left. Quarrie suggests contacting Admiral Ackbar but the Freemakers and Roger are reluctant to contact him after all the trouble they have caused including the loss of the Arrowhead. Kordi instead contacts Lieutenant Valeria, whom she reasons is less eager to shove them through a black hole. Valeria is initially reluctant to talk to them since she could be court-martialed. She tells Kordi that the rebel fleet is heading to Endor to launch a surprise attack on the second Death Star.
At that moment, Valeria and the rest of the rebel fleet exit hyperspace above Endor. Rowan tries to warn Valeria that the second Death Star is fully operational and that M-OC is there but is cut off by static interference. Valeria discovers that the Death Star's shield are up while Admiral Ackbar realizes too late that they have stumbled into a trap. Rowan, Kordi, and Zander realizes that the rebels' sneak attack has backfired.
Zander wants to set a course for Endor but Roger asks what they will do there. Zander says that he don't but they can't sit back and let the Rebellion be destroyed. Quarrie points out that the StarScavenger is no matched for the Death Star and Rowan adds M-OC. Kordi says they need something to even the odds. Rowan realizes that they need the Kyber Saber. Roger points out that it is ironic that they are over the planet where he destroyed it. Roger thinks the Saber would come in handy right now.
Rowan realizes he did not destroyed it even though the others saw him throw it into a lava pit. He tells them that he can still sense the kyber crystals and that they are still there. Rowan says that destiny led them to this place and to this moment. He says he has to get the Kyber Saber. The Freemakers land on Sullust. Rowan stands on top of a cliff and uses the Force to summon the pieces of the Kyber Saber from the lava pit and reassemble it. Rowan grabs the hilt of the Kyber Saber but it is burning hot. Roger, who has metal hands, retrieves the weapon and tells Rowan to let's go and save the Rebellion.
Into the thick of battle [ ]
While traveling through hyperspace, Zander tells the others to get ready. Rowan replies that he is ready for anything. When the StarScavenger exits hyperspace, they find the rebel fleet under attack from Imperial forces. The Freemakers outrun two TIE interceptors to reach the second Death Star, which is still protected by the Endor shield generator. Since the shield prevents starships from entering the Death Star, Rowan decides to use the StarScavenger ' s newly incorporated embersteel Blade to break through the shields. When Zander points out that it needs a kyber crystal, Rowan uses the Kyber Saber to power the Blade.
The StarScavenger uses the Embersteel Blade to break a hole through the shield. However, the ship loses its lateral controls and crashes into a hangar bay, ploughing through several parked TIE fighters. Kordi and Zander pretend to surrender to the stormtroopers but Rowan uses the Kyber Saber to assemble a giant blaster out of crates and hurl the troopers aside. He also traps some storm troopers inside solar collectors. Rowan is jubilant about wielding the Kyber Saber but is stunned by a stormtrooper, who is able to shoot straight.
The stormtroopers quickly take the Freemakers and Quarrie prisoner. The stormtrooper commander tells his men to take the prisoners to the detention level where Lord Vader will deal with them later. He also tells an Imperial weapons technician to deliver the Kyber Saber to the Emperor at once. Inside the detention cell, Roger recalls his earlier calculation that the odds of things getting worse were 7,826 to once. Roger quips about them beating the odds.
Kordi fears that if the rebels lose the battle while Rowan adds that the Empire will vaporize them. Zander refuses to give up hope and hopes that the rebels will knock out the shield and blow the Death Star to dust. Kordi points out that they will get blown to dust with it. A despondent Zander sees her point.
Becky to the rescue [ ]
Just then, the doors to their cell open and an Imperial weapons technician enters with the Kyber Saber. She tells them that they have to get out of here now and frees them. When Zander asks who she is, the technician removes her helmet, revealing herself as Zander's love interest Becky Smoochenbacher. She tells Zander that she loves him. Becky explains that she joined the Empire when he left the Wheel but decided to change sides after learning that Zander fights with the rebels. She tells Zander that she has had a crush on him forever and the two embrace. Becky tells the Freemakers and Quarrie to find a ship and that she will find them on Endor. Zander is smitten and collapses.
After escaping the detention block, the Freemakers and Quarrie sneak up on a command center. The Imperial officers stationed there have just received word that the rebels have taken out the Endor shield generator. After the officers head down a turbolift to battle stations, Quarrie tells them that there is nothing better than a huge galactic battle to provide a distraction. Kordi then contacts Lieutenant Valeria and tells them she is on the Death Star. When Admiral Ackbar orders the rebel fighters to enter the Death Star, she tells the Freemakers to flee faster than a womp rat because they are coming into the reactor core.
The Freemakers wants to escape but Rowan reminds them that M-OC is still committed to ensuring the Emperor's victory. Rowan realizes that M-OC is going to try and stop the rebel attack at the Death Star's reactor core. Quarrie agrees that the main reactor core would be a good place to mount a last line of defense. Rowan says that he can sense M-OC and that he must stop him. Zander and Kordi says that they will defeat M-OC together but Roger is unwilling to risk the lives of his family. He uses the Force to shove them into a turbolift and tells them to take care of themselves because he has a job to do, as he takes the other turbolift down on his way to the Death Star reactor core.
Final match with M-OC [ ]
Rowan confronts M-OC at the Death Star reactor core. M-OC remarks that he calculated that Rowan had a one in three chance in coming. M-OC is confident that the rebel attack will face because he believes he is invincible in his current form. Rowan is defiant and attacks M-OC with the Kyber Saber. While Rowan advances on M-OC, Zander says that he can't believe what Rowan did to them. Roger is not surprised since he knows Rowan well. Exiting the lift, the Freemakers try to find their ship StarScavenger only to run into three stormtroopers, who chase them.
While recognizing that the Kyber Saber has upgraded Rowan's powers, M-OC taunts him that he is invulnerable in his arachnid form. Rowan is unable to breach the deflector shield generated by M-OC's Arrowhead kyber crystal. M-OC unleashes a multi-faceted attack with all his weapons and blasts at Rowan. Meanwhile the other Freemakers lead their stormtrooper pursuers on a chase and cross a bridge. After they have crossed, Kordi manages to stop the advance by threatening to touch the control panel. When one of the stormtroopers says that they will still blast her, Kordi deactivates the bridge, causing them to plunge into the depths of the Death Star. Kordi quips about the trooper's honesty.
The Freemakers reach the hangar bay where the StarScavenger is parked and fight the stormtrooper sentries stationed there. They then depart aboard their ship with Kordi firing up the converters and angling the deflectors. Zander tells the others to hold on to their bricks, as the StarScavenger departed on its way to the Death Star's reactor core to pick up Rowan as he defeats M-OC. In the Death Star's reactor core, M-OC manages to drive Rowan to the edge of the platform. Rowan manages to hide behind the reactor core. M-OC boasts that as long as he has his kyber crystal, he is invulnerable.
Realizing that he has been going about it the wrong way, Rowan uses the Kyber Saber to call to M-OC's Arrowhead crystal. When M-OC questions his unorthodox move, Rowan retorts that he is taking back his crystals. A tug of war between the two ensues. M-OC says they have reached a stalemate that he cannot win but Rowan counters that he is trying to distract him from protecting the reactor core. M-OC vows to finish Rowan quickly and taunts Rowan about his lack of focus.
M-OC attacks Rowan with his flamethrowers, missiles, and many other countless weapons which Rowan is able to avoid. However, M-OC uses hologram recordings of his siblings Zander and Kordi to distract Rowan and blasts him with a sonic cannon, knocking the Kyber Saber out of his hand. M-OC pins Rowan down with one of his magnetic legs and taunts him that just as he predicted, family is his weakness. However, M-OC is distracted along with Rowan saw the Emperor plunging to his death down the Death Star reactor core. With M-OC distracted in which that he's shocked for the loss of the Emperor, Rowan hurls the Kyber Saber into M-OC's Arrowhead crystal.
M-OC says this was not in his calculation before exploding, disabling the deflector shield protecting the reactor core. Rowan realizes he won but that the rebels will blow up the second Death Star with him on it. Rowan is about to resign himself to death when he hears the screech of the StarScavenger ' s engines. Zander says they have got their little brother while Kordi opens the scoop. Rowan boards the StarScavenger shortly before the Millennium Falcon and several rebel starfighters arrive and blast the reactor core. The Freemakers and Quarrie escape the second Death Star as it explodes. Rowan is delighted his family came back for him and embraces them. The StarScavenger joins the rest of the rebel fleet in fleeing to Endor.
Victory celebrations [ ]
The Freemakers, Quarrie, and Valeria join the rebel celebration at Bright Tree Village. Quarrie tells Valeria that the X-wing's design could do some tweaking. Zander and Becky share a kiss while Roger chats with C-3PO and R2-D2, asking what they did to advance the cause of freedom.
Rowan asks his siblings where they go from here. Zander says they don't know because it is a pretty big galaxy. Kordi says that she has a feeling that it would need a lot of rebuilding. Roger quips that it would need a whole lot of rebuilding. Rowan suggests they could help with that.
Rowan then meets Luke Skywalker, whom he calls Master, and shows him his Force Building powers by levitating and reassembling a chest in the presence of the rebels. Wedge Antilles is impressed and asks who he is. Kordi tells Wedge that Rowan is their brother. X-wings fly overhead as fireworks explode in the skies above Endor.
Use this guide to relive the epic conclusion to the classic Star Wars trilogy while completing every last challenge along the way.
Quick Links
Coming off of the dour conclusion to The Empire Strikes Back, Return of the Jedi is a notably more triumphant story. And with its inclusion in Lego Star Wars: The Skywalker Saga, we are given a chance to relive it through the lens of Lego. With this episode will come more devilish challenges, but we have you covered on that front. Related: Lego Star Wars: The Skywalker Saga - All Minikits In Every Episode 6 Level From learning the fate of your robotic allies to hitting Boba Fett out of the air to using the force to turn Scout Troopers against each other, these challenges come in a number of shapes and sizes. However, much like how the Force guides look, we are going to guide you through each and every one of them.
A Plan To Save Han
| Challenge Name | Description |
|---|---|
| Don’t Blow Our Cover | Complete the Leia and Chewbacca area without causing any trouble. |
| Learn the Droids’ Fate | Discover the fate of R2-D2 and C-3PO within Jabba’s Palace |
| Rancor-cussion | Pick up and throw 5 objects at the Rancor using the Force. |
As long as you don’t whack any of the guards or patrons, you will accomplish the “Don’t Blow Our Cover” challenge. You can still freely destroy objects; this will not be considered “causing trouble”. And, if you want to get the True Jedi achievement, it is going to be necessary.
The “Rancor-cussion” challenge is another pretty straightforward one. When you drop down into the Rancor pit, just start picking things up with the Force and throwing them at the gigantic monster. The items aren’t in short supply, so you don’t have to worry about running out of things to throw.
You will need to come back in the free-play mode for the “Learn the Droids’ Fate” challenge, as it requires a protocol droid to complete. Outside of the prison cells, you will see a protocol droid terminal. If you interact with it, you will unlock a scene that shows what happened to R2-D2 and C-3PO. It is as easy as that. Conveniently, that room also leads to two Minikit pieces, so you are going to complete this challenge no matter what (if you are planning to come back for the Minikits, at least).
The True Jedi achievement is easy enough to get as long as you are diligently smashing the crates you come across. Just make sure you are within 10,000 or so by the time you make it to Jabba (and get thrown into the pit).
The Copa-Khetanna
| Challenge Name | Description |
|---|---|
| Boba Fett? No Sweat! | Destroy one of Boba Fett’s rockets while it is still in the air. |
| How do YOU like it? | Hit Boba Fett with a deflected bolt. |
| Trick Shot | Hit Boba Fett with a thrown lightsaber while he is in the air. |
All of the challenges for this stage take place during the Boba Fett fight. The first challenge you should focus on is deflecting a laser bolt back at him. Try to block just before the bolt hits you. You should be able to get it within a few attempts. Once you do this, you will complete the “How do YOU like it?” challenge.
The next two challenges can only be performed in the second phase of the fight. Don’t bother trying to throw your lightsaber at Boba Fett while he flies around in the first phase; the game won’t count it. During the second phase, he will hover around the ship, shooting missiles at you. This is when the game wants you to throw your lightsaber at him. Once you hit him, you will complete the “Trick Shot” challenge. Now, switch to Lando. Just aim to shoot one of the missiles as it is traveling toward you. It may take a few attempts, but you will eventually complete the “ Boba Fett? No Sweat” challenge.
The True Jedi achievement only requires 28,000 studs. These will be obtained easily enough by destroying the junk in this level. The stage isn’t that big, so it shouldn’t be hard getting it all.
Endor The Line
| Challenge Name | Description |
|---|---|
| Dodge This! | Fly through an AT-AT's legs. |
| In-Fighting | Make the Scouts fight amongst themselves with Jedi Mind Tricks. |
| No Safe Place | Damage the Scout troopers by overloading the generator. |
The first two challenges are dead simple. Switch to Luke and have him use his Jedi powers to cause panic in one of the Stormtroopers. Note that you don’t want to use the influence power here. The troopers will start fighting amongst each other. You will then complete the “In-Fighting” challenge. Next, look for a giant cube that is pulsating with energy. Shoot it until it explodes. This will complete the “No Safe Place” achievement.
The final challenge is completed in the speeder bike section. When you see an AT-AT, simply drive right through its legs. Doing this will complete the “Dodge This!” challenge.
As for the True Jedi achievement, it requires that you earn 65,000 studs. Given that the speeder bike section will loop until you kill all the troopers, and that there is a ton of stuff to shoot that is worth studs in this section, it is fair to say that you shouldn’t struggle to hit this goal. Just allow the stage to loop until you have all the studs you need and you will be fine!
The Chewbacca Defense
| Challenge Name | Description |
|---|---|
| Ewok and Roll | Blast the loose rocks with the AT-ST to take out Stormtroopers. |
| Helmet Drum Collection | During the first cover shooting section, land 3 headshots on the Stormtroopers. |
| Sweep the Legs | Trigger the log trap against the AT-ST. |
Now, at the first blockade, there will be a number of Stormtroopers and a turret gun in the back. Ignore all the soldiers and run straight ahead. Once you get behind the turret, an Ewok will crash into it. Now you can deal with the Stormtroopers without being gunned down by heavy turret fire. Focus on landing headshots. You need to get three of them to complete the “Helmet Drum Collection“ challenge.
Once you have dealt with those troops, build the horn in the back (where the turret used to be). Follow this path until you are fighting another battalion on a bridge. Destroy the turret in the back, then rebuild it. Once you have rebuilt it, the turret gun will be facing in the direction of an AT-AT. Fire at the logs to the right of it and you will complete the “Sweep the Legs“ challenge. Lastly, when you are in the AT-AT, shoot a giant pile of rocks on the right. This will complete the “Ewok and Roll” challenge.
As for the True Jedi achievement, you will need 110,000 studs. This is a pretty hefty amount. So, you will be wanting to clear out each section of all the junk. Thankfully, once you are in the AT-AT, you will be able to earn a ton of studs, just make sure you don’t let them fade before you get them. Don’t move too far forward in the final section or you may trigger the ending without having earned enough studs. Destroy everything in that last section and you should meet the requirement.
The final showdown against the Emperor is here. Luke, Leia, Han Solo, Lando, and everyone else arrive at Endor to bring down the Empire once and for all — or until the sequel trilogy. In the second half of Return of the Jedi, we’re blazing through three big levels. We’ll chase down speeders on Endor, join the Ewoks in a fight against the Imperial forces, and then fight Darth Vader on the deck of the Death Star 2. It’s non-stop action and adventure, and if you’re even lost or confused, we’ll show you how to progress. And how to find any minikits or level challenges we’ve collected along the way.
More Star Wars: The Skywalker Saga guides:
Mission: The Forest Moon
Before the Rebel Fleet can destroy the Death Star, a small team has to infiltrate the Imperial Base on Endor. Return to the Home One Hangar and ride the Imperial Shuttle. It’s parked in the hangar, and it’s the only one that will work! Travel back to Endor Space and fly into the level marker.
Level 3: Endor The Line
Welcome to the forest moon of Endor! Han and Chewie immediately get caught, so we’re playing as Leia and Luke. Drop down into the cover spots below and start blasting bad guys! More reinforcements will arrive once you clear the first group out.
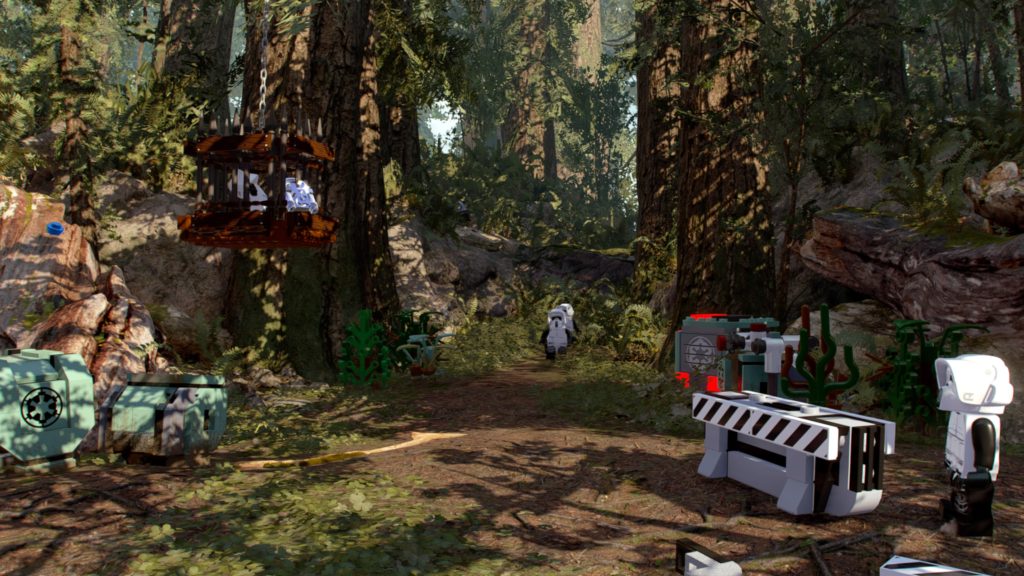
- Minikit: Right at the start of the level, shoot the red alien LEGO birds flying about the Scout Troopers. Blast all three to earn a minikit.
- Minikit: In the starting area with the Scout Troopers, grab a fully trooper disguise with Leia and then throw a bomb at the silver LEGO lock on the caged trooper. Pick up the keycard he drops and use it on the terminal nearby. You can build a keycard terminal with hopping bricks, opening the Imperial LEGO container.
- Minikit: In the same starting area, find this minikit hidden in the bushes to the right of the speeders that arrive. Grab it before chasing down the escaping scouts!
- Level Challenge: No Safe Place – In the first encounter with the Scout Troopers, shoot the generator on the right. It will overload and explore, destroying the enemy’s cover.
Hop onto the speeder bikes that are left behind by reinforcements and chase the bad guys. You’ll be automatically accelerating, so you can focus on firing blasters and dodging incoming LEGO trees. Defeating four scouts on speeder bikes is your objective here.
- Level Challenge: Dodge This! – During the speeder bike sequence, you’ll pass by an AT-AT walker. Fly right under it, between the legs, to score a simple level challenge.
- Minikit: During the speeder bike chase sequence, a scout will eventually appear with a minikit on his bike. Defeat the trooper and they’ll drop it so you can take it.
Keep shooting down enemy speeder bikes and dodging trees. Once you clear enough bad guys, the chase sequence will come to an abrupt halt. Thanks to C-3P0, the Ewoks happily embrace Luke and friends. They’ll even show us the best way to reach the Shield Generator. Nice!
Level 4: The Chewbacca Defense
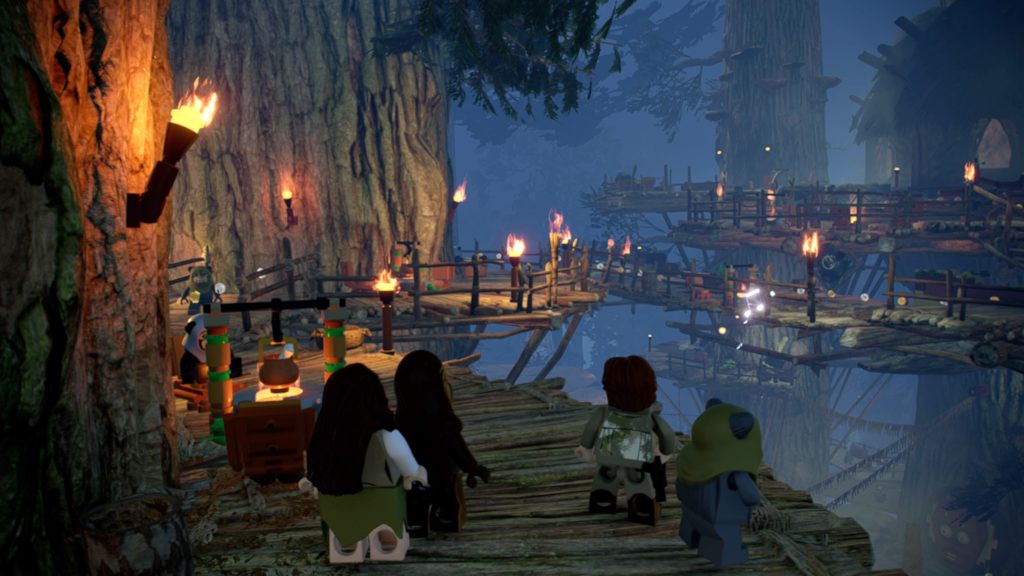
It doesn’t take long for Han to get captured. The Ewoks are here to save the day! Chewbacca teams up with Wicket to fight back the Empire. As Wicket, you can use Scavenger abilities to break cracked blue walls. Summon Wicket’s Breaker Blaster — a tutorial will appear if you’ve never used Scavengers. Be prepared for a fight against Stormtroopers ahead.
- Level Challenge: Helmet Drum Collection – During the first cover shooting section, land 3 headshots on the Stormtroopers.
- Nothing tricky here. During the first cover shooting section, score three headshots. Aim carefully!
After taking out the troopers, run toward the shielded turret until a cutscene shows an Ewok blasting it into bricks. Construct the bricks — you’ll have two options. You can build a Giant Hammer or an Ewok Horn. For this walkthrough, we’re building the Giant Hammer. Pull the orange handle to smash the LEGO crates, then construct to create a ladder leading up to the top of the ridge.
At the campsite ahead, defeat the troopers and smash the glowing LEGO crates. Build the hopping bricks to fix the lift up to the Ewok tree house platform. Along the path, you’ll find a wall. Use the blueprint with Wicket to learn the Net Launcher tool. Build the Net Launcher [hold B / Circle] then shoot a net at the X-shaped LEGO wall. Once the net is attached, you can climb over the wooden wall.
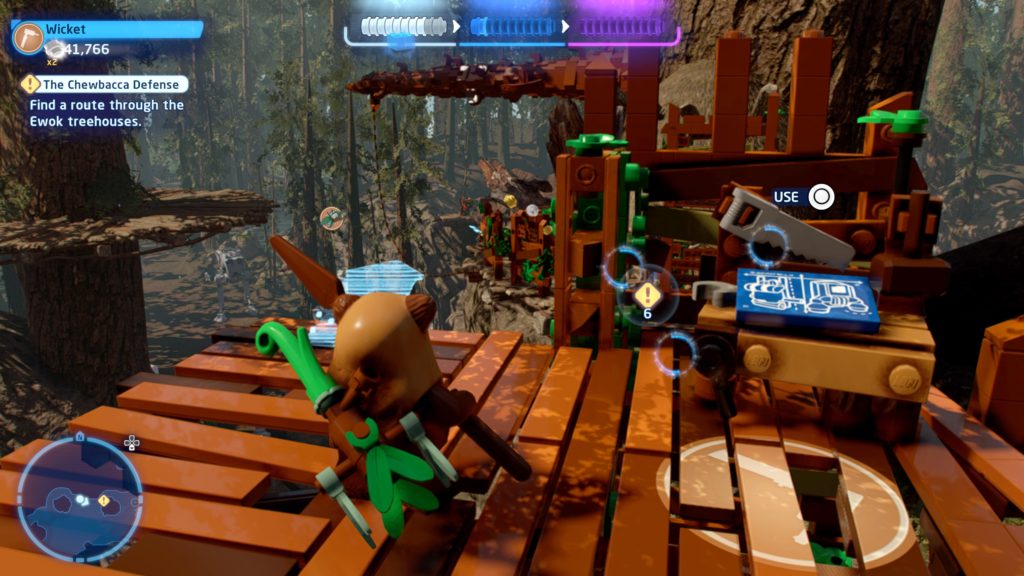
Over the wall, push the LEGO cart off the side of the platform, then use the Net Launcher to climb up to another blueprint. Use the blueprint to learn the Glider tool. Use the Glider with Wicket to cross the long gap and flip the switch to lower the bridge.
Destroying The Imperial Walker: As Chewie crosses the bridge, an AT-ST will appear from the forest. Aim for the two Ewok cages on the wooden platforms to the left and right of AT-ST walker. Once the two Ewoks are free, they’ll set off a trap and blow the Imperial Walker to bits.
Continue through the wooden platform path to swing onto some AT-STs. Now we get to control them and go on a rampage! Send the troopers packed with a taste of their own medicine.
- Minikit: In the AT-ST section, shoot down three speeder bikes that are zipping around to make a minikit spawn.
- Level Challenge: Ewok and Roll – Blast the loose rocks with the AT-ST to take out Stormtroopers.
-In the AT-ST section, look for a wall of loose LEGO rocks to the right just as you begin. Blast them and they’ll crumble, defeating any troopers underneath.
Approach the bunker to complete the level and save your pals. Next, we’re joining Darth Vader and Luke on the Death Star 2. It’s time for the final confrontation!
Level 5: Fulfill Your Destiny
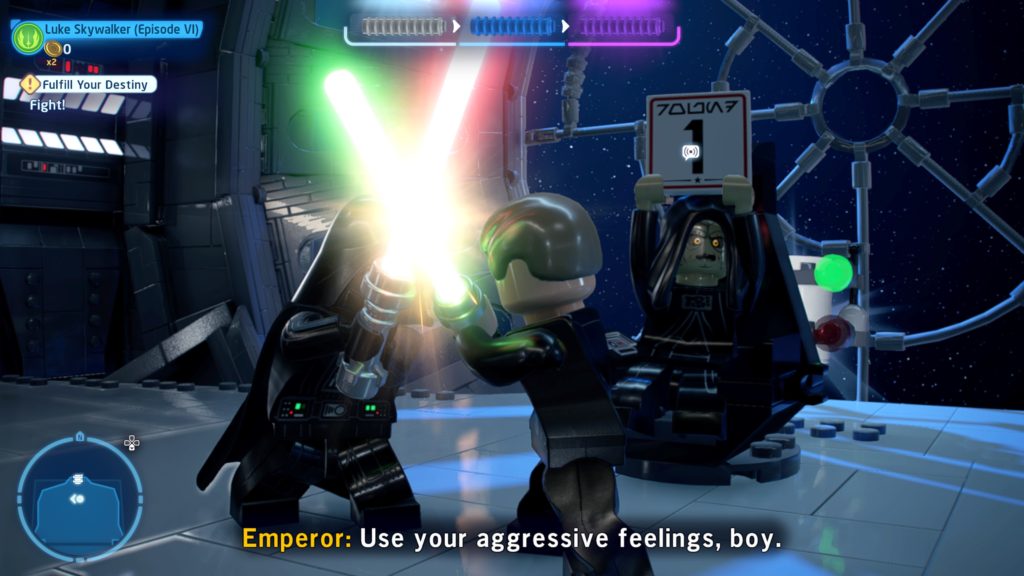
On the Death Star 2, we’ll have to reach Palpatine’s Throne Room — and you’ll need Darth Vader to do it. In this open-world area, use your Force power to Influence the Stormtrooper at the locked door. Take control and unlock the Imperial Terminal with the trooper. In the second room, Influence the guard behind the glass to stand on the red button, then Influence a stormtrooper nearby to use the Imperial Terminal and unlock the last door. The way to the final mission is clear.
BOSS: Darth Vader – We’re fighting Darth Vader. Again! This is a Jedi Battle, just like the end of Empire Strikes Back. Dodge, unleash a few combos, and complete any QTEs you get caught in. After defeating him once, Luke retreats to a high platform. Press the button prompts that appear to dodge Vader’s lightsaber throws. After the bridge falls, Luke has to hide from Vader.
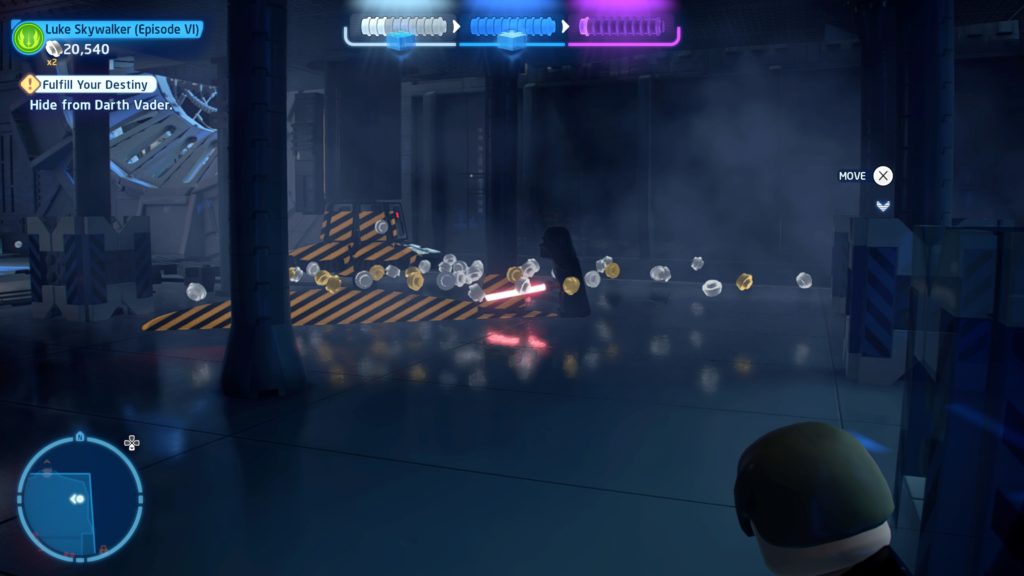
To hide from Vader, stay outside the yellow vision cone that appears. As long as you’re in the dark around and not standing in Vader’s vision cone, he won’t be able to find you. If you are caught, you’ll just start the second phase of the boss battle faster.
- Level Challenge: Make your way past Vader without being detected.
- Complete the first phase of the Darth Vader boss fight. When Luke falls into the dark area, avoid him until a cutscene plays. Don’t get caught! You just need to stay out of Vader’s yellow vision cone. If you get too close, he’ll also hear you and turn to look.
Defeat Darth Vader a second time, and the old Sith Lord will finally come to his senses. Instead of fighting with Luke, the father and son duo work together to battle Emperor Palpatine.

BOSS: Emperor Palpatine – The Emperor immediately unleashes a torrent of electricity. Shielding yourself with your saber, redirect the blast to the Emperor to give him a zap. More guards will pour into the arena. These guys are way tougher than your average troopers. Use combos by pressing a variety of different buttons — attack, jump and build. As you fight, the Emperor will summon lightning blasts on your position so keep moving to avoid a mean jolt.
- Level Challenge: Let the Hate Flow Through You – Cause damage to one of Palpatine’s guards by luring them into one of his attacks.
- In the final battle against Emperor Palpatine, he’ll summon red Royal Guards to fight you. During this fight, he’ll also blast you with lightning attacks. Stand near one of the guards and let the blast hit you and a guard at the same time.
To finally bring an end to the Empire, defeat each wave of guards then redirect the Emperor’s lightning back at him. At 50% health, he’ll jump down and unleash stronger blasts. Complete the QTE by mashing the button prompts, move the cursor onto the Emperor, and you’ll finally free the galaxy from tyrranny. I’d call that a job well done! That’s one trilogy done and two more to go.
Читайте также: