
Star wars the empire strikes back lego
Обновлено: 26.04.2024
There are 25 Minikits to collect that are split up into five unique levels in LEGO Star Wars: The Skywalker Saga's The Empire Strikes Back.
The Empire Strikes Back has 25 Minikits to collect that are split up into five levels in LEGO Star Wars: The Skywalker Saga. Collecting a set of five Minikits in any level will award players with a new Microbuild ship that can be used to explore space or complete unlocked story missions in Free Play. When using a Microbuild ship, the player's active character can be seen sitting on top of it rather than flying around inside the ship.
Most of the levels in The Empire Strikes Back will need to be replayed in Free Play to obtain every Minikit. Characters in LEGO Star Wars: The Skywalker Saga have unique abilities and are split into different categories, so some Minikits may require the skills of a particular class. In Free Play for The Empire Strikes Back, players can change out their team at any time, except during the last mission. While fighting Darth Vader, the characters will switch back to Luke and R2-D2, but after the fight sequence they can be swapped again.
When selecting a level, players will need to make sure they choose Free Play instead of Story Mode so their characters aren't locked in. If Story Mode is chosen accidentally, players can pause and quit the mission, then start it over again in Free Play. There are also some levels in The Empire Strikes Back where progression prevents backtracking, so players should make sure they explore every area thoroughly before moving on to avoid missing any secrets.
LEGO Star Wars: The Skywalker Saga - Hoth and Cold Minikit Locations
All of the Minikits in Hoth and Cold can be collected with the LEGO Star Wars: The Skywalker Saga characters used in the first playthrough, but they're spread all around the map. Due to the low visibility, it can be hard to notice the Minikits without having the upgrade that highlights them. Collecting the five Minikits in Hoth and Cold will unlock the GR-75 Medium Transport (Micro).
LEGO Star Wars: The Skywalker Saga - Assault on Echo Base Minikit Locations
The Minikits in Assault on Echo Base are some of the easiest ones to find, especially if the ability to highlight them is unlocked. There are some that require players to fly low under bridges, but the ship is fairly easy to maneuver without crashing. The Minikits in this level will unlock the Imperial Star Destroyer (Micro).
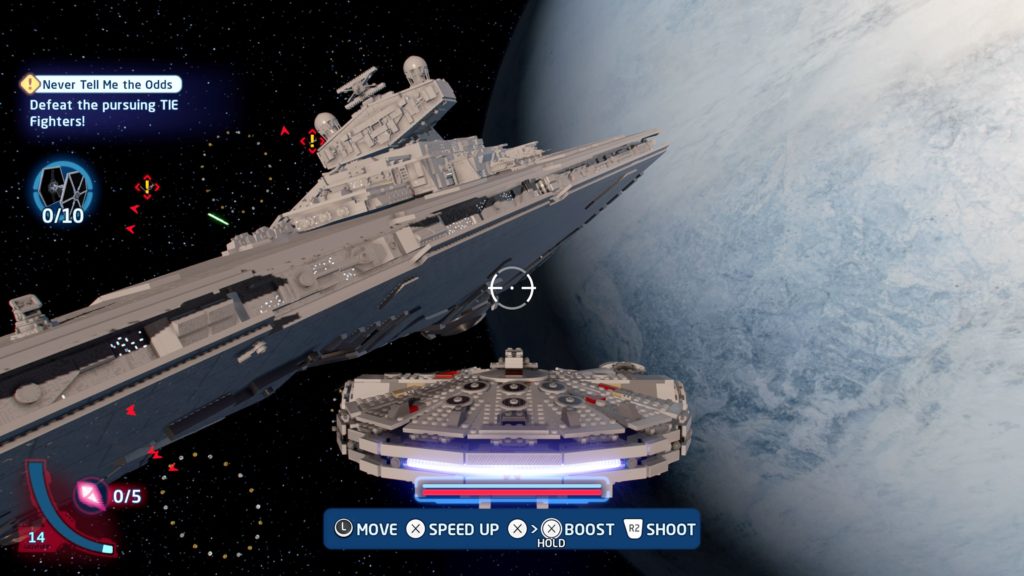
LEGO Star Wars: The Skywalker Saga - Never Tell Me the Odds Minikit Locations
Most of the Minikits in Never Tell Me the Odds are at the end of the level after players enter the asteroid field and get into the final canyon. Collecting them will require some precision flying, so it may take a few tries to get them all. Finding the five Minikits in Never Tell Me the Odds will unlock LEGO Star Wars: The Skywalker Saga's Imperial TIE Bomber (Micro).
LEGO Star Wars: The Skywalker Saga - Hibernation Station Minikit Locations
Hibernation Station is a relatively small level, but players will need to revisit it to find every secret. With the right team, players can collect all of the Minikits in this level in just a few minutes. Finding all five of the Minikits in the Hibernation Station level will unlock Boba Fett's Starship (Micro).
LEGO Star Wars: The Skywalker Saga - Revelations! Minikit Locations
This level is centered around a boss battle with Darth Vader, so the Minikits need to be found in between fighting phases. The most difficult part about collecting Minikits is avoiding triggering the next stage of the battle before finding them, because there are certain spots where players can't backtrack. The Minikits in this level will unlock the Rebel X-wing (Micro).
Star Wars Episode V: The Empire Strikes Back is the second Chapter in LEGO Star Wars II: The Original Trilogy and the fifth chapter in LEGO Star Wars: The Complete Saga.
Contents
Story
The Empire dispatched many Probe Droids across the galaxy. One of them lands on the ice planet Hoth. Luke Skywalker notices it in the form of a meteorite and checks it out with his binoculars. Then, a Wampa attacked him and hanged him on the ceiling of an ice cave. Luke summoned his lightsaber an cut the Wampa's arm off. He escaped the cave and was rescued by Han Solo. The Empire identified the Rebel base and Darth Vader ordered to set the Star Destroyer's course to the Hoth system. However, they went to close to the planet and the Rebel Troopers prepared to battle the AT-ATs. They tied up the walkers and blew them up with bombs. However, Luke was hit, and jumped out of his Snowspeeder. He then threw a grenade in the AT-AT. It fell out so he kicked it back in, blowing up the walker.
However, the Empire was still winning so Han Solo and Princess Leia had to escape from Echo Base. They fought many Snowtroopers on the way to the Falcon, meeting up with C-3PO and Chewbacca. When they got in the ship, the lights went out so Han snuck a kiss on Leia. As they left Hoth, Luke headed to Dagobah.
The Falcon destroyed the turbolasers on the Star Destroyers orbiting Hoth. They then navigated through an asteroid field. They then attached the Falcon to a Star Destroyer an unattached when it dumps it's trash. Unbeknownst to them, the Bounty Hunter Boba Fett followed them.
Luke arrived at the swamp planet Dagobah. R2-D2 nearly got eaten by a swamp monster, but apparently he didn't taste very good. Luke then meets Yoda. Yoda then taught Luke the ways of the Force. Luke and Yoda faced a spectral Darth Vader. Luke tried to lift his X-Wing out of the swamp, but he couldn't do it, so Yoda lifted the X-Wing. Luke prepared to leave when the ghost of Ben Kenobi appeared. Luke left Dagobah to head for Bespin.
Luke arrived in Cloud City. He fought Darth Vader. At the end of the duel, Vader cut off Luke's hand and pulled out a photo of Anakin and Padmé, revealing that he is Luke's father. Luke let go of the thing he was holding on to and fell through a tunnel and hanged underneath Cloud City.
The Falcon arrived in Cloud City, and Han saw his old friend Lando Calrissian, who wasn't too happy to see him, but took an interest in Leia. It then turns out that Lando was in league with Vader. Han was then frozen in carbonite. Lando had a change of heart and helped the rebels. They chased the Bounty Hunter Boba Fett, but he escaped in the Slave 1 with Han, but at least R2 arrived. The Rebels fought through Cloud City and escaped on the Falcon. However, Leia sensed Luke was in peril and rescued him and the ship escaped. Luke was given a new hand which spazzes out a lot.
The Death Star is destroyed, but the Empire isn’t beaten. LEGO Star Wars: The Skywalker Saga continues as we rejoin Luke, Han Solo, Leia and all the other Star Wars heroes in Episode 5: The Empire Strikes Back. The first levels of Empire take place on the frozen wastes of Hoth, with Han Solo searching for a lost Luke across the vast snow fields.
After that, the Empire strikes, sending gargantuan walking machines to destroy the Rebel Base. There’s a lot to explore in these levels, and the first level totally changes things up, letting you tackle objectives in whatever order you want. We’ll be seeing even more levels just like that in the future. For now, let’s escape the evil Empire together with the first missions of Empire Strikes Back.
More Star Wars: The Skywalker Saga guides:
Level 1: Hoth and Cold
The story begins with C-3P0 and R2-D2 exploring Echo Base on Hoth. Han Solo has been searching for Luke. He hasn’t returned yet, and the Empire is closing in. Follow the markers to the control center to get started.
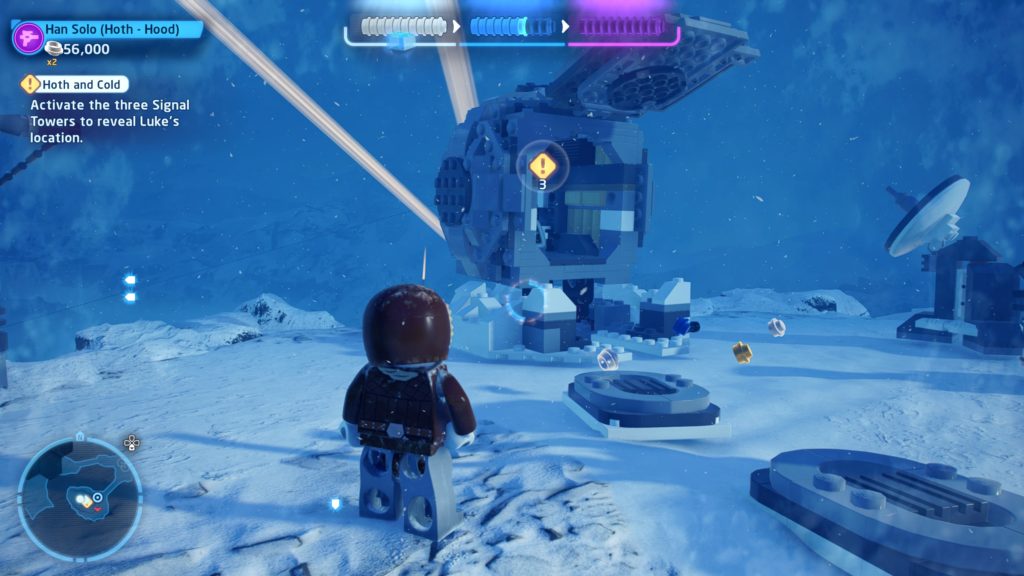
The First Signal Tower: In this level, Han needs to activate three Signal Towers to find Luke. The level is surprisingly vast, so open the map to help navigate. We’re going to the center-north objective marker first. This is an old speeder site. Flip the switch, then ride the speeder as it slowly turns. Shoot the bridge once you pass by to knock it down. Now we can reach the signal tower across.
On the bridge, use Han Solo’s sharpshooter ability on the strut beneath the raised bridge to auto-aim and blast it down.
- Level Challenge: Not a Probe-lem – Shoot 1 probe droid out of the air without them spotting you first.
-Easy. Just shoot a probe droid down before they spot you. Stay out of their red zone to avoid an alert! - Level Challenge: Avoid the Droid! – Shoot 5 probe droids out of the air without them spotting you first.
Minikit: To unlock an early (and tricky) minikit, you need to blast 5 Snowmen.
Crossing the bridge, you’ll reach the signal tower. We’ll need to climb to the top! Push the LEGO crate so you can jump to the orange handholds, then jump onto the spinning poles to reach the very top. Take your time and wait for “Jump” prompts to appear. That way you won’t miss.
At the top, use the terminal and move the signal beam to face the sky. The speed of the beep will show you where to place it. The faster the beep, the closer you are. Think of it like hot and cold. When the signal beeps faster, you’re warmer. Slide down the zipline, and we’ll now approach the eastern signal tower.
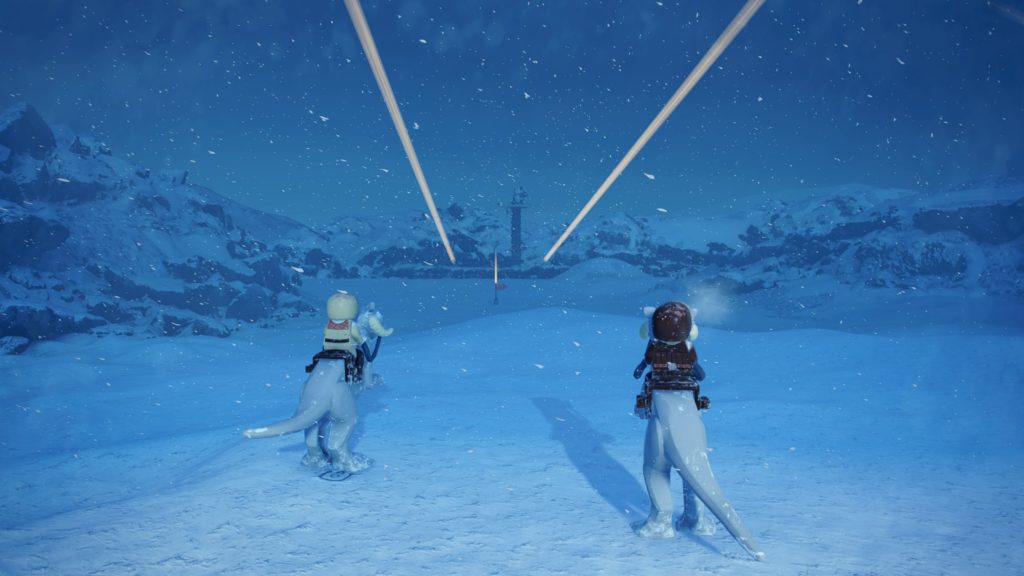
The Second Signal Tower: Ride your Tauntaun east until you reach an old outpost. Use the switch by the huge gate to open the path forward — to reach the tower, we need to close the massive blast doors. Go inside after opening them, then move the LEGO crate to the hill. Place it at the slope down and it will slide, blocking the gate. Now we can close it but keep it open enough to slip through.
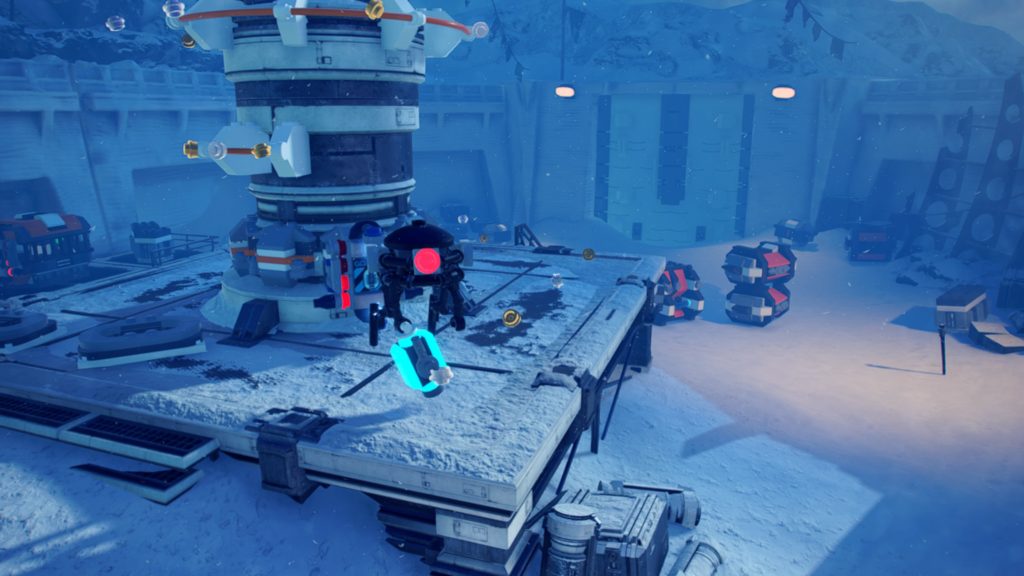
With the gate closed (and obstructed by the LEGO crate) go back up the stairs and jump the gap to reach the second tower. As you reach the tower, an annoying Probe Droid arrives to steal the power battery. On the snow, look for hopping bricks and construct the Magnet — only the Magnet will work. The droid is immune to lasers! Once your magnet is constructed, you can plug the battery back in and climb to the top of the tower. Align it just like before.
The Third Signal Tower: Travel south and cross the ice bridge to the signal tower area. To reach it, you’ll need to commandeer a turret to blast the ice covering the frozen bridge. Once you enter the area, go right and cross another ice bridge to reach the top of a rocky spire — blast all the ice, reach the top of the third tower, align the laser and you’ll finally find Luke’s location.
Travel to the green market to save Luke from the angry Wampa monster. That completes the level and leads to our next big confrontation. The Empire is attacking Echo Base!
Level 2: Assault On Echo Base
Back in Echo Base, you’ll need to prepare Luke’s Snowspeeder. Use the Astromech Terminal behind his speeder, then smash all the glowing LEGO objects so you can build up the wing. Use the force to move the complete wing onto the speeder, and the level marker will appear!
The Empire is assaulting Echo Base! Your first goal is to destroy the four AT-ST Walkers. They’re the big guys stomping around the rebel battle lines. Regular blasters are enough to destroy these guys.
After defeating the first four AT-STs, you’ll need to destroy six. Clear them all out and you’ll move down the line toward a larger arena with a huge four-legged AT-AT. To defeat them, lock on and fly through the circles to wrap your wires around the legs, forcing them to tumble over. You’ve figured out their weakness! After toppling one, you’ll need to topple three more.
Level 3: Never Tell Me The Odds
On the way out of Echo Base, you’ll have to blast your way past groups of Snowtroopers. Don’t spend too much time exploring! The base is in chaos, and you’ll be better off exploring in Galactic Freeplay. Once you reach the hangar, the level will begin.
We’re getting a second vehicle mission! In space, you’ll have to outmaneuver a pair of Star Destroyers. Blast 10 Tie Fighters, then another Star Destroyer will appear — before you can escape, you’ll have to disable the battleship by blasting the tracking dish and the turrets. You have to use Proton Torpedoes. You can get more Proto Torpedoes from the Tie Bombers — Tie Bombers are easy to spot from far away. Just look for the purple trails they leave behind as they fly around.
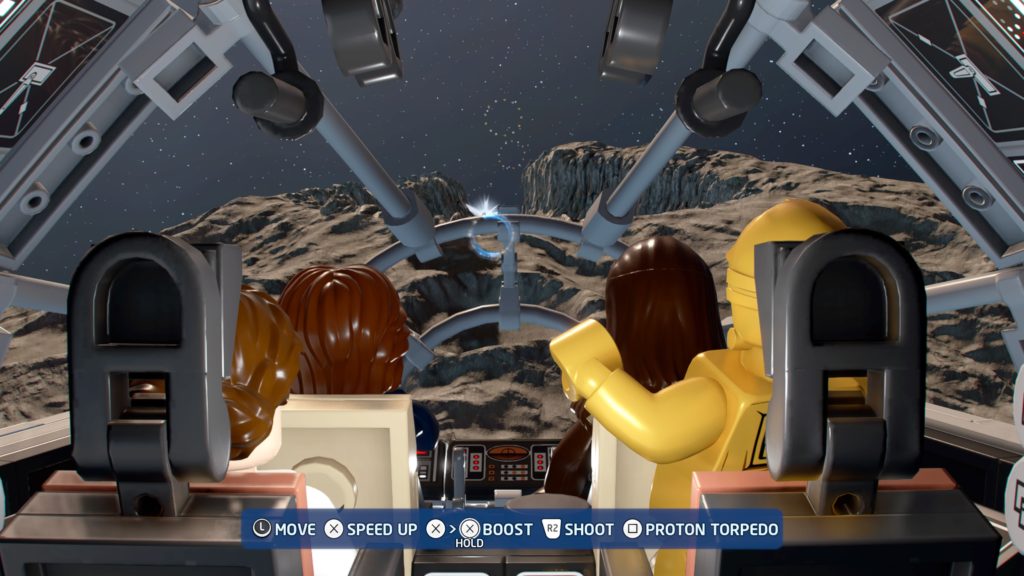
Lock-on and blast 10 of the high-lighted Star Destroyer parts and you’ll escape into the Asteroid Field. Nothing to do here but fly forward and try your best to avoid all the giant floating rocks.
After a quick flyby through the asteroid surface canyon, you’ll complete the level! That’s a short pair of fun levels, but we’ve finally — mostly — escaped the Empire. Next, we’ll rejoin Luke on his quest to the Dagobah system. Time to meet Adult Yoda!
This guide will help you do everything from defeat Darth Vader in record time to perfectly tripping a whole gaggle of AT-ATs.
Quick Links
After completing the A New Hope section of Lego Star Wars: The Skywalker Saga you will unlock The Empire Strikes Back. This is, famously, one of the darker Star Wars episodes. Which makes it a fun episode to play through here, given the goofy tone of this game. And, of course, alongside this delightful episode comes a thrilling set of new challenges to complete. Related: Lego Star Wars: The Skywalker Saga - All Minikits In Every Episode 5 Level From having to fly through the legs of an AT-AT, to needing to beat Darth Vader in record time, these challenges are going to keep you on your toes. Thankfully, you have this guide to help show you the way.
Hoth And Cold
| Challenge Name | Description |
|---|---|
| Avoid the Droid! | Shoot 5 probe droids out of the air without them spotting you first. |
| Not a Probe-lem | Shoot 1 probe droid out of the air without them spotting you first. |
| Stylish Way Down | Find and use all 5 zip wires. |
In Hoth and Cold, we get a rare example of a two-tiered challenge. The “Not a Probe-lem” and “Avoid the Droid” challenges have the exact same goal. You just need to shoot the probe droids before they spot you. There are a number of opportunities to do this, just make sure you aren’t in their sight radius (which appears all around them). If you give yourself enough distance this will be easy as pie.
The “Stylish Way Down” challenge simply requires that you take the zip wire down from each key location. There is a zip line on each satellite tower, as well as a zip line that crosses the chasm, and lastly, there is a zip line located at the laser turret you use to de-ice the bridge. These are essentially unmissable, so don’t worry about not being able to find them.
The 100,000 stud requirement for the True Jedi achievement is steep, but as long as you are scouring the tundra for debris, it is more than doable. Just make sure you don’t head to the end goal point, after you synchronize all three satellites, before getting all the studs required.
Assault On Echo Base
| Challenge Name | Description |
|---|---|
| AT-ATrick | Fly through the legs of an AT-AT |
| Show Off! | Trip up the AT-ATs without the tow cable breaking. |
| Rogue Squadron, Form Up! | Complete the level without being defeated. |
With the Assault On Echo Base mission, you have two challenges that demand that you not fail a single time. So, don’t feel down if you have to repeat this mission once or twice. First of all, the AT-ATrick is the sketchiest of the challenges. If you mess this up, you will instantly explode. This is unfortunate because if you explode, you will lose the “Rogue Squadron, Form Up!” challenge, which demands that you not be defeated. The trick is that you need to fly between the legs when the AT-AT is standing still. So, circle around until you see it taking a break, then swoop through the legs.
The “Show Off” challenge is easy enough to complete. Just fly into the rings that appear while you are attached (you don’t even have to hit every ring). However, if you get mixed up and fly in the other direction, or miss too many rings, your cable will break and you will not be able to complete this challenge this time around.
Beyond that, don’t get destroyed and you will claim the “Rogue Squadron, Form Up!” challenge, and gather 30,000 studs and you will achieve the True Jedi achievement. Just fly through stud rings and you will be more than fine.
Never Tell Me The Odds
| Challenge Name | Description |
|---|---|
| Asteroid Evasion | Avoid contact with the asteroids during the asteroid chase. |
| Proton Power | Destroy 5 TIE Fighters using Proton Torpedoes. |
| Take Evasive Action! | Complete the Star Destroyer encounter without being destroyed. |
There are BARELY challenges in this mission. Both “Asteroid Evasion” and “Take Evasive Action!” amount to you just not dying or running into anything. The diciest moment you are going to encounter is in the asteroid field if you are trying to get all the Minikit pieces, but even then, those asteroids aren’t moving that fast.
For the Proton Power challenge, you simply need to shoot down five TIE Fighters with Proton Torpedoes. The torpedoes will start being available in the second section of the battle (when the third Star Destroyer shows up). Just make your first priority destroying the TIE Fighters, then move on to the Star Destroyer parts. That way you can’t accidentally complete this section without accomplishing the challenge.
On theme with the ease of the rest of the challenges, the 30,000 studs required to complete the True Jedi achievement are easily obtained if you just casually fly through the stud rings.
Hibernation Station
| Challenge Name | Description |
|---|---|
| You Want to Make That Move? | Build a distraction for the Stormtroopers. |
| Hello, What Have We Here? | Discover and loot an Empire Weapon Cache as a disguised Rebel. |
| Surprise! | Trigger the secret defense on the Landing Pad. |
The first thing you are going to want to do here is to find a few Stormtroopers and give them a good shellacking. There is a small batch of them near where you start this level off. Once you have dismantled them, have Leia wear all the different Stormtrooper pieces. This will give you access to an imperial grenade and the ability to use Imperian terminals. Now, work your way to a hallway that is lined with barricades. Off to the side, you will find some junk to break into pieces. Then, you can rebuild it into a distraction. You want to build the Dejarik Board distraction! This will complete the “You Want to Make That Move?” challenge.
Now, continue forward; you will see an Imperial captain take a card key and run away. Follow him to a set of security doors that need destroying. Just past those doors, on your left, you will see a weapon chest. Use your disguised Leia to open it. Grab one of the weapons and you will complete the “Hello, What Have We Here?” challenge. Finally, at the very end of the stage, when you are on the landing pad, drive the gonk droids to the power plates to the left and to the right of the bridge. This will unlock the landing pad turrets. Use those to hold off the Stormtroopers and blast Boba Fett’s ship when it comes around. This will complete the “Surprise!” challenge.
The True Jedi achievement requires a pretty lofty 100,000 studs. However, there is a ton of crap to destroy on your path to the end of the stage. You can absolutely get a very respectable chunk of studs at the end when you are gunning down the Stormtroopers with the turret (just run out and collect the studs after you take out the first wave).
Revelations!
| Challenge Name | Description |
|---|---|
| Force Feedback | Force Throw 3 separate objects at Darth Vader. |
| Most Impressive | Complete the level in under 10 minutes. |
| Ugnaught-y | Find all of the hidden Ugnaughts throughout the level. |
Your main focus in this mission is going to be speed. So, a quick word of advice, since there are two Minikit pieces that are inaccessible during the story mission run, don’t bother with the Minikit stuff at all. Just pursue the challenges.
Start the mission and beat Vader’s first form. He will run, forcing you to chase after him. When you come to the three tunnels, use R2-D2 to open the left tunnel using the terminal (it is hidden under some debris). This will uncover the first batch of missable Ugnaughts. When you enter into the next room, just go into either wing of the building. Vader will appear, you will battle once again, and he will eventually start tossing stuff at you. Take the initiative and start tossing stuff at him instead. This will complete the “Force Feedback” challenge.
Vader will then toss you out a window; after you work your way back around, you will need to find him in one of the rooms. Before you do, go to the back and open the room on your left, this will reveal the other set of hidden Ugnaughts. Completing the “Ugnaught-y challenge. Open the door across from this one and complete your fight with Vader. As long as you didn’t dally too much, you will earn the “Most Impressive” challenge.
The True Jedi achievement will require that you earn 100,000 studs. This is very achievable in this stage, as it is loaded with junk. Just hammer the force button as you go and Luke will probably blow up enough stuff to get you the amount of studs you need.
James is a writer for TheGamer. He typically spends his time playing games, thinking about games, overanalyzing games, and sleeping. While he has an appreciation for all genres, he is especially interested in fighting games and RPGs. He also enjoys reading books and watching movies and will happily overanalyze those as well.
Luke, I'm your guide to every last Minikit in The Empire Strikes Back.
Quick Links
The Empire Strikes Back is the legendary sequel to the first film in the original series. Now you have a chance to relive this thrilling episode in Lego Star Wars: The Skywalker Saga. Of course, with every episode comes another wide assortment of Minikit pieces, and The Empire Strikes Back doesn't disappoint. Related: Lego Star Wars: The Skywalker Saga - All Challenges In Every Episode 5 Level From the Minikit pieces hidden among asteroids, to pieces scattered around the majestic Sky City, you will be collecting these Minikits in a wide variety of classic Star Wars locations. And with this guide, you will have no fear of missing out on any of these elusive collectibles.
Hoth And Cold
Throughout the level, you will locate snowmen. Once you have destroyed all five, you will be rewarded with the “Snow Friends of Mine” Minikit piece. One of the snowmen is on the path to the laser turret you need to clear the bridge of ice, another is sitting outside the fortress, and the other three snowmen are located next to the satellite towers.
Inside the fortress, shoot the droid carrying the power core. However, instead of using it on the nearby tower, use it on the nearby crate. This will get you the “Repurpose and Reuse” Minikit piece. During your exploration of Hoth, you will find a broken-down Snowspeeder. Get it up and running and you will be able to fire its lasers. You will need to use this to clear a nearby bridge of ice, but if you shoot the nearby mound of ice you will also find the “Meltdown” Minikit piece.
There are a series of satellite dishes. One of them will shoot a laser. Just arrange them so that the laser blast will hit the nearby mound of ice, revealing the “Chain Reaction” Minikit piece. Finally, after you have aligned all the satellite towers, you go to the next checkpoint marker. In that area, there is a droid carrying the last piece. Shoot it and it will drop the “Up To Snow Good” Minikit piece.
Assault On Echo Base
Both the “Snowed Under” and the “Snow Problem” Minikit pieces are hidden under little snow bridges. The first is to your right in the first area, and the second is in the Northeast corner of the second area.
The “Did Somebody Order Ice?” and “Let It Go” Minikit are under blocks of ice. One of them is to the right in the first area, and the other is on the right leaving the path that leads into the final area (where you fight the AT-ATs).
Lastly, the “Probe-ation” Minikit is obtained by shooting six of the droids rolling around. They are everywhere, so it won’t be hard to get six of ‘em. And that is it.
Never Tell Me The Odds
For starters, you will start the mission facing a Star Destroyer. The “They Can’t Have Disappeared” Minikit piece is right at the top of that Star Destroyer. Fly up and claim it.
The Minikits found in the asteroid section are dead easy to find if you have the collectible detector skill leveled up. It may be a bit of a nightmare trying to find them without it.
After that, there are no more Minikit pieces until you hit the asteroid field. Here, the “Rock Steady” Minikit piece is claimed by shooting five Minikit-shaped asteroids. The “Avoid the Asteroid” Minikit will be a cluster of asteroids in the dead center of the screen. Finally, you will encounter the “Exogorth Leftovers” Minikit wedged between a large rock and the wall once you get to the surface of the giant asteroid.
There is one more Minikit, but this one requires that you repeat the mission in the free-play mode. This mission is a race. The race will become available in the second part of the Star Destroyer battle (when the third ship arrives). You simply need to hit all the translucent green orbs in order. The path is pretty straightforward, but there is a trick: you have very little time.
So, right from the beginning, you are going to need to punch it. That means tapping the acceleration button twice and holding it. You shouldn’t need to let go of it. Don’t worry if you don’t get it the first time, the mission will allow you to instantly restart after you complete it. After a few attempts, you will learn the pattern, earn the gold ranking, and get your “Imperial Space Race” Minikit piece.
Hibernation Station
Use C-3PO to get the password from the terminal in the first area, then input the password outside the dining-room door. This will unlock the dining room and give you access to the “Password Puzzle for Peckish People” Minikit piece.
Not far away from the beginning area, there is a small Stormtrooper blockade (their backs will be facing away from you once you arrive here). Take these guards out and there is another protocol droid console on your right. Use C-3PO again to interact with this terminal and you will take control of the droid inside the furnace room. Have this droid open the door and then come outside to meet C-3PO. Now, enter the furnace room, kickstart the furnace, and the “Infernal Furnace” Minikit will pop out.
When you see a couple of Stormtroopers sitting outside on a platform, interact with the rebel terminal next to them. Once you turn this on, you will be able to push their platform forward (by pushing the nearby block) and eject them from it. This will then provide you with the “Sightseeing Stormtrooper” Minikit piece.
Once you take out the Imperial captain to claim the key card, use Lando’s grappling hook to grab the bar above the elevator with the malfunctioning door. Holding onto this bar will pull it down and fix the door, allowing you to access the “Lofty Lift Lever” Minikit piece from inside the elevator.
Now, return to the mission in the free-play mode. Use an astromech droid to open the door at the very beginning of the stage. From there, destroy the object, revealing a power core. Insert the core in the open slot. This will grant you the “Small Systems Secret” Minikit piece.
Revelations!
Since the story mission requires you to complete it in a relatively short amount of time, you are better off obtaining the Minikit pieces in the free-play mode. Considering that two of the Minikit pieces are only able to be obtained in free-play, that works out anyway.
The first Minikit piece is found after you defeat Vader’s first form. Pull the switch near the Ugnaughts and you will reveal the “Carbon Copy” Minikit piece. Now, go down one of the tunnels; it doesn’t matter which. From the opposite side, you can enter the center tunnel. Have a character with a grappling hook (R2-D2 in the story mode) pull the grapple point that is on the ceiling and you will obtain the “Hatching a Plan” Minikit piece.
In the very next area, you will enter a dark room; instead of looking for Darth Vader, switch to a protocol droid. Have them interact with the nearby terminal and they will pull up the “Tabletop Games” Minikit piece. After Darth Vader blows you out the window, you will drop close to a hero-class character terminal. Have a hero character interact with it and reveal the “In Case of Emergency” Minikit piece.
Lastly, after you have made your way back around, the room on your right is a giant closet for Lando Calrissian. He has a self-portrait in the center of the room. Destroy the portrait and you will reveal the “Vanity Room” Minikit piece.
James is a writer for TheGamer. He typically spends his time playing games, thinking about games, overanalyzing games, and sleeping. While he has an appreciation for all genres, he is especially interested in fighting games and RPGs. He also enjoys reading books and watching movies and will happily overanalyze those as well.
Читайте также: