
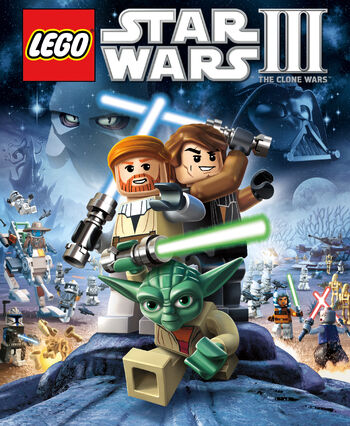
Lego star wars 3 all minikits
Обновлено: 01.05.2024
With another episode comes another army of Minikits to find. Thankfully, this guide will help you locate every last one.
Quick Links
Concluding the prequel trilogy, Episode 3 concludes the tale of Anakin Skywalker. Lego Star Wars: The Skywalker Saga gives us a more comical spin on Anakin Skywalker's descent into the dark side. However, while Anakin loses himself looking for power, you are at risk of getting lost looking for Minikits.
The Minikits available in Revenge of the Sith are hidden on the sides of cliffs, concealed in the ceilings of rooms, and often require character-types that are only available in the free-play mode. We will guide you through how to best acquire every last Minikit in the fewest amount of attempts possible.
Out For The Count
Nearly every Minikit piece in this stage will require that you obtain it in the free-play mode. Since many of them lead into each other, you may as well acquire them all in one go in the free-play mode.
At the beginning of the stage, take a left (using a villian-type character to blow the door down). Head straight until you are in the southeast corner of the map. Here, there is a room filled with droids and spare parts. Destroy everything in the room and you will be able to assemble the "Extra Parts" Minikit piece. Now, leave that room and take a left. Run down this hallway until you run into an astromech console on your left. Use an astromech droid to open the door and enter the room. Pull all the switches and you will acquire the "We're Smarter Than This" Minikit piece.
From that room, take another left and go straight and you will run into a wall of lasers with the top half blinking in and out. Push the nearby block up close to the laser wall and jump over the lower section. Just around the corner, there is a pile of junk. Destroy it and you will obtain the "It Lay Beyond Lasers" Minikit piece.
Now, return to the starting area. Here you are going to want to progress through the stage allowing the arrows to guide you. Once you hit a room that has a silver chest, use a villain unit to blow it up and build a lever that will allow you to open the door on your right. Move through that door and continue straight until you hit a room with a protocol droid terminal. Use a protocol droid to open the closet, revealing the "Store Room Surprise" Minikit piece. Use the protocol droid to also control the Droideka, which will burst through the door, allowing you to progress.
In this next area, there will be a door that can be cut open using a lightsaber. In that room, there is a statue of General Grievous. Use the Force to place a lightsaber in each of his hands. Once you do this you will be rewarded with the "Grievously Egotistical" Minikit piece.
100% Walkthrough guide showing all 10 Minikit Locations, Red Bricks and Gold Bricks.
All locations are per video

1

1

| 3,271 | уникальных посетителей |
| 232 | добавили в избранное |

All 18 Red Brick Locations
00:14 - Geonosian Space Mission
02:50 - Christophsis Space Mission
05:25 - Rugosa Space Mission
07:30 - Naboo Space Mission
10:45 - Florrum Space Mission
12:05 - Quell Space Mission
13:50 - Ruusan Moon Space Mission
15:06 - Dead Moon of Antar Space Mission
00:30 - Vassek Space Mission
02:20 - Rishi Moon Space Mission
05:40 - Saleucami Space Mission
07:37 - Malastare Space Mission
10:05 - Coruscant Space Mission
11:49 - Tatooine Space Mission
13:20 - Maridun Space Mission
15:20 - Rlyoth Space Mission
00:07 - Naboo Republic Assault Mission
09:08 - Christophsis Republic Assault Mission
21:57 - Ruusan Moon Republic Assault Mission
31:55 - Coruscant Republic Assault Mission
40:43 - Tatooine Republic Assault Mission
51:30 - Quell Republic Assault Mission
59:08 - Dead Moon of Antar Republic Assault Mission
1:06:23 - Vassek Republic Assault Mission
00:08 - Ryloth Replublic Assault Mission
05:32 - Malastare Replublic Assault Mission
11:00 - Rugosa Replublic Assault Mission
17:20 - Geonosis Replublic Assault Mission
22:32 - Florrum Replublic Assault Mission
30:13 - Maridun Replublic Assault Mission
34:24 - Rishi Moon Replublic Assault Mission
38:23 - Saleucami Replublic Assault Mission
Home » Guides » PC Guides » LEGO Star Wars 3 Minikits Locations Guide (Wii, PC, PS3, Xbox 360)
LEGO Star Wars 3 Minikits Locations Guide (Wii, PC, PS3, Xbox 360)

Our Lego Star Wars 3 The Clone Wars Minikits Locations Guide shows all the minikits in the Xbox 360, PS3, Wii and PC game.
There are 10 mini-kits to be found in each mission. Below lists each and every mini-kit along with video of where each location is at in each mission.
Table of Contents
Prologue
Count Dooku
General Grievous
Asajj Ventress
Epilogue
Separatist Missions
Index of LEGO Star Wars 3 Guides:
- This Page: Lego Star Wars 3 Minikits Locations Guide
- New Page: Lego Star Wars 3 Red Power Bricks Locations Guide
- New Page: Lego Star Wars 3 Gold Bricks Locations Guide
- New Page: Lego Star Wars 3 Walkthrough
- New Page: Lego Star Wars 3 Characters List & Unlock Guide
- New Page: Lego Star Wars 3 Vehicles List & Unlock Guide
- New Page: Lego Star Wars 3 Achievements & Trophies Guide
- New Page: Lego Star Wars 3 Cheat Codes List
- For Fun: How to talk like Lego People
- For Fun: Lego Star Wars 3 Wallpapers
Prologue: Geonosian Arena Minikits
Minikit 1: This minikit can be obtained in Story or Free Play mode. You need to destroy the 5 merchant carts along the bottom of the arena and it will automatically appear on the last 1 destroyed.
Minikit 2: This minikit can be obtained in Free Play mode. You need to stack the purple lego plates on top of one another and then use Jar Jar to jump and reach it in the sky.
Minikit 3: This minikit can be obtained in Free Play mode. You will need a small character such as Yoda or Wag Too to access the hatch at the top middle of the arena that leads you directly to the minikit on the balcony.
Minikit 4: This minikit can be obtained in Free Play mode. You will need find the 5 flower boxes around the arena and then use a Jedi character to Force slam. Then use a Sith character to stuff the new grown plant into the nearby pot by using Dark Force.
Minikit 5: This minikit can be obtained in Free Play mode. You will need to use a Sith character such as Count Dooku to Dark Force Manipulate the pillar to the left from where you start. Then use a grapple character to yank out the two hook points that are revealed afterwards. This will then collapse the pillar and reveal the minikit.
Minikit 6: This minikit can be obtained in Free Play mode. You will need to destroy 5 golden objects that are around the arena’s walls using a rapid fire character such as Lt. Thire.
Minikit 7: This minikit can be obtained in Free Play mode. You will need to use a bounty hunter to access the small exercise room on the left side of the arena. Then run on each of the 3 threadmills and keep running until they explode. The minikit will pop up on the final treadmill.
Minikit 8: This minikit can be obtained in Free Play mode. Head to the right side of the wall and use the Force to rebuild a droid in pieces. You will then get the minikit after building it.
Minikit 9: This minikit can be obtained in Free Play mode. You will need to find and herd up 5 Droidekas that are rolling around the arena into the electric fence to get the minikit.
Minikit 10: This minikit can be obtained in Free Play mode. You will need a character with a sniper rifle such as Aurra Sing. Then shoot all the ducks in the air until they are all gone and the minikit appears.
Continue Reading on: Page 1 Page 2 Page 3 Page 4 Page 5 Page 6
Minikit 1: This minikit can be obtained in Story or Free Play mode. You need to destroy the 3 golden boxes in each of the first 3 circular chamber rooms. You can either use a Gold Super Battle Droid during Story mode or anyone with rapid-fire while in Free Play mode to destroy these golden boxes.
Minikit 2: This minikit can be obtained in Story or Free Play mode. You need to destroy the 5 tea dispensers that are found in the consoles along the walkways.
Minikit 3: This minikit can be obtained in Free Play mode. You need to activate the power panel to the left from where you start the mission, and then use a small character such as Yoda to crawl through the crawl space and destroy the 3 Droids fishing.
Minikit 4: This minikit can be obtained in Free Play mode. You need to build the 5 Gold Super Battle Droids found in the side consoles along the walkways.
Minikit 5: This minikit can be obtained in Free Play mode. You need to destroy the 5 mouse Droids along the walkways, 2 of them will be inside the side consoles that require the use of Dark Force to open.
Minikit 6: This minikit can be obtained in Free Play mode. You need activate the 3 protocol Droid Control Panels in the corridors and destroy the beach balls that drop out of them. There are a total of 5 to destroy, 2 drop in the first 2 and then 1 in the 3rd.
Minikit 7: This minikit can be obtained in Free Play mode. You need to hover across to the next ledge after defeating Grievous and activate the power panel.
Minikit 8: This minikit can be obtained in Free Play mode. You need to use the Dark Force to reveal the minikit pieces from the far left corner of the main Control Room Panel with a purple table in the center. Then build it the minikit to grab it. This is just shortly after switching characters and defeating Grievous.
Minikit 9: This minikit can be obtained in Free Play mode. You need to use the Dark Force to reveal the UFO pieces at the bottom corner of the hangar area. Then use the built UFO to fly over the orange pads to grab the minikit.
Minikit 10: This minikit can be obtained in Free Play mode. You need to jump into the air vent above the hangar balcony that leads to a bowling alley. Then knock down all of the pins on the left and right side to reveal the minikit in-between of the bowling lanes.
Chapter 2: Shadow of Malevolence Minikits
Minikit 1: This minikit can be obtained in Story or Free Play mode. You need to use the Force to send the 3 red dumpsters to the trash compactor when you are on the 3rd landing pad.
Minikit 2: This minikit can be obtained in Free Play mode. You need to destroy the 5 green highlighted ships around the area.
Minikit 3: This minikit can be obtained in Free Play mode. You need to launch the shuttle on the first landing pad then destroy it in space.
Minikit 4: This minikit can be obtained in Free Play mode. You need to use an enemy ship to destroy the glowing red object at the far left of the Malevolence Battleship on the lower deck. In this video I use the enemy ship called the Soulless One. To grab the minikit, you need to perform a flip by double tapping the joystick.
Minikit 5: This minikit can be obtained in Free Play mode. You need to grapple down the box on the first landing pad and then use a super-jump character such as Jar Jar to jump up and grab the minikit.
Minikit 6: This minikit can be obtained in Free Play mode. You need to destroy the gold object on the Malevolence Battleship near the first landing pad with a rapid-fire ship.
Minikit 7: This minikit can be obtained in Free Play mode. You need to activate the protocol Droid Control Panel on the 2nd landing pad and then grapple the hook point and use Jar Jar to grab the minikit. You could also use a regular character and use the diving board to jump and grab the minikit.
Minikit 8: This minikit can be obtained in Free Play mode. You need to grapple the hook point on the 2nd landing pad to find the 2 plunk Droids and then use them to turn the nearby orange pads green. Take one of the plunk Droids and place it on the first orange pad nearest to you. Then take the 2nd plunk Droid and start driving over the furthest orange pad towards the parked plunk Droid.
Minikit 9: This minikit can be obtained in Free Play mode. You need to launch another shuttle from the 3rd landing pad then destroy it in space.
Minikit 10: This minikit can be obtained in Free Play mode. You need to fly close to the ion cannon at high altitude to open a secret panel and then destroy the silver object within with missiles.
Chapter 3: Destroy Malevolence Minikits
Minikit 1: This minikit can be obtained in Story or Free Play mode. You need to shut down the Droideka’s shield and then Force-throw them into Grievous 5 times.
Minikit 2: This minikit can be obtained in Story or Free Play mode. You need to match up the 3 colored bricks when slotting them into the wall, match them to what they are to the left. This will be when you switch characters after you have encountered Grievous for the first time.
Minikit 3: This minikit can be obtained in Free Play mode. You need to activate the clone panel in the hallway ahead to your right from where you start the mission then use the Force to solve the tilt maze.
Minikit 4: This minikit can be obtained in Free Play mode. You need to grapple the 2 hook points at the start of the train yard area below the steps.
Minikit 5: This minikit can be obtained in Free Play mode. You need to hover over and activate the protocol Droid Control Panel in the train yard area and then destroy the gold boxing glove.
Minikit 6: This minikit can be obtained in Free Play mode. You need to destroy the silver box on the 2nd train and then build and activate the Astromech Droid Control Panel to reveal a caged minikit. Then use the crane to open the minikit’s cage and move the platform you originally moved back to its original location and hover over with R2-D2.
Minikit 7: This minikit can be obtained in Free Play mode. You need to jump to the background platform before you leave the train yard area from the train yard area from the train that you moved with the crane. Then destroy the silver object to drift up to the minikit.
Minikit 8: This minikit can be obtained in Free Play mode. You need to destroy the 5 silver points in the chamber where you battle Grievous.
Minikit 9: This minikit can be obtained in Free Play mode. You need to destroy the 5 Sith washing machine’s hidden throughout the mission with Dark Force.
Minikit 10: This minikit can be obtained in Free Play mode. You need to activate the power panel on the bridge and then grapple the hook point to reveal the minikit.
Chapter 4: Lair of Grievous Minikits
Minikit 1: This minikit can be obtained in Story or Free Play mode. You need to order the blaster clones to destroy the gold rock near bottom left area of where you start the mission then jump across to grab the minikit.
Minikit 2: This minikit can be obtained in Story or Free Play mode. You need to hit the 10 hanging overhead lights with a thrown Lightsaber inside of the compound area. There are 3 different areas shown in this video where to hit them all at.
Minikit 3: This minikit can be obtained in Story or Free Play mode. You need to Force-move the top of the left tower onto the right tower. Then plug the right tower’s power plug into the generator in the final outdoor area of the mission to reveal the minikit.
Minikit 4: This minikit can be obtained in Free Play mode. You need to use the Dark Force to create a power panel after the shuttle has been hit by the rocket from the MagnaGuards. Then activate the control panel to kill the bee and grab the minikit.
Minikit 5: This minikit can be obtained in Free Play mode. You need to use an Astromech Droid or Bounty Hunter to hover over to the first circular chamber’s side room. Then Force-move the colored pool balls into the matching pockets.
Minikit 6: This minikit can be obtained in Free Play mode. You need to activate the 3 control panels in the room with the power plugs. Then build the pieces and drive the cart over the orange pads to grab the minikit.
Minikit 7: This minikit can be obtained in Free Play mode. You need to use the Dark Force to raise the foreground platforms below the lava that lead to the minikit in the lava pit area.
Minikit 8: This minikit can be obtained in Free Play mode. You need to activate the power panel inside the Gor room that activates the disco ball and it will appear above the control panel.
Minikit 9: This minikit can be obtained in Free Play mode. You need to find the 10 valves with the Dark Force throughout inside the compound and destroy them.
Minikit 10: This minikit can be obtained in Free Play mode. You need to find and destroy the 10 gold clamps. There are 3 in the Gor room the rest of the 7 will be found in the final area at the landing pad. In the final area you will need to destroy them and shoot the spotlights in midair. It will appear at the final one you destroy.
Chapter 5: Rookies Minikits
Minikit 1: This minikit can be obtained in Free Play mode. You need to destroy the silver barricade at the start of the mission. Then build the pieces for a cleaning machine and clean up the 6 goo piles.
Minikit 2: This minikit can be obtained in Free Play mode. You need to use Dark Force to enter the cave after the worm flees. Then hatch the 5 eggs inside the cave to reveal the minikit.
Minikit 3: This minikit can be obtained in Free Play mode. You need to destroy the silver rubble after the worm flees. Then jump onto the high cave and grapple the 3 hook points inside the cave to reveal the minikit.
Minikit 4: This minikit can be obtained in Free Play mode. You need to use the Jedi logo to access a cave. Then feed the young worm the 5 minikit pieces.
Minikit 5: This minikit can be obtained in Free Play mode. You need to activate the Power Panel then afterwards activate the Astromech Droid Control Panel for the minikit to be revealed on the platform above. This will be after defeating the worm.
Minikit 6: This minikit can be obtained in Free Play mode. You need to find and plug 5 steaming vents throughout the mission.
Minikit 7: This minikit can be obtained in Free Play mode. You need to use Dark Force to open the vent in the Control Room. Then drain the jacuzzi outside by using the Control Panel next to it.
Minikit 8: This minikit can be obtained in Free Play mode. You need to use Dark Force to open the vent in the Control Room. Then activate the radio tower and quickly switch characters to the other side and collect the minikit with Hevy or any other one.
Minikit 9: This minikit can be obtained in Story or Free Play mode. You need to destroy the 6 gold boxes with Hevy when battling the army of Droids near the end of the mission.
Minikit 10: This minikit can be obtained in Story or Free Play mode. You need to destroy the 5 blue consoles inside of the station to reveal hook points then grapple them. It will be revealed when you destroy the final blue console.
Chapter 6: Grievous Intrigue Minikits
Minikit 1: This minikit can be obtained in Story or Free Play mode. You need to Force-throw the objects at the window behind you at the start of the mission to crack it 5 times.
Minikit 2: This minikit can be obtained in Story or Free Play mode. You need to destroy the 3 gold objects on the walls in the 2nd circular chamber. While in story mode, you will need to Force-lift a Super Gold Battle Droid to do this.
Minikit 3: This minikit can be obtained in Free Play mode. You need to destroy the gold box near the back of the bridge at the start of the mission and then build the lever from the pieces.
Minikit 4: This minikit can be obtained in Free Play mode. You need to destroy the silver object near the first ramp once you are on Grievous’s ship. Then blast the plant that emerges to grab the minikit.
Minikit 5: This minikit can be obtained in Free Play mode. You need to plug up the 5 steaming vents on Grievous’s ship.
Minikit 6: This minikit can be obtained in Story or Free Play mode. You need to block the 4 floor hatches in Eeth Koth’s holding room. Here is how you block them going from left to right. First unplug the power cord, then destroy the gold chair near Eeth and rebuild the pieces over the hatch, then throw a light-saber at the right console and finally move the block to the right of the room onto the hatch.
Minikit 7: This minikit can be obtained in Free Play mode. You need to destroy the gold door in Eeth Koth’s holding room.
Minikit 8: This minikit can be obtained in Free Play mode. You need to destroy the 5 green highlighted ships during the space combat part of the mission.
Minikit 9: This minikit can be obtained in Story or Free Play mode. You need to stack the purple crates in the hangar to reach a high minikit.
Minikit 10: This minikit can be obtained in Free Play mode. You need to activate the power panel in the hangar to launch a shuttle then destroy it in space.
Continue Reading on: Page 1 Page 2 Page 3 Page 4 Page 5 Page 6
Lego ® Star Wars III: The Clone Wars is the fourth installment to the Lego ® Star Wars Video Game series. It was released on March 22, 2011 in the United States of America. A version for handheld devices was also made.
Contents
List of ships and vehicles
- AAT
- Anakin's Jedi Starfighter
- Arc-170 Starfighter (rapid fire)
- AT-AP Walker
- AT-RT
- Geonosian Solar Sailor
- H-type Nubian Yacht
- R-type curan shuttle
- Hyena Bomber
- Jedi Shuttle
- Kit Fisto's Jedi Starfighter
- MagnaGuard Starfighter
- Medical Frigate (torpedoes)
- Neimoidian Shuttle
- Obi-Wan's Jedi Starfighter
- OG-9 Homing Spider Droid
- Pirate Saucer (missiles)
- Pirate Speeder Tank
- Plo Koon's Jedi Starfighter
- Probe Droid
- Republic Attack Shuttle
- Republic Cruiser (missiles and torpedoes)
- Republic Dropship (rapid fire)
- Republic Gunship
- RX-200 Tank
Promotional artwork for the game
- Slave I
- Soulless One (rapid fire)
- STAP
- Starhawk Speeder Bike
- Stealth Ship (missiles and torpedoes)
- Super Tank
- The Halo (rapid fire)
- The Twilight
- Trident Assault Craft (missiles and torpedoes)
- V-19 Torrent Starfighter
- Vulture Droid
- Xanadu Blood (rapid fire)
- Y-wing Starfighter
List of missions
Assajj Ventress
Bonus Missions
Epilogue
List of extras
- Regenerate Hearts: Recovers hearts after a short while - Cost: 400,000 studs
- Fast Build: Builds Lego bricks far more quickly - Cost: 500,000 studs
- Invincibility: Invulnerable to attacks, but can fall - Cost: 1,000,000 studs
- Red brick Detector: Shows the location of Red Power Bricks - Cost: 125,000 studs
- Minikit Detector: Shows the location of Minikits - Cost: 750,000 studs
- Character Studs: Killing enemies provides studs Cost: 100,000 studs
- Stud Magnet: Attracts nearby studs to you - Cost: 500,000 studs
- Score x2: Multiplies every stud you get by two - Cost: 500,000 studs
- Score x4: Multiplies every stud you get by four - Cost: 2,000,000 studs
- Score x6: Multiplies every stud you get by six - Cost: 10,000,000 studs
- Score x8: Multiplies every stud you get by eight - Cost: 20,000,000 studs
- Score x10: Multiplies every stud you get by ten - Cost: 40,000,000 studs
- Super Speeders: Makes speeders able to destroy not just average constructions faster, but gold and silver objects as well. Speeders go faster and are invincible from attack while ridden - Cost: 40,000,000 studs
- Dual Wield: Gives you two weapons instead of one - Cost: 250,000 studs
- Glow in the Dark: Gives your character a green glow, lighting areas - Cost: 25,000 studs
- Super Saber Cut: Cuts through walls far more quickly - Cost: 300,000 studs
- Dark Side: Gives all Jedi the ability to activate dark side modules - Cost: 150,000 studs
- Perfect Deflect: Automatically deflects blaster fire back to shooter - Cost: 100,000 studs
List of characters (Note; this list is incomplete)
Minikits
Minikits are small cylindrical objects with a green and a red light on each. There are ten in each mission and can be found in many places. If you get all ten minikits in a mission, then you get some studs and unlock a certain character that can be bought from a room inside the hub as well as a Gold Brick.
Читайте также: