
Миникиты в лего марвел супергерои
Обновлено: 16.05.2024
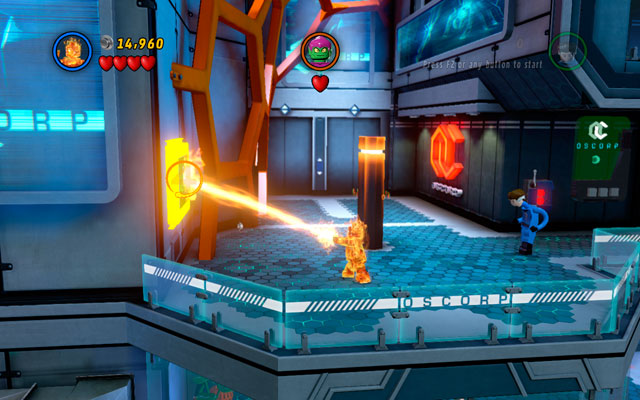
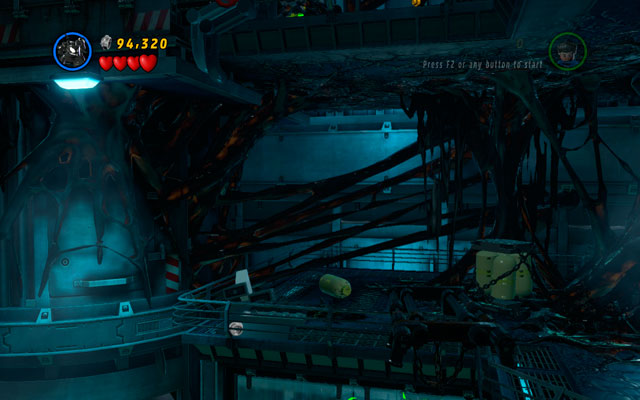
Cуета на Центральном вокзале (Халк, Железный человек, Человек-паук)
Вам потребуется двигаться до вокзала, попутно убирая со своего пути автомобили и убивая солдат песочного человека. Сперва, потребуется убрать автобус, для этого вам потребуется Железный человек - он своими ракетами может разбить два крана, которые находятся по бокам, далее остаётся лишь Халком разбить песочное препятствие.
Пройдя с боями немного дальше, на вашем пути встанет огромный Фургон. При помощи Железного человека разрушьте его груз, после чего с выпавших деталей собирайте ручки. За эти ручки нужно будет схватится Халком и после, просто бросить транспорт. Мерзость станет вам мешать, так что выберите противника побольше (Халка) и дайте ему по шее.
Как окажитесь в здание вокзала, то встретите Песочного человека. Сперва он будет мешать вам своими огромными руками. Разрушьте с правой стороны от рук - скамейки, после чего заметите ручку, которую нужно оторвать и кинуть в правую руку Песочного человека. Ещё одно ручка будет лежать в песке уже от левой руки Песочного человека. Вам придётся её так же оторвать и кинуть.
Пройдя немного дальше, перед вами встанет песочный огромный поезд. Для того, чтобы его пройти, вам потребуется уничтожить 25 песочных солдат, но и после этого злодей никак не захочет быть пленённым, поэтому создаст песочную стенку. Вы в свою очередь должны будете сломать часики с правой стороны. С выпавших деталей собирайте конструкцию и выйдет водяная пушка. Теперь можно полить песочную стенку водой. В конце концов, сломайте стену Халком.
После чего, вы оказываетесь в шаге от нужной цели, но неожиданно появляется песочная башня. С правой стороны скорее рушьте серебряные стенки, после чего с деталей собирайте большой ком. Далее выберите Халка и киньте этот ком в новое препятствие. После, продолжайте погоню за Песочным человеком.
Сражение продолжиться и на этот раз к вам на помощь придёт Человек-паук. Выбирайте пукана и двигайтесь в правую сторону, пользуясь чутьём взбирайтесь на стенку. На верху разрушьте радио-башню. С выпавших деталей собирайтесь глыбу, которую должен кинуть Халк в электрическую панель.
Проходите дальше и вскоре необходимо будет разрушить преграду с левой стороны при помощи ракет Железного человека. Далее разрушьте паутиной Человека-паука очередной счётчик. Теперь двигайтесь пауканом дом буквы - А и рушьте её паутиной, после чего можно отправляться на финальное сражение с мега огромным Песочным человеком.
Пройдите в правую сторону и взбирайтесь на паутине на вершину. Далее снова берите Халка и трансформируйтесь в Беннера, для того, чтобы можно было взобраться по паутине. Теперь снова становитесь Халком и рушьте механизм. С выпавших деталей нужно будет собрать гидро-пушку. Теперь можете поливать с этой пушки Песочного человека и вскоре нужно будет его ударить Халком. После, снова вернитесь в начало, где ещё была буква - А. Разрушьте тут предмет и снова соберите с деталей конструкцию, после чего можно будет нанести очередной удар по Песочному человеку. В конце концов, подойдите поближе к Боссу и воспользуйтесь чутьём пукана, для того, чтобы отыскать два рычага. Тяните рычаги паутиной и добивайте противника в конце Халком.
Выходной на Таймс-сквер (Капитан Америка, Человек-паук, Мистер Фантастик)
Совершите свой первый прыжок с парящего в небе корабля организации Щ.И.Т. и окажитесь в парке. Переключайтесь на Мистера Фантастика и рушьте столбик, который находится возле ворот. С деталей, которые выпадут, соорудите очередную постройку через которую сможете пробраться на другую сторону. Далее превращайтесь в щипцы и ломайте замок. Теперь переходите на Капитана Америку и его щит кидаете в точку, которая обозначена его цветами. Расположена она с правой стороны от дверей. Далее подниметесь на верх по лестнице управляя МФ. Прыгайте через пропасть и тяните рычаг, в итоге сможете открыть ворота. Тут и активируется защитная система, поэтому скорее Кэпом становитесь на отмеченный круг и своим щитом направляйте лазеры немного выше дверей. Теперь можете спокойно пройти в небоскрёб.
Далее Мистером Фантастика нужно будет перелететь до другого здания - тут поднимайте по одной из лестниц и поворачивайте на верху антенну. Далее можно перейти на другую сторону Капитаном Америкой. В углу соседнего дома, нужно будет воспользоваться щитом, после МФ сможет пробраться через очередную решётку. Теперь рушьте трубы, после чего соберите ещё одну конструкцию, при помощи которой можно разрушить дамбу. Теперь при помощи паутины можно будет пролететь до следующего дома.
Проходите через обломки на вершину и вскоре рушьте надпись "Мотель", что расположена на здании по соседству.
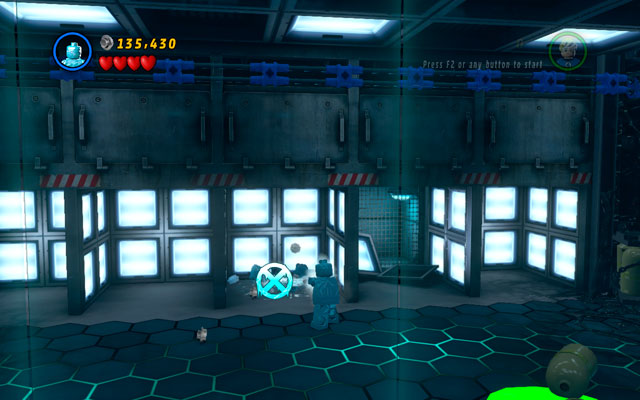
Лабораторные исследования (Человек-паук, Соколиный глаз, Черная вдова)
Двигайтесь в правую сторону за призрачными следами. При помощи стрел рушьте надпись, а после ставьте их на обломки, далее перепрыгнуть большую пропасть. Проходите в перёд до здания с вывеской синего цвета. Берите управление Чёрной вдовой и проходите до переулка с правой стороны от дома. Далее по стенкам нужно будет прыгать на верх. Вскоре придётся пройти в левую сторону и вырубить электропитание, после чего продолжайте двигаться через переулки. Теперь становить невидимыми и вырубите защиту, после чего пройдите в здание.
Как пройдёт видеоролик, то двигайтесь в правую сторону и переключитесь обратно на Чёрную вдову. Вам придётся повторить комбинацию, которая была изображена. В следующем помещение возле дверей будут ящики, которые нужно разрушить при помощи стрел. С деталей нужно будет собраться музыкальную конструкцию, после чего его нужно будет проходить аналогичным образом как и в первый раз. Как окажитесь в тупике, то берите управление пуканом и ломайте двери. В итоге, вы доберётесь до своего первого сражения с Гоблином. В бою с ним придётся лишь уклонятся от его бомб, которые он кидает. Ударить его придётся всего-лишь один раз.
Далее проходите по балке. Теперь берите Человека-паука и поднимайтесь на вершину. Тут нужно будет сломать двери и спустить своим напарникам лестницу. Далее в бой вступает Соколиный глаз. Переключайтесь за него и ломайте балки, которые находятся наверху. Перейдите на ЧВ и постарайтесь незаметно пройти через лазеры и вот очередной видеоролик.
Берите СГ и сломайте балку сверху. Сделайте скорее верёвку, для того, чтобы скорее выбраться из данной ловушки. Пройдите в правую сторону и попутно убивайте всех симбиотов. Снова при помощи СГ сломайте лестницу, что находится на вершине. Как опустится - то поднимитесь. С левой стороны нужно будет взломать панель, после чего прикрепите сверху стрелы и по ним продолжайте своё движение.
В итоге, вы окажитесь в новом помещении, где нужно будет бежать в правую сторону. Снова прицепляйте стрелы и дальше включите механизм при помощи Человека-паука. Переключитесь на Чёрную вдову и взломайте очередную панель. Вернитесь теперь обратно к большим вратам. С каждой стороны есть помещение. В этих комнатах нужно будет одолеть симбиотов, после чего собирайте с выпавших деталей платформы, на которых придётся немного постоять. В следующем помещении нужно будет собрать новую конструкцию, которая поможет вам расчистить дальнейший путь.
Двигайтесь дальше и вскоре придётся сразится с Веномом. Вам придётся строить разнообразные конструкции с лего-деталей, после которых Веном будет оглушён и вы сможете свободно наносить ему удары. Бейте до тех пор, пока победа не окажется за вами. На этом уровень будет пройден.
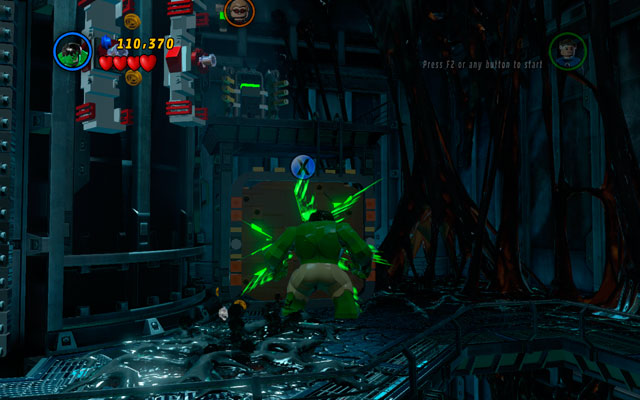
Покоряя вершины (Железный человек, Халк, Росомаха)
Летите до берега и достаньте необходимый билет. Отдайте его Капитану, после чего плывите до острова. Открывайте врата и начинайте прохождение очередного уровня. Спускайтесь до воды и пролетите всю воду при помощи Железного человека. Вскоре нужно будет выстроить мостик и только тогда продолжать своё прохождение. При помощи Росомахи выкопайте рычаги, которые требуется прилепить к стенке. Её нужно будет разломать уже Халком, после чего переключайтесь на Росомаху и взбирайтесь на вершину. Наверху разрушайте баллоны с правой стороны и активируйте лифт. Далее придётся разрушить четыре ракетницы и разрушить врата с левой стороны (при помощи Халка). Теперь переключитесь обратно на Росомаху и взбирайтесь на вершину, где нужно будет пробить стенку. И вот можно открыть врата-мост при помощи Железного человека. Пройдите через него к следующей территории.
Далее будет Босс. Сперва уничтожайте ракетами ЖЧ фиолетовые объекты, после чего можете треснуть противника. После победы, проходите немного вперёд и после сверните в правую сторону - тут воспользуйтесь чутьём Росомахи и разрушьте стенку. В правом углу помещения разрушайте все предметы, после чего собирайте очередную конструкцию. У вас получится выключатель, на которой нужно будет потом нажать. Теперь спустите Мерзость обратно в мусоропровод, где ему и место. Далее поднимайтесь на вершину по цепке, попутно расстреливая замки своими ракетами. Как окажитесь возле рычага, то дёрнуть его нужно будет Росомахой. Теперь пройдите до места, где открылся проход для вас. Тут вам придётся разгадать не слишком сложную головоломку. После решения лёгкой задачки, двигайтесь дальше.
Как пройдёт ещё одна видео-сценка, то вам придётся одолеть нового врага - Саблезуба. Вам придётся защищаться от постоянных атак наёмных солдат, собирать шарики и квадратики из материала, что попадается, после чего кидать в Босса, когда тот находится в воздухе. Когда одолеете его, то придёт новый Босс - Мерзость. Сперва вам нужно будет взобраться на три рядом стоящие вышки и ослепить Мерзость, после чего переключится на Халка и набить морду. После очередной победы, уровень будет пройден.
Перезагрузка и перевооружение (Железный человек, Капитан Америка)
Проходите до небоскрёба Тонни Старка. Разрушьте защитный барьер. Далее разрушайте все помещения и собирайте очередную конструкцию. Отключайте защиту и продвигайтесь в правую сторону, попутно обходя электрические поля. В самом конце нужно будет соорудить платформу. Разрушьте лазер и сконструируйте радиоуправляемое устройство. Далее становитесь на собранную платформу. Вытаскивайте механизм с помещения и ставьте его там, где указано, после чего одевайте свой костюм.
Теперь возвращайтесь обратно и вырубайте ещё один защитный барьер. Пройдите в лифт и продвигайтесь до следующей локации. При помощи ЖЧ подвиньте платформу, на которой стоит Кэп. Далее Кэпом проходите через огонь и ломайте защиту. Теперь переключайтесь на Железного человека и разрушьте балкон и двери при помощи ракет, после чего взбирайтесь на вершину вместе с Капитаном Америкой. Тут активируйте лифт и проходите дальше. Разрушьте стенки и проходите до следующего помещения. Вскоре вы дойдёте до тупика - тут нужно взобраться на верх при помощи Капитана Америки. Собирайте очередное устройство и разрушайте провода. Теперь возвращайтесь немного назад и становитесь на платформу, после чего зарядите два электрогенератора от центральных дверей, что расположены сбоку.
Красная карточка (Соколиный глаз, Черная вдова, Джонни Шторм, Капитан Америка)
Проходите через пост с охранниками при помощи Чёрной вдовы. Далее пройдите до точки сбора. При помощи стрел открывайте себе проход дальше. Как зайдёте в здание, то проходите к лифту управляя Чёрной Вдовой. Теперь взбирайтесь на вершину и крушите панель управления камерами. С деталей которые выпадут, вы сможете собрать для себе необходимый Механизм, после чего при помощи стрел сломайте с правой стороны вентиль.
Пройдите в правую сторону и разрушайте все попадающиеся предметы. Вскоре нужно будет активировать устройство, после которого откроется проход дальше. Вам предстоит бой с Красным Черепом. Возле стен будут находится механизмы, которые нужно будет разрушать. Учтите, что данный Босс вас постарается уничтожить своими лучами смерти, поэтому лучше взять Капитана Америку и отражать эти лучи, после чего бить своего врага в ближнем бою.
Радужный прием (Росомаха, Тор, Джонни Шторм, Капитан Америка)
Тут загадки не слишком сложные. В основном, нужно будет Тором заряжать указанные приборы, что позволит открывать проходы. Но вот сражение с Локи не окажется слишком простым боем. Вам придётся одним героем его отвлекать, другим атаковать с одной конструкции и третьим уже добивать.
Догонялки на выбывание (Джинна Грей, Циклоп, Человек-лед)
Вам нужно будет спасти школу Мутантов. Тут просто нужно помогать деткам убегать и тушить огонь там, где только вообще можно. В финальном сражении будет Босс Джагернаут. Просто отвлекайте его внимание, просто нужно делать так, чтобы он бился об боковые стены, после чего замораживаете те места и кидаете своего противника.
Доктор по вызову (Сью Шторм, Джонни Шторм, Существо, Мистер Фантастик)
Просто двигайтесь по указанному направлению. В финале этого уровня вас ожидает схватка с Гоблином. В него нужно просто кидаться все попавшиеся предметы, но и важно не попадаться на его тыквы.
Это дурное предчувствие (Человек-паук, Джинна Грей, Тор, Железный человек)
Разрушайте все препятствия встречающиеся на вашем пути, когда вы встретите Модока, то не нужно его бояться. Это наверное самый просто Босс в игре. После его атак, должны атаковать вы его. Как окажитесь в воде, то скорее доберитесь до спасательной шлюпки.
Отстаивая свободу (Мистер Фантастик, Халк, Росомаха)
Поочерёдно переключайтесь между героями, попутно расчищая путь до Башни. Чтобы одолеть Повелителя Разума, нужно всего лишь убивать сперва его приспешников, а после и его самого.
Хищнический прием (Существо, Капитан Америка, Гроза)
Вам необходимо отправится на остров Мутантов. Разрушайте как обычно всё вокруг себя, после чего собирайте прибор и вытаскивайте Существо с песка. Далее разбейте каменную стенку. Продвигайтесь по побережью и вскоре нужно будет разрушить пушку. После этого, нужно будет кинуть камень в защитный барьер, чтобы его вырубить. Далее проходите по мостику. Теперь у вас никаких сложных загадок больше не будет, так что просто продвигайтесь вперёд: разрушайте всё, что можно и стройте механизмы, которые необходимы для взлома. Вскоре к вашей команде присоединится и Гроза. При помощи неё вы сможете зарядить энергетические поля. Когда будет битва с Магнето, то просто старайтесь уклоняться от его атак и убивайте нападающих динозавров. Атаковать Босса придётся предметами, которые вы сможете собрать из лего-деталей. После победы, уровень будет завершён.
Притягательная личность (Железный человек, Человек-паук, Тор)
Двигайтесь до Центрального парка - тут нужно активировать ваш корабль и сесть в него. Когда пройдёт очередная сценка, то вам придётся сразится с большим количеством мутантов. Две стенки сбоку можно разрушить при помощи: ракет, паутины или же молота - на ваш выбор. Механизм, который появится нужно будет крутить, после чего бежать в коридор, где при помощи чутья пукана отыскать трещину в стекле. Как найдёте, то разрушьте её при помощи Тора. Далее включайте магнит, который расчистит вам проход.
тут вас снова ждёт стена, которая была ещё в начале. Разрушьте боковины, зажимайте рычаги и пробегайте скорее дальше. Далее нужно будет в куполе повернуть в коридор. Магнето победить будет не слишком сложно. Старайтесь уклоняться от всех его атак. С обломков нужно собрать очередную конструкцию, с которой и атаковать Босса, после чего останется его лишь добить.
Дальновидный Дум (Существо, Гроза, Человек-паук, Капитан Америка)
Проходите вперёд и взбирайтесь на платформу выше. Тут разрушайте предметы и собирайте конструкцию, которая нужна для щита Капитана Америки. Итак, механизм, который появится нужно будет зарядить молнией. Проходите дальше и отрывайте кусок стенки, после чего при помощи паутины ломайте. Становить снова на платформу и щитом Кэпа наведите луч на выключатель. Далее нужно пройти пропасть и зарядить ещё одно устройство, после которого появится лифт. Как всё сделаете, то садитесь в лифт и поднимайтесь на нём на вершину.
Вам нужно разрушить очередную стенку и пройти в коридор. Далее вам нужно при помощи Грозы или Человека-паука переключать дорожку, после чего пройти немного дальше, до тех пор, пока не окажитесь в открытом космосе. Соберите полезные бонусы. Бой с Доктором Думом не лёгкое занятие. Сперва нужно будет уничтожать всех его слуг, после нужно отражать лучи и навести их на пушку. В конце концов, вам удастся побить данного Босса.
Хороший, плохой, голодный (Магнето, Железный человек, Тор, Существо, Мерзость, Мистик, Человек-паук, Веном, Зелёный Гоблин, Отто Октивиус, Ник Фьюри, Джонни Шторм, Капитан Америка, Мистер Фантастика, Циклоп, Шторм)
Сперва двигайтесь до Центрального парка и побеседуйте с Магнето. Когда пройдёт сценка, то двигайтесь до Доктора Дума. И теперь вас ждёт эпичный бой с Галактусом.
Переходите на Зелёного Гоблина и кидайте свои бомбы в серебряные блоки. Далее осколком камня, сломайте другой осколок. Когда Босс начнёт атаковать вас, то скорее двигайтесь активировать платформу организации Щ.И.Т. Далее при помощи Человека-паука наклоняйте турбины этого шатла.
Теперь переходите ко второй группе. Берите управление Железным человеком и разрушайте им все золотые и серебряные блоки, после чего включите платформу. Теперь перейдите на Венома и наклоняйте турбины.
Разрушайте всё, что тут находится и включите четвёртую по счёте платформу. Далее кидайте шар в Галактуса. И вот вы можете просмотреть последние видеоролики.
На данном этапе игра пройдена, но вы можете остаться и продолжить выполнять побочные задания, так как в игре их очень много. Всем удачи и до новых приключений.
To receive this minikit , you must melt four golden boards placed on the first stage. First can be found at the beginning - right behind you.

Second is hanged on the wall in the passage on the right.

Third can be found near to the lift pit, on the right wall.
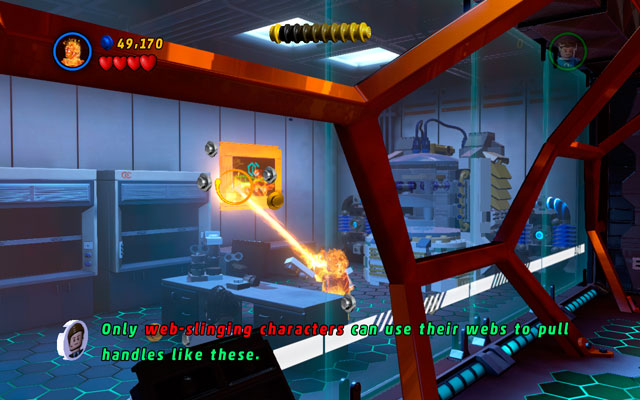
The last golden board is located in the lab, opposite to the next lift. To go there, you must use Jean Grey's power to take control over the scientist standing on the right. Use him to switch the computer on. When the sewer appears, pass through it using Mr. Fantastic superpower.
Minikit 2

Choose Magneto and enter to the one of the first laboratories, looking for the big batteries . Lift them to the power point to open the door.
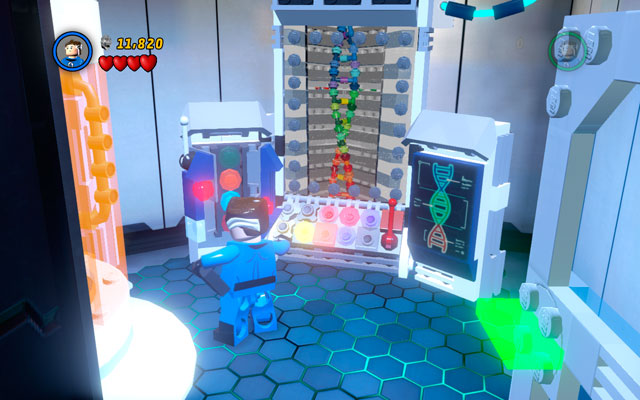
Enter to the newly opened room and use Mr. Fantastic to arrange the DNA code in the right order (showed above).
Minikit 3

Standing near to the lift pit choose any big character (like Hulk ) and yank two green handles located on the left. Now toss Captain America's shield at the patriotic panel , so you can unlock the next minikit .
Minikit 4

In the corridor located after the lift pit use Jean Grey's telepathic abilities to take control over the scientist hidden on the right. Go to the computer as him and switch it on.

When the sewer appears, pass through it using Mr. Fantastic superpower. After that charge both batteries using Thor or Storm to unlock the next minikit .
Minikit 5
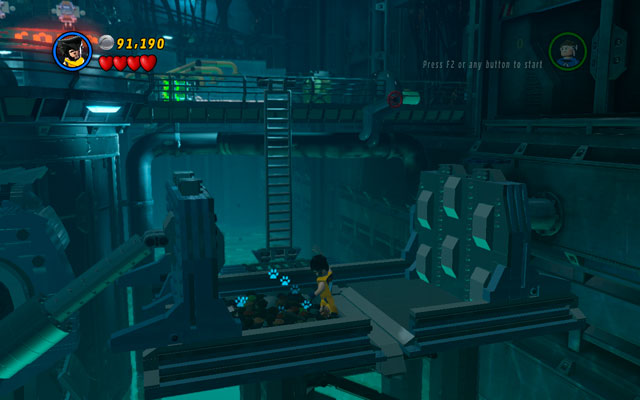
In the underground of the building choose Wolverine and go to the right corner of the location. Climb down using the ladder and then dig up a minikit from the sandbox .
Minikit 6

The way to obtain this minikit is a bit complicated. First of all, go to the highest floor of the building and turn right. There use Jean Grey's ability to telekinetically turn the violet valve . After that jump down and build the first spider .
Choose Venom and go to the middle floor, turning left. Destroy all boxes, uncovering black pool. Pass through it (do not mistake it with similar, but deadly pools !) destroying all objects in the new area. Now build second spider from the debris .
Climb to the highest floor and turn right, using any big character to destroy the shining wall . After that build the last spider and finally receive a minikit .
Minikit 7
In the further area go to the corridor filled by cages . Wait for the enemies to break from inside and then look for a pool of water . Freeze it using Iceman abilities, so you can melt newly created ice block as Human Torch .
Minikit 8

On the same floor turn left and enter the big shining room with the red button hidden inside. Melt golden vent using Human Torch fire beam and pick up a minikit .
Minikit 9

After a short play with the huge speaker you will be moved to the long corridor. Choose Magneto and lift up the metal box standing on the left. When the claw switch appears, use Wolverine's talons to unlock the mechanism - you will receive a minikit and rescue Stan Lee at the same time.
Minikit 10

During the fight with Venom fly to the upper floor and destroy all obstacles found there. Then use Galactus to construct a special lock - open it to uncover the last minikit .
How to find missing Minikits?: In-game the Minikits will appear simply as a “Lego Mini Kit”, which looks like a black/grey/blue scubadiving air bottle with bright red and green lights on the right side of it. It can be confirmed as being Minikits simply by walking into to it, as the on-screen counter will then tell you that you’ve collected another Minikit.
As a bonus for finding all 10 Minikit locations in each of the 20 levels — making for 200 to collect in all — you will unlock a unique comic book for each level. Which you can read in Gwenpool’s room*.
*To find Gwenpool’s room in Avengers Mansion, from the entrance follow the Foyer from the main room up the white stairs. There you’ll find a door on the left side, go through the door to enter Gwenpool’s room.
Collecting Tip: You can select Free Play to replay Story Missions, which allows you to use all characters you have unlocked. So after beating the game, first try to have as many characters unlocked (with all the abilities needed) before you go for many of these Minikits. — The start of each video shows the characters needed to find all 10 Minikits in said level.
Note About Progress: You can track your Minikits collecting progress as you find each one, as the current count will then (for a few seconds) be indicated on the bottom-left of your screen. — After you’ve completed each level the game will tell you, on a results-screen, how many Minikits you’ve picked up in total.
Trophy / Achievement: Finding all 200 Minikits locations and picking them up will help unlock the following Achievement / Trophy:
* “Comic Book Collector” (Silver Trophy / Gamerscore) — Unlock and view all Minikit comics.
Where to find all Minikits in Lego Marvel Superheroes 2? The in-game collectibles locations for the Minikits are described in this detailed video guide with Camzillasmom’s handy voice-over tips.
The Minikits are listed in the videos in the order that they appear normally.
Level 1: No Eson of Mine Minikits
All 10 of the Minikit locations on the “No Eson of Mine” level of Story Mode are shown in this video guide.
Level 2: Avenger’s World Tour Minikits
All 10 of the Minikit locations on the “Avenger’s World Tour” level of Story Mode are shown in this video guide.
Level 3: Castle Hassle Minikits
All 10 of the Minikit locations on the “Castle Hassle” level of Story Mode are shown in this video guide.
Level 4: What’s Klaw’s is Mined Minikits
All 10 of the Minikit locations on the “What’s Klaw’s is Mined” level of Story Mode are shown in this video guide.
Level 5: Hydra Hijinks Minikits
All 10 of the Minikit locations on the “Hydra Hijinks” level of Story Mode are shown in this video guide.
Lego Marvel Superheroes 2 Minikits Locations Guide continues on Page 2 with Level 6.
How to find missing Minikits?: In-game the Minikits will appear simply as a “Lego Mini Kit”, which looks like a black scubadiving air bottle with bright red and green lights on the right side of it. It can be confirmed as being Minikits simply by walking into to it, as the on-screen counter will then tell you that you’ve collected another Minikit.
Collecting Tip: You can select Free Play to replay Story Missions, which allows you to use all characters you have unlocked. So after beating the game, first try to have as many characters unlocked (with all the abilities needed) before you go for many of these Minikits. — The start of each video shows the characters needed to find all 10 Minikits in said level.
Note About Progress: You can track your Minikits collecting progress as you find each one, as the current count will then (for a few seconds) be indicated on the bottom-left of your screen. — After you’ve completed each level the game will tell you, on a results-screen, how many Minikits you’ve picked up in total.
Where to find all Minikits in Lego Marvel Super Heroes? The in-game collectibles locations for the Minikits are described in this detailed video guide.
The Minikits are listed in the videos in the order that they appear normally.
Level 1: Sand Central Station Minikits
All 10 of the Minikit locations on the “Sand Central Station” level of Story Mode are shown in this video guide.
Timeline in minutes for the Level 1 Minikits Locations Guide:
Level 2: Times Square Off Minikits
All 10 of the Minikit locations on the “Times Square Off” level of Story Mode are shown in this video guide.
Note: Whenever one of the Minikits from a Free Play stage was already collected in Story Mode, they will still be shown how to unlock it. In the visual guide they are now replaced by a blue or purple stud.
Timeline in minutes for the Level 2 Minikits Locations Guide:
Level 3: Exploratory Laboratory Minikits
All 10 of the Minikit locations on the “Exploratory Laboratory” level of Story Mode are shown in this video guide.
Timeline in minutes for the Level 3 Minikits Locations Guide:
Level 4: Rock up at the Lock up Minikits
All 10 of the Minikit locations on the “Rock up at the Lock up” level of Story Mode are shown in this video guide.
Timeline in minutes for the Level 4 Minikits Locations Guide:
Level 5: Rebooted, Resuited Minikits
All 10 of the Minikit locations on the “Rebooted, Resuited” level of Story Mode are shown in this video guide.
Timeline in minutes for the Level 5 Minikits Locations Guide:
Lego Marvel Super Heroes Minikits Locations Guide continues on Page 2 with Level 6.
How to find Pink Bricks: The Red Power Bricks are now called Pink Brings, but are also known as “Gwenpool Bricks”. When you find one in each of the game’s 10 Gwenpool Bonus Missions; After you finish the Story Mode you can find them across the Chronopolis open world hub’s map. Then you can buy the Pink Brick off of Gwenpool in her room in the Avengers Mansion (along with the 7 Pink Bricks that are automatically unlocked from the start). — Scroll down on this page for instructions on how to get all Pink Bricks in Lego Marvel Superheroes 2.
How to Unlock Gwenpool and All Gwenpool Bricks Video Guide:
Where to buy the unlocked Pink Bricks?: Many people have asked “Where’s Gwenpool’s room?”, since it’s the location where you go to to buy the Pink Bricks, so here it is… Gwenpool’s room can be found in the Avengers Mansion. In the Mansion’s Foyer, walk up the stairs on the left side to find Gwenpool’s poster on the first floor that leads to her room door. — Her room allows you to access the cheats entering menu via her TV. — Also, buying Pink Bricks in her room will unlock new cheats that you can then activate via the game’s pause menu under the Extras option.
This video guide (at 24:30 minutes in) shows how to walk to Gwenpool’s room to buy Pink Bricks and read comics:
Tip: After you’ve bought the first score multiplier Pink Brick, they will become increasingly expensive. So after you buy the first “Studs x2” Pink Brick, you can increase your studs total by mostly just smashing stuff (like consoles and boxes) into studs as you walk the floors.
Protip: Turn on all five stud score multiplier Pink Bricks to multiply every single stud you collect times 3840!!
Pink Brick 1: Studs x2
Description: This first Pink Brick is called “Studs Score Multiplier x2”. This and the other four Stud multipliers are very handy to turn on at the same time at the start of your game, because you’ll make your Stud counter number go up and up and up, so you’ll always have enough Studs to buy characters & vehicles, as well as easily get True Believer status at the end of each level.
Location: This Pink Brick is already unlocked for you from the very start of the game, without having to find it. All you have to do is go to Gwenpool’s room in the Avengers Mansion (directions are in the intro above) with enough money and buy each of them. There are actually seven Pink Bricks already unlocked from the beginning, which is why when you pause the game, it only show 10 Pink Bricks to find out of the 17 in total.
Price: The cost to buy this Pink Brick is 800,000 studs.
Pink Brick 2: Studs x4
Description: This second Pink Brick is called “Studs Score Multiplier x4”.
Location: This Pink Brick is already unlocked for you from the very start of the game, without having to find it. All you have to do is go to Gwenpool’s room in the Avengers Mansion (directions are in the intro above) with enough money and buy each of them. There are actually seven Pink Bricks already unlocked from the beginning, which is why when you pause the game, it only show 10 Pink Bricks to find out of the 17 in total.
Price: The cost to buy this Pink Brick is 1,500,000 studs.
Pink Brick 3: Studs x6
Description: This third Pink Brick is called “Studs Score Multiplier x6”.
Location: This Pink Brick is already unlocked for you from the very start of the game, without having to find it. All you have to do is go to Gwenpool’s room in the Avengers Mansion (directions are in the intro above) with enough money and buy each of them. There are actually seven Pink Bricks already unlocked from the beginning, which is why when you pause the game, it only show 10 Pink Bricks to find out of the 17 in total.
Price: The cost to buy this Pink Brick is 5,000,000 studs.
Pink Brick 4: Studs x8
Description: This fourth Pink Brick is called “Studs Score Multiplier x8”.
Location: This Pink Brick is already unlocked for you from the very start of the game, without having to find it. All you have to do is go to Gwenpool’s room in the Avengers Mansion (directions are in the intro above) with enough money and buy each of them. There are actually seven Pink Bricks already unlocked from the beginning, which is why when you pause the game, it only show 10 Pink Bricks to find out of the 17 in total.
Price: The cost to buy this Pink Brick is 50,000,000 studs.
Pink Brick 5: Studs x10
Description: This fifth Pink Brick is called “Studs Score Multiplier x10”.
Protip: Turn on all five stud score multiplier Pink Bricks to multiply every single stud you collect times 3840!!
Location: This Pink Brick is already unlocked for you from the very start of the game, without having to find it. All you have to do is go to Gwenpool’s room in the Avengers Mansion (directions are in the intro above) with enough money and buy each of them. There are actually seven Pink Bricks already unlocked from the beginning, which is why when you pause the game, it only show 10 Pink Bricks to find out of the 17 in total.
Price: The cost to buy this Pink Brick is 100,000,000 studs.
Pink Brick 6: Hat Mode
Description: This sixth Pink Brick is called “Hat Mode” as it dresses your current player character in funny hats.
Location: This Pink Brick is already unlocked for you from the very start of the game, without having to find it. All you have to do is go to Gwenpool’s room in the Avengers Mansion (directions are in the intro above) with enough money and buy each of them. There are actually seven Pink Bricks already unlocked from the beginning, which is why when you pause the game, it only show 10 Pink Bricks to find out of the 17 in total.
Price: The cost to buy this Pink Brick is 200,000 studs.
Pink Brick 7: Gravity Mines Affect All
Description: This seventh Pink Brick is called “Gravity Mines Affect All” as it does exactly as its description reads, increasing the effect of Gravity Mines. Helpful!
Location: This Pink Brick is already unlocked for you from the very start of the game, without having to find it. All you have to do is go to Gwenpool’s room in the Avengers Mansion (directions are in the intro above) with enough money and buy each of them. There are actually seven Pink Bricks already unlocked from the beginning, which is why when you pause the game, it only show 10 Pink Bricks to find out of the 17 in total.
Price: The cost to buy this Pink Brick is 200,000 studs.
Pink Brick 8: Helium Mode
Description: This eight Pink Brick is called “Helium Mode” as it’ll give all characters a funny high-pitched voice!
Price: The cost to buy this Pink Brick is 200,000 studs.
Cheat Code: The code to enter for this Pink Brick is ?
Where exactly to find the Helium Mode Pink Brick: It’s shown in the video guide, which shows map & in-game locations. Note that this guide also includes the Squirrel Girl unlock quest.
Pink Brick 9: Big Head Mode
Description: This ninth Pink Brick is called “Big Head Mode” because when you turn on this Pink Brick all of the characters’ heads become supersized!
Price: The cost to buy this Pink Brick is 200,000 studs.
Cheat Code: The code to enter for this Pink Brick is ?
Where exactly to find the Big Head Mode Pink Brick: It’s shown in the video guide, which shows map & in-game locations.
Pink Brick 10: Minikit Detector
Description: This tenth Pink Brick is called “Minikit Piece Detector” as it’ll point you to all minikit pieces in your general area. A handy way to find all 10 in each level!
Price: The cost to buy this Pink Brick is 500,000 studs.
Cheat Code: The code to enter for this Pink Brick is ?
Where exactly to find the Minikit Detector Pink Brick: It’s shown in the video guide, which shows the in-game location.
Pink Brick 11: Character Token Detector
Description: This eleventh Pink Brick is called “Character Token Detector” because it’ll point you to all Character Tokens in your general area.
Price: The cost to buy this Pink Brick is 250,000 studs.
Cheat Code: The code to enter for this Pink Brick is ?
Where exactly to find the Character Token Detector Pink Brick: It’s shown in the video guide, which shows map & in-game locations.
Pink Brick 12: Stan Lee Detector
Description: This twelfth Pink Brick is called “Stan Lee Detector” because it’ll point you to the Stan Lee in Peril in your general area.
Price: The cost to buy this Pink Brick is 250,000 studs.
Cheat Code: The code to enter for this Pink Brick is ?
Where exactly to find the Stan Lee Detector Pink Brick: It’s shown in the video guide, which shows the in-game location.
Pink Brick 13: Attract Studs
Description: This thirteenth Pink Brick is called “Attract Studs” because it pulls all studs around you directly to you.
Price: The cost to buy this Pink Brick is 500,000 studs.
Cheat Code: The code to enter for this Pink Brick is ?
Where exactly to find the Attract Studs Pink Brick: It’s shown in the video guide, which shows map & in-game locations.
[VIDEO COMING SOON]
Pink Brick 14: Fast Interactions
Description: This fourteenth Pink Brick is called “Fast Interactions” because it allows you to interact with the Lego world super fast.
Price: The cost to buy this Pink Brick is 500,000 studs.
Cheat Code: The code to enter for this Pink Brick is ?
Where exactly to find the Fast Interactions Pink Brick: It’s shown in the video guide, which shows map & in-game locations.
Note: In case you need it, here’s the Agent Venom unlock quest guide.
Pink Brick 15: Infinite Power Gauge
Description: This fifteenth Pink Brick is called “Infinite Power Gauge” because it grants your player character an infinite Power Gauge.
Price: The cost to buy this Pink Brick is 250,000 studs.
Cheat Code: The code to enter for this Pink Brick is ?
Where exactly to find the Infinite Power Gauge Pink Brick: It’s shown in the video guide, which shows map & in-game locations.
[VIDEO COMING SOON]
Pink Brick 16: Demolition Mode
Description: This sixteenth Pink Brick is called “Demolition Mode” as that’s exactly the destructive effect it has.
Price: The cost to buy this Pink Brick is 500,000 studs.
Cheat Code: The code to enter for this Pink Brick is ?
Where exactly to find the Demolition Mode Pink Brick: It’s shown in the video guide, which shows map & in-game locations.
Pink Brick 17: Party Mode
Description: This seventeenth Pink Brick is called “Party Mode” as that’s exactly what it starts!
Price: The cost to buy this Pink Brick is 1,000,000 studs.
Cheat Code: The code to enter for this Pink Brick is ?
Where exactly to find the Party Mode Pink Brick: It’s shown in the video guide, which shows map & in-game locations.
Tip: Completing the final Gwenpool bonus mission also unlocks Gwenpool as a playable character.
Thanks to Packattack, Afguides, Blitzwinger, Mike & Anon for the Pink Brick tips.
If you have any questions or know of new Lego Marvel Superheroes 2 Pink Brick locations, please post them below! – Thanks for visiting!
Читайте также: